เมื่อเร็วๆนี้ Angular ได้ปล่อยตัว Angular 4 ออกมา ซึ่งจริงๆแล้ว มันก็ไม่ได้แตกต่างกับ Angular 2 เท่าไหร่นัก เป็นเพียงแค่ Improve Feature เล็กๆน้อยๆ ไม่ได้ Major change แบบตอน Angular 1 มา Angular 2 นั่นเอง
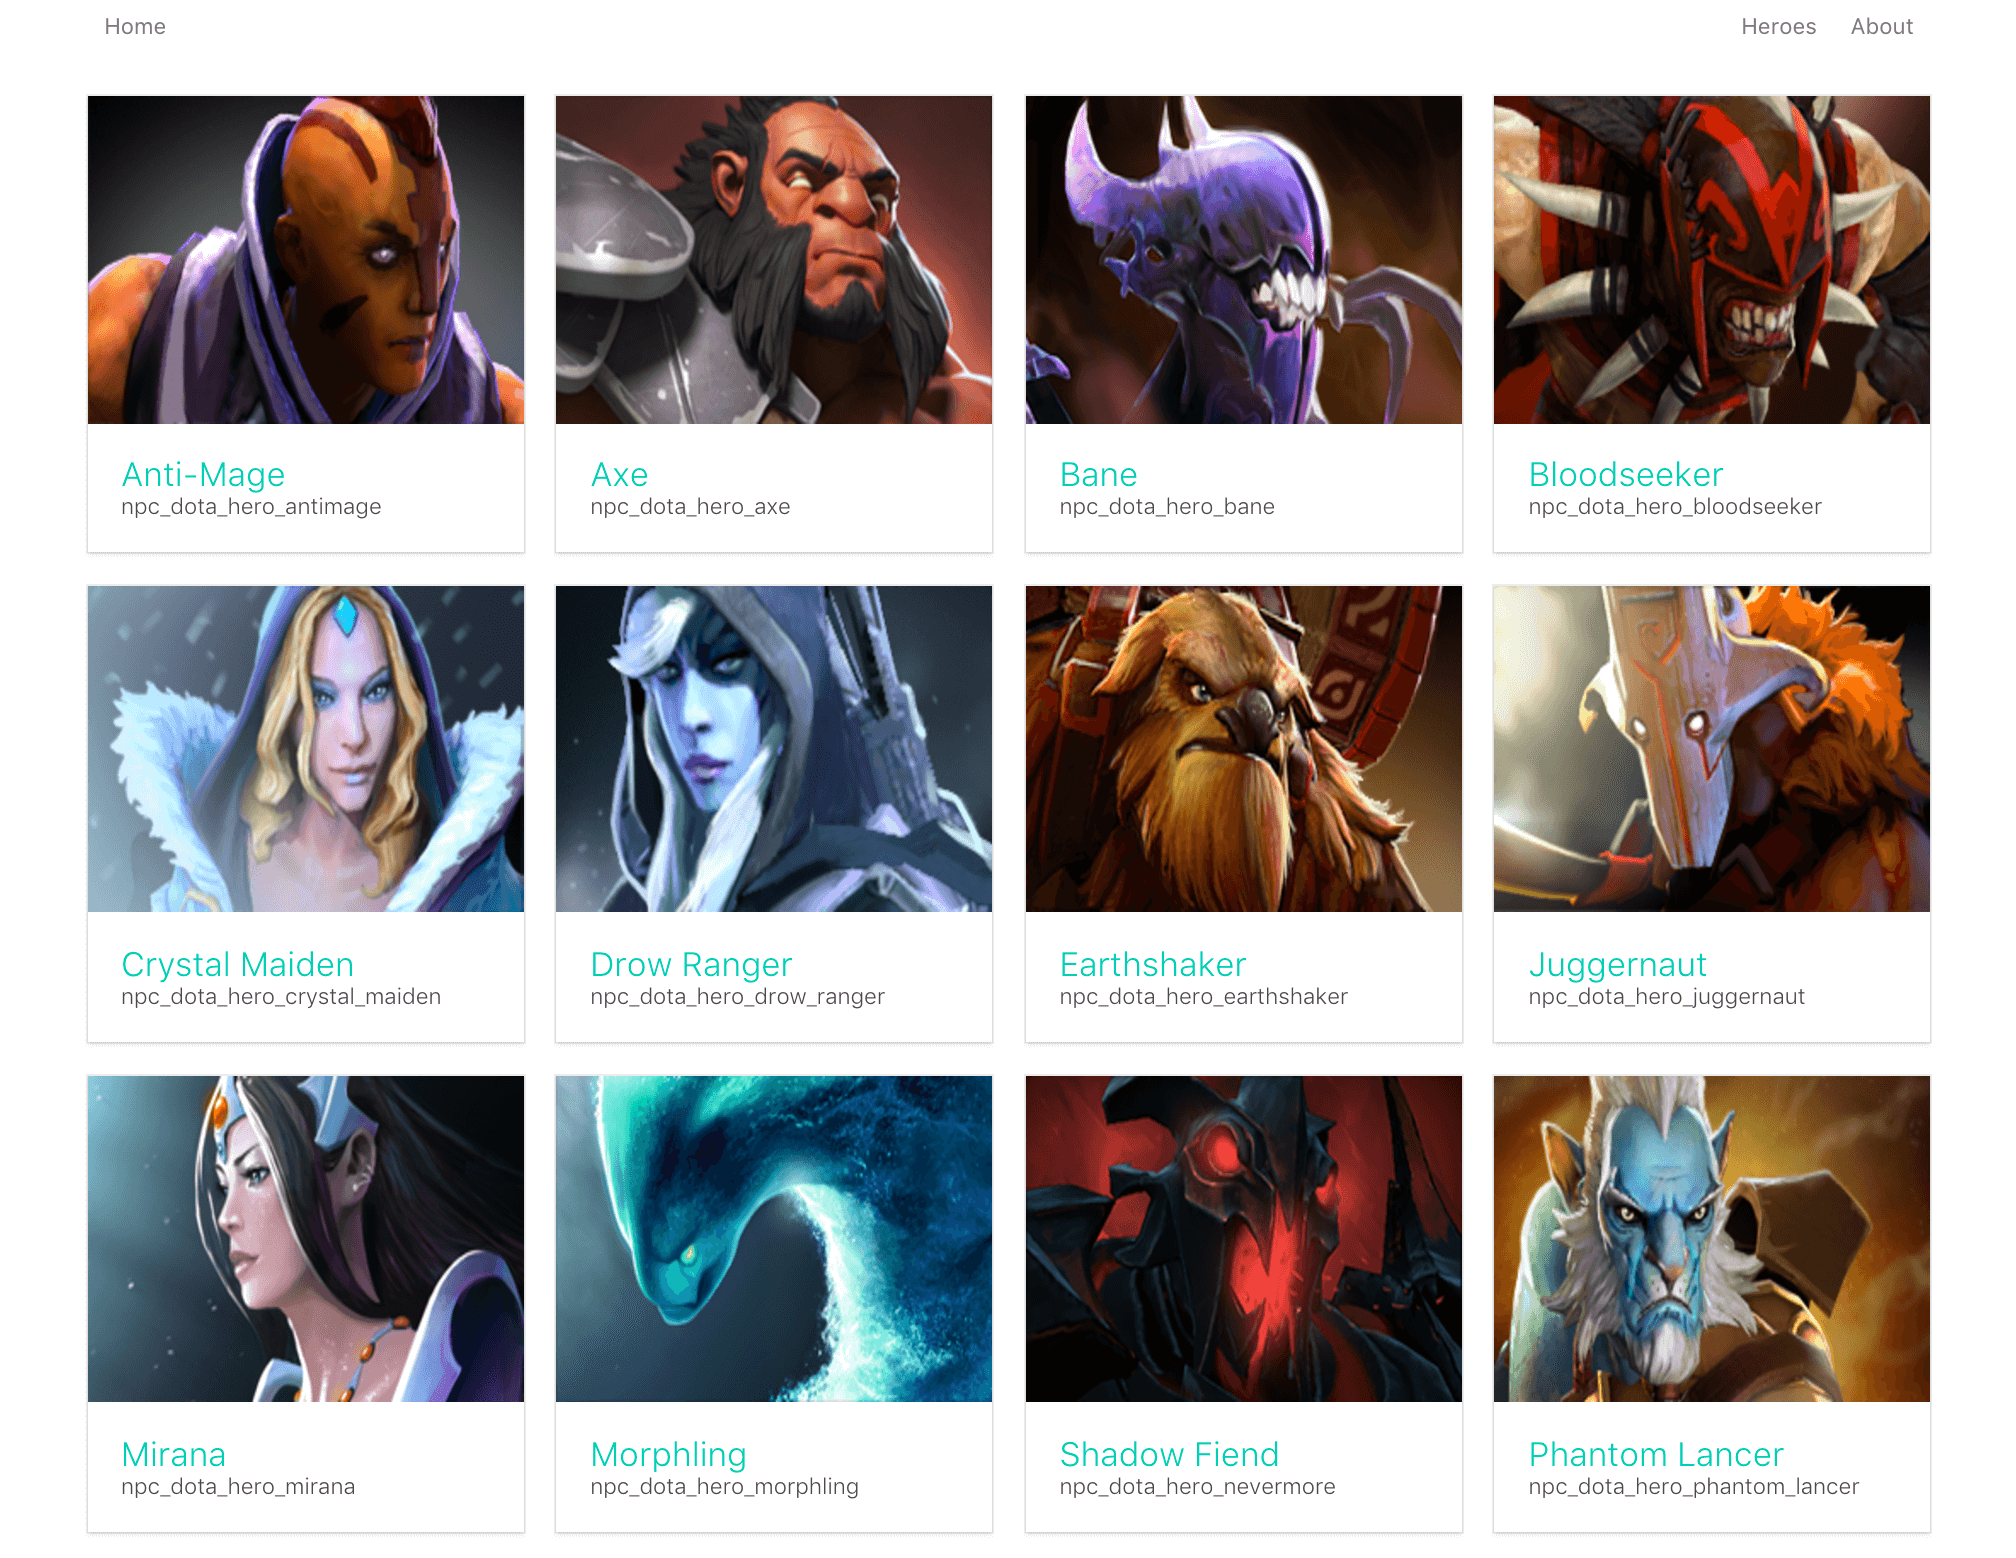
วันนี้ก็เลยมานำเสนอบทความการเขียน Angular 2 ฉบับเริ่มต้นกันครับ ซึ่งตัว Angular 2 นั้นเขียนด้วย TypeScript และตัวอย่างของวันนี้จะเป็นเว็บแบบ Single Page Application ที่เอาไว้แสดงข้อมูล Heroes ของเกม Dota 2 ครับ
หน้าตาของ App เมื่อเขียนเสร็จก็จะได้ประมาณรูปด้านล่างครับ
จะเรียก Angular เวอร์ชั่น 2 ขึ้นไปว่า Angular ส่วน Angular 1.x จะเรียกว่า AngularJS
Enviroments
ในตัวอย่างนี้จะใช้ Angular-cli ในการสร้างโปรเจ็ค รวมถึงการสร้าง Component และเขียนด้วย TypeScript
ฉะนั้นสิ่งที่ควรมีก็คือ
- Node.js v6.9.5
- TypeScript v2.1.5
- Angular CLI v1.0.0-beta.30
หากยังไม่ได้ติดตั้ง Node.js สามารถอ่านได้จากบทความนี้ Node.js คืออะไร ? + เริ่มต้นใช้งาน Node.js
Step 1 : Installation
$ npm install typescript -g$ npm install angular-cli -gบน Mac OS X หรือ Linux อาจจะต้องติดตั้ง Watchman เพิ่มเติม (ตัว Watchman เอาไว้สำหรับ Monitoring file ของ AngularCLI)
$ brew install watchmanหากไม่มี Homebrew หรือยังไม่รู้จัก อ่านบทความนี้ครับ Homebrew คืออะไร? + สอนวิธีใช้งาน
Step 2 : Create Project
เริ่มต้นสร้างโปรเจ็ค Angular ด้วยการใช้ angular-cli จะใช้คำสั่ง ng new <ชื่อโปรเจ็ค> ครับ
$ ng new awesome-app
installing ng2  create .editorconfig  create README.md  create src/app/app.component.css  create src/app/app.component.html  create src/app/app.component.spec.ts  create src/app/app.component.ts  create src/app/app.module.ts  create src/assets/.gitkeep  create src/environments/environment.prod.ts  create src/environments/environment.ts  create src/favicon.ico  create src/index.html  create src/main.ts  create src/polyfills.ts  create src/styles.css  create src/test.ts  create src/tsconfig.json  create angular-cli.json  create e2e/app.e2e-spec.ts  create e2e/app.po.ts  create e2e/tsconfig.json  create .gitignore  create karma.conf.js  create package.json  create protractor.conf.js  create tslint.jsonSuccessfully initialized git.Installing packages for tooling via npm.
Project 'awesome-app' successfully created.
ไฟล์และ dependencies ต่างๆจะถูกติดตั้งด้วย angular-cli
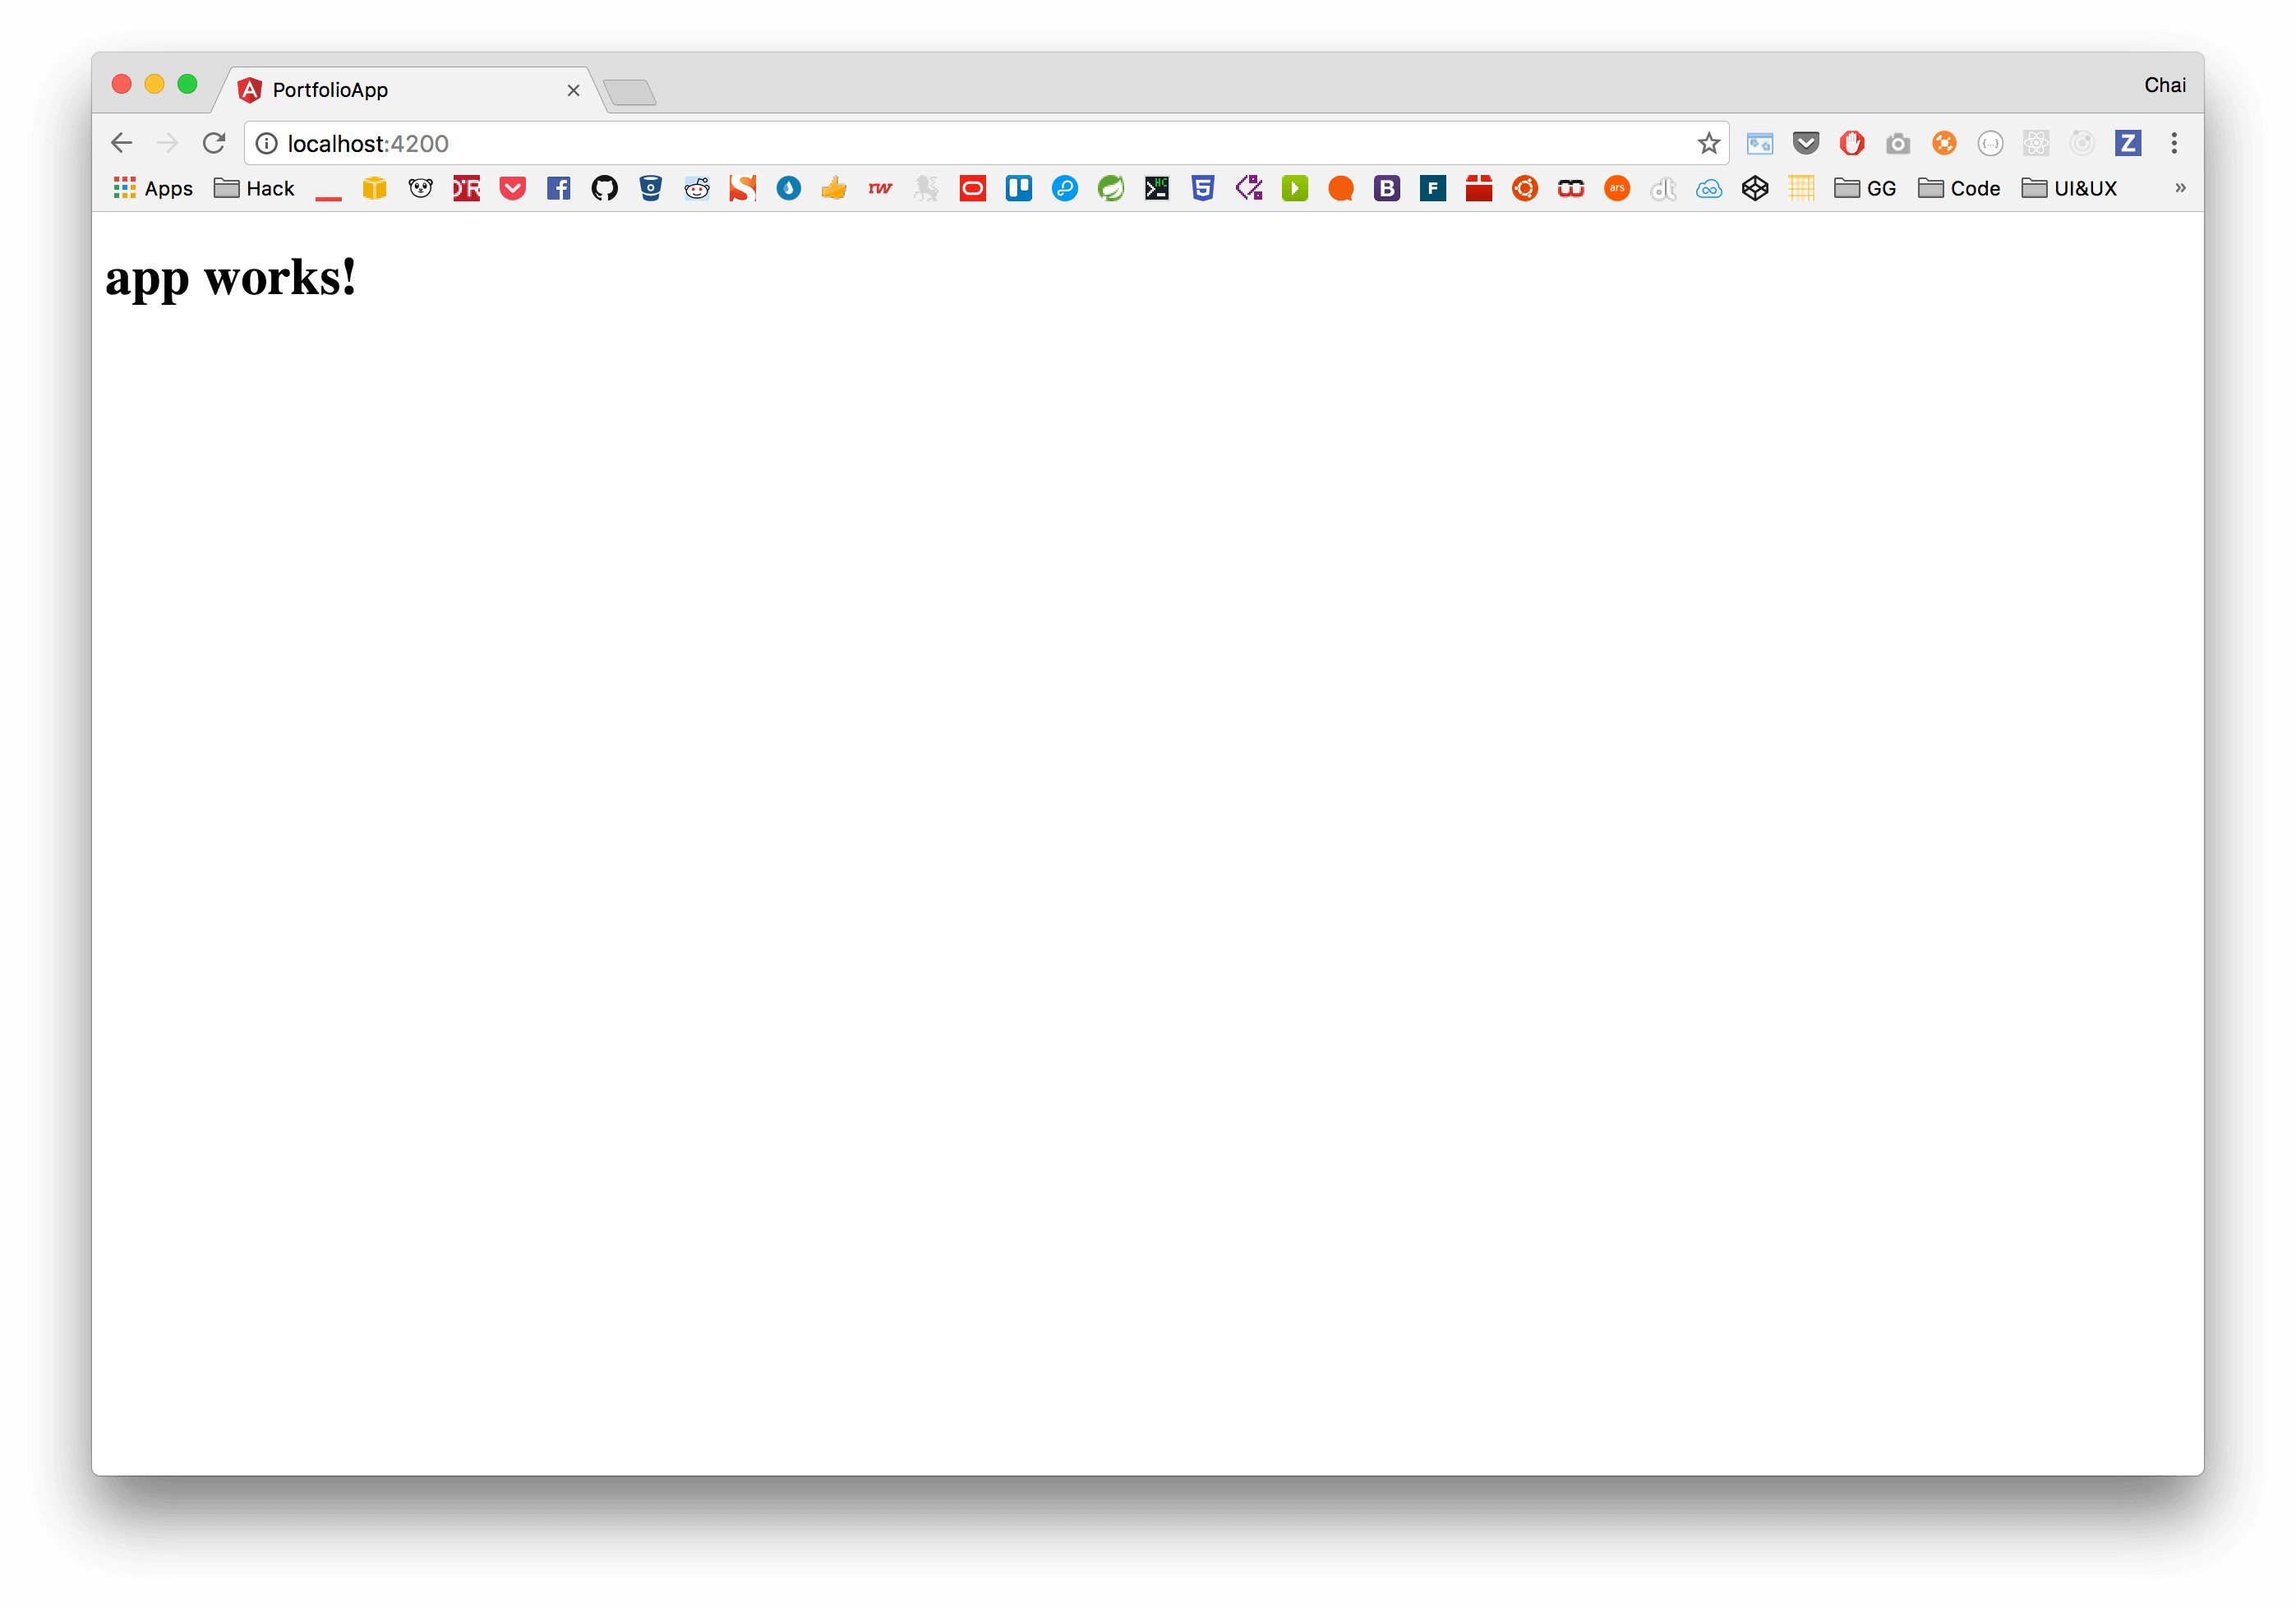
เมื่อสร้างโปรเจ็คด้วย angular-cli เสร็จแล้ว ก็ลองรัน server ดูด้วยคำสั่ง ng serve
$ cd awesome-app$ ng serveเข้าเว็บผ่าน http://localhost:4200/ จะเห็นหน้าเว็บ Angular
Step 3 : Project Structure
เมื่อลอง browse file ในโฟลเดอร์ src จะเห็นว่ามีไฟล์และโฟลเดอร์ต่างๆดังด้านล่างนี้
├── app/│ ├── app.component.css│ ├── app.component.html│ ├── app.component.spec.ts│ ├── app.component.ts│ └── app.module.ts├── assets/├── environments/│ ├── environment.prod.ts│ └── environment.ts├── favicon.ico├── index.html├── main.ts├── polyfills.ts├── styles.css├── test.ts└── tsconfig.jsonลองดูที่ไฟล์ src/app/app.component.html
<!doctype html><html>  <head>    <meta charset="utf-8" />    <title>AwesomeApp</title>    <base href="/" />
    <meta name="viewport" content="width=device-width, initial-scale=1" />    <link rel="icon" type="image/x-icon" href="favicon.ico" />  </head>  <body>    <app-root>Loading...</app-root>  </body></html>
จะสังเกตเห็น tag <app-root> ใน Element <app-root>Loading...</app-root> ซึ่งหากใน AngularJS (Angular 1) จะเรียกว่า Diretives ส่วนใน Angular (Angular 2)เราจะเรียกมันใหม่ว่า Component
แล้วทีนี้ Component ใน Angular มันสร้างมาได้ยังไง? ลองเปิดไฟล์ src/app/app.component.ts ขึ้นมา
import { Component } from '@angular/core'
@Component({  selector: 'app-root',  templateUrl: './app.component.html',  styleUrls: ['./app.component.css']})export class AppComponent {  title = 'app works!'}
จากโค๊ดด้านบน มีการ import Component จากโมดูล @angular/core และประกาศ Component โดยมี property คือ
selector: ชื่อ component ที่เราต้องการ เช่นapp-rootเวลาใช้งานก็คือ<app-root></app-root>templateUrl: Path ไฟล์ html ที่เราต้องการให้ Component นี้มัน renderstyleUrls: สามารถกำหนด stylesheet เฉพาะ component ได้template: หรือหากไม่ระบุ url ก็สามารถใส่ HTML tag ลงไปในนี้ได้เลย
ซึ่งหากสังเกตแล้ว จริงๆ 1 component ของ Angular จะมีด้วยกัน 4 ไฟล์ คือ
app.component.css: เอาไว้สำหรับจัดการ stylesheet ของ component นั้นapp.component.html: ไฟล์ html template ของ Componentapp.component.spec.ts: ไฟล์สำหรับ testapp.component.ts: ไฟล์สำหรับ implement logic component
Step 4 : Generate component
เนื่องจากว่าตอนเราสร้างโปรเจ็คด้วย Angular-CLI app.component จะถูกสร้างมาให้อัตโนมัติอยู่แล้ว ทีนี้เราลองมาสร้าง Component เพิ่มด้วยคำสั่ง CLI กันครับ
คำสั่งก็ง่ายๆเลยคือ ng generate component <ชื่อ component> เช่น
ng generate component about
installing component  create src/app/about/about.component.css  create src/app/about/about.component.html  create src/app/about/about.component.spec.ts  create src/app/about/about.component.ts  update src/app/app.module.ts
หรือจะใช้คำสั่งแบบสั้นๆ ก็ได้ คือ
ng g c about
จะเห็นว่าไฟล์ถูกสร้างมา 4 ไฟล์ รูปแบบคล้ายๆการสร้าง 1 Component และมีอัพเดทไฟล์ src/app/app.module.ts
ซึ่งหากเราเปิดไฟล์ app.module.ts ดูจะพบว่า
import { BrowserModule } from '@angular/platform-browser'import { NgModule } from '@angular/core'import { FormsModule } from '@angular/forms'import { HttpModule } from '@angular/http'
import { AppComponent } from './app.component'import { AboutComponent } from './about/about.component'
@NgModule({  declarations: [AppComponent, AboutComponent],  imports: [BrowserModule, FormsModule, HttpModule],  providers: [],  bootstrap: [AppComponent]})export class AppModule {}
สิ่งสำคัญมีอยู่ 3 ส่วนครับ คือ
declarations: เอาไว้กำหนด Component ของเราให้ใช้ได้ภายใน app ถ้าไม่ใส่ในส่วนนี้ Component ที่เราสร้างมาตัว angular จะไม่รู้จักimports: สำหรับ import โมดูลต่างๆเพื่อเอาไว้ใช้ในโปรเจ็ค เช่นHttpModuleสำหรับ GET/POST Http เป็นต้นproviders: ตัวนี้จะเป็นสำหรับส่วนที่เอาไว้ประกาศ เวลาเรามี Service
Step 5: Create Routing
ต่อมาเป็นการสร้าง Routing เพื่อจะกำหนดว่า เวลาเราเข้า path นี้ จะให้มันไปไหน เช่น เข้า /about จะให้แสดงหน้า About เข้าหน้า /heroes ก็แสดงรายชื่อ Heroes เป็นต้น
ตัวอย่างการกำหนด Routing โดย App นี้จะแบ่งออกเป็น 3 หน้าคือ
- Home : เป็นหน้าแรก
- Heroes : แสดงรายชื่อ Heroes
- About : หน้ารายละเอียด
ซึ่งทัง้สามหน้า จะเป็นแค่ Static website มีเพียงแค่ Heroes ที่จะต้องดึง Service API นั่นเอง
สร้างไฟล์ชื่อ app-routing.module.ts ขึ้นมา
import { NgModule } from '@angular/core'import { RouterModule, Routes } from '@angular/router'import { AboutComponent } from './about/about.component'
const routes: Routes = [  {    path: 'about',    component: AboutComponent  }]
@NgModule({  imports: [RouterModule.forRoot(routes)],  exports: [RouterModule]})export class AppRoutingModule {}
โดย Angular จะมาพร้อมโมดูล RouterModule และ Routes ให้เราไว้สำหรับ Config Routing อยู่แล้ว เราก็กำหนดได้เลยว่า path = about ให้มันแสดง component ชื่อ AboutComponent
ตัว
pathไม่ต้องใส่ slash (/)
กลับไปที่ไฟล์ app.module.ts ทำการ import RoutingModule ที่เราสร้างนี้ไปด้วย
import { BrowserModule } from '@angular/platform-browser'import { NgModule } from '@angular/core'import { FormsModule } from '@angular/forms'import { HttpModule } from '@angular/http'
import { AppComponent } from './app.component'import { AboutComponent } from './about/about.component'import { AppRoutingModule } from './app-routing.module'
@NgModule({  declarations: [AppComponent, AboutComponent],  imports: [BrowserModule, FormsModule, HttpModule, AppRoutingModule],  providers: [],  bootstrap: [AppComponent]})export class AppModule {}
และที่ไฟล์ app.component.html ให้เราเพิ่ม tag <router-outlet></router-outlet> เพื่อให้ Angular Router ทำงานนั่นเอง เมื่อเวลา Routing มันแมตกับ path ที่เรากำหนด ตัว Component ก็จะ replace ข้อมูลแทนแท็กนี้นั่นเอง
<div class="container"> <router-outlet></router-outlet></div>ต่อมา Generate หน้า Home และ Hero List สำหรับเป็น Component และ map routing ไว้ก่อน (ยังไม่มีคอนเท้น)
ng g c homeng g c hero-listและทำการเพิ่ม Routing ในไฟล์ app-routing.module.ts
import { NgModule } from '@angular/core'import { RouterModule, Routes } from '@angular/router'
import { AboutComponent } from './about/about.component'import { HomeComponent } from './home/home.component'import { HeroListComponent } from './hero-list/hero-list.component'
const routes: Routes = [  {    path: '',    component: HomeComponent  },  {    path: 'about',    component: AboutComponent  },  {    path: 'heroes',    component: HeroListComponent  },  {    path: '**',    redirectTo: '/',    pathMatch: 'full'  }]
@NgModule({  imports: [RouterModule.forRoot(routes)],  exports: [RouterModule]})export class AppRoutingModule {}
โดย path: '' คือจะเป็นหน้า Home และ path: '**' คือไม่เจอ path ใดๆเลย จะให้มัน redirect ไปที่ Home นั่นเอง
ตอนนี้ App เราก็มี 3 หน้าแล้ว คือ
Step 6: Services
ต่อมาส่วน Service ที่เราใช้ request เพื่อจะได้ข้อมูล Heroes แบบทั้งหมด และอีก request สำหรับ Hero id นั้นๆ
ไฟล์ชื่อ hero.service.ts
import { Injectable } from '@angular/core';import { Http } from '@angular/http';import 'rxjs/add/operator/map';
@Injectable()export class HeroService {
  constructor(private http: Http) { }
  findAll() {    return this.http.get('http://localhost:5000/api/heroes')      .map(res => res.json());  }
  findOne(id) {    return this.http.get(`http://localhost:5000/api/heroes/${id}`)      .map(res => res.json());  }
}
จะเห็นว่าโค๊ดด้านบน มีการ import { Http } from '@angular/http'; ซึ่งเป็น module สำหรับ Http ในส่วนของ
;`constructor(private http:Http) {}`จะมีค่าเท่ากับเราประกาศ
let http;
constructor(http: Http) {  this.http = http;}
คือเราทำการประกาศตัวแปร http ใน constructor ได้เลย
ต่อมาไฟล์ hero-list/hero-list.component.ts
import { Component, OnInit } from '@angular/core';import { HeroService } from '../hero.service';
@Component({  selector: 'app-hero-list',  templateUrl: './hero-list.component.html',  styleUrls: ['./hero-list.component.scss']})export class HeroListComponent implements OnInit {
  heroes: any = [];
  constructor(private heroService: HeroService) { }
  ngOnInit() {    this.heroService.findAll().subscribe(response => {      this.heroes = response.data;    });  }
}
ด้านบน เรา Inject HeroService ที่สร้างไว้ มาไว้ในนี้ผ่านตัวแปร heroService จากนั้นก็สามารถ call method findAll ได้เลย
แต่จะเห็นว่ามีส่วน .subscribe() ตรงนี้ทำหน้าที่คล้ายๆกับ Promise().then() คือเมื่อได้ response มันก็จะ ทำงานในส่วนของ subscribe() ซึ่งในที่นี้คือ นำค่า response ไปใส่ไว้ตัวแปรชื่อ heroes
เช่นเดียวกันกับ hero/hero.component.ts จะ Implement คล้ายๆกัน เพียงแต่ ส่วนที่เป็น /heroes/:id จะต้องใช้ ActivatedRoute ในการหา params ดังโค๊ดด้านล่าง
import { Component, OnInit } from '@angular/core';import { ActivatedRoute } from '@angular/router';import { HeroService } from '../hero.service';
@Component({  selector: 'app-hero',  templateUrl: './hero.component.html',  styleUrls: ['./hero.component.scss']})export class HeroComponent implements OnInit {
  hero: any;
  constructor(private route: ActivatedRoute, private heroService: HeroService) { }
  ngOnInit() {
    this.route.params.subscribe(params => {      const id = params['id'];      this.heroService.findOne(id).subscribe(response => {        this.hero = response.data;      });
    });
  }
  like() {    console.log('like');  }
}
สุดท้าย เพิ่ม HeroService ไปในส่วน provider ของ app.module.ts ด้วย
import { BrowserModule } from '@angular/platform-browser'import { NgModule } from '@angular/core'import { FormsModule } from '@angular/forms'import { HttpModule } from '@angular/http'
import { AppComponent } from './app.component'import { AboutComponent } from './about/about.component'import { AppRoutingModule } from './app-routing.module'import { HeroComponent } from './hero/hero.component'import { HomeComponent } from './home/home.component'import { HeroListComponent } from './hero-list/hero-list.component'import { HeroService } from './hero.service'
@NgModule({  declarations: [AppComponent, AboutComponent, HeroComponent, HomeComponent, HeroListComponent],  imports: [BrowserModule, FormsModule, HttpModule, AppRoutingModule],  providers: [HeroService],  bootstrap: [AppComponent]})export class AppModule {}
Step 7: Add HTML Markup
ต่อมาผมทำการเพิ่ม HTML Markup ของแต่ละหน้าเริ่มจากไฟล์ index.html ทำการเพิ่ม CSS ของ Bulma
<!doctype html><html>  <head>    <meta charset="utf-8" />    <title>AwesomeApp</title>    <base href="/" />
    <meta name="viewport" content="width=device-width, initial-scale=1" />    <link rel="icon" type="image/x-icon" href="favicon.ico" />    <link      rel="stylesheet"      href="https://cdnjs.cloudflare.com/ajax/libs/bulma/0.3.2/css/bulma.css"    />  </head>  <body>    <app-root>Loading...</app-root>  </body></html>
ต่อมาไฟล์ app.component.html ก็จะเพิ่มส่วน Navbar เพื่อจะได้ Link ไปหน้าต่างๆได้
<div class="container">  <nav class="nav">    <div class="nav-left">      <a class="nav-item" routerLinkActive="active" routerLink="/">Home</a>    </div>
    <div id="nav-menu" class="nav-right nav-menu">      <a class="nav-item" routerLinkActive="active" routerLink="/heroes"> Heroes </a>      <a class="nav-item" routerLinkActive="active" routerLink="/about"> About </a>    </div>  </nav>  <router-outlet></router-outlet></div>
ซึ่ง HTML Tag ด้านบน เราจะเห็น routerLink และ routerLinkActive ซึ่งเป็นส่วนของ Angular Router โดย routerLink เอาไว้สำหรับบอกว่า Link นี้ จะไปไหน โดยมันจะไป map กับที่เรา config ไว้ใน app-routing.module.ts นั่นเอง
ไฟล์ app.component.css (บทความใช้ .scss)
body {  background-color: #ccc;}
nav {  margin-bottom: 20px;}
ต่อมา ส่วนหน้า About ก็ใส่ Content เพิ่มเข้าไป
<div class="tile is-ancestor">  <div class="tile is-half is-vertical is-parent">    <div class="tile is-child box">      <p class="title">About</p>
      <div class="content">        <p>This is demo application built with Angular 2</p>        <p></p>        <ul>          <li>            <a              href="https://www.eventbrite.co.uk/e/building-spa-with-nodejs-and-angular2-tickets-32402850799"              >Building SPA with Hapi.js and Angular 2</a            >          </li>          <li>            <a href="https://github.com/Phonbopit/node-x-angular">Source code on Github</a>          </li>        </ul>      </div>    </div>  </div>  <div class="tile is-half is-parent">    <div class="tile is-child box">      <p class="title">Credit</p>
      <div class="content">        <ul>          <li><a href="http://bulma.io/">Bulma</a> for CSS Framework</li>          <li><a href="https://www.opendota.com/">OpenDota API</a> for mock data</li>        </ul>      </div>    </div>  </div></div>
หน้า hero-list/hero-list.component.html ก็เช่นเดียวกัน
<div class="columns is-multiline "> <div class="column is-one-quarter" *ngFor="let hero of heroes"> <div class="card"> <div class="card-image"> <figure class="image is-4by3"> <img src="https://api.opendota.com{{hero.img}}" alt="Icon" /> </figure> </div> <div class="card-content"> <div class="media"> <div class="media-content"> <p class="title is-4"> <a routerLink="/heroes/{{hero.id}}" class="is-success">{{hero.localized_name}}</a> </p> <p class="subtitle is-6">{{hero.name}}</p> </div> </div> </div> </div> </div></div>และสุดท้ายหน้า Hero Detail hero/hero.component.ts
<div class="card">  <div class="card-image">    <figure class="image is-4by3">      <img src="https://api.opendota.com{{hero?.img}}" alt="Icon" />    </figure>  </div>  <div class="card-content">    <div class="media">      <div class="media-content">        <p class="title is-4">{{hero?.localized_name}}</p>        <p class="subtitle is-6">{{hero?.name}}</p>      </div>    </div>  </div></div>
<hr />
<div class="columns">  <div class="column">    <a class="button is-outlined" routerLink="/heroes">Back</a>  </div>  <div class="column">    <a class="button is-outlined" (click)="like()">Like</a>  </div></div>
Step 8: Backend
สำหรับส่วน Backend จะไม่อธิบายถึงละกันครับ เพราะว่าอยู่นอก scope ของบทความ ซึ่งสามารถดูได้จาก Link นี้ https://github.com/Phonbopit/node-x-angular/tree/master/server
ซึ่งเมื่อเราทำการรัน Server หรือ มี response จาก backend ตัวหน้าเว็บที่เราทำไว้ก็จะสามารถใช้งานได้นั่นเอง
เป็นอันเรียบร้อย :)
Conclusion
บทความนี้ก็เป็นคล้ายๆ Walkthrough สำหรับทำ Single Page Appliction ด้วย Angular 2 หรือ 4 แบบง่ายๆนะครับ อาจจะไม่ได้เจาะลึกลงไปในแต่ละรายละเอียด ซึ่งอยากให้มองเห็นภาพรวมแล้วก็ไปต่อยอดศึกษาเพิ่มเติมเอาเองนะครับ เช่น Angular Router ว่ามันทำอะไรได้บ้าง หรือ RxJS หรือ Observable มันใช้ยังไง ทำอะไรอีกได้บ้าง เป็นต้น หวังว่าบทความนี้จะมีประโยชน์กับผู้ที่กำลังสนใจ Angular นะครับ
สุดท้าย Source Code สามารถดูได้จาก Link ด้านล่างเลยครับ

Chai Phonbopit
Senior Software Engineer ประสบการณ์กว่า 12 ปี ด้าน Frontend: React, Next.js, Tailwind CSS และ Backend: Node.js, Express, NestJS ปัจจุบันสนใจ Astro, Cloudflare Workers และ AI Coding Tool
Freelance
ต้องการคนช่วยพัฒนาเว็บไซต์หรือ Web App?
รับงาน Frontend, Backend, Web App, CMS, เว็บไซต์บริษัท, E-Commerce, และเชื่อมต่อ API สำหรับธุรกิจหรือทีมที่ต้องการคนช่วยพัฒนา