Image Credit : http://developer.android.com/
บทความว่าด้วยเรื่องการทำ Notification บน Android ในบทความนี้จะพูดถึงว่า Notification คืออะไร และการใช้งานเบื้องต้นเท่านั้น ไม่รวมถึง Push Notification ต่างๆ เช่น ใช้ Parse , GCM หรือ implement Server เอง (จะไว้เขียนในบทความถัดๆไป)
Notification
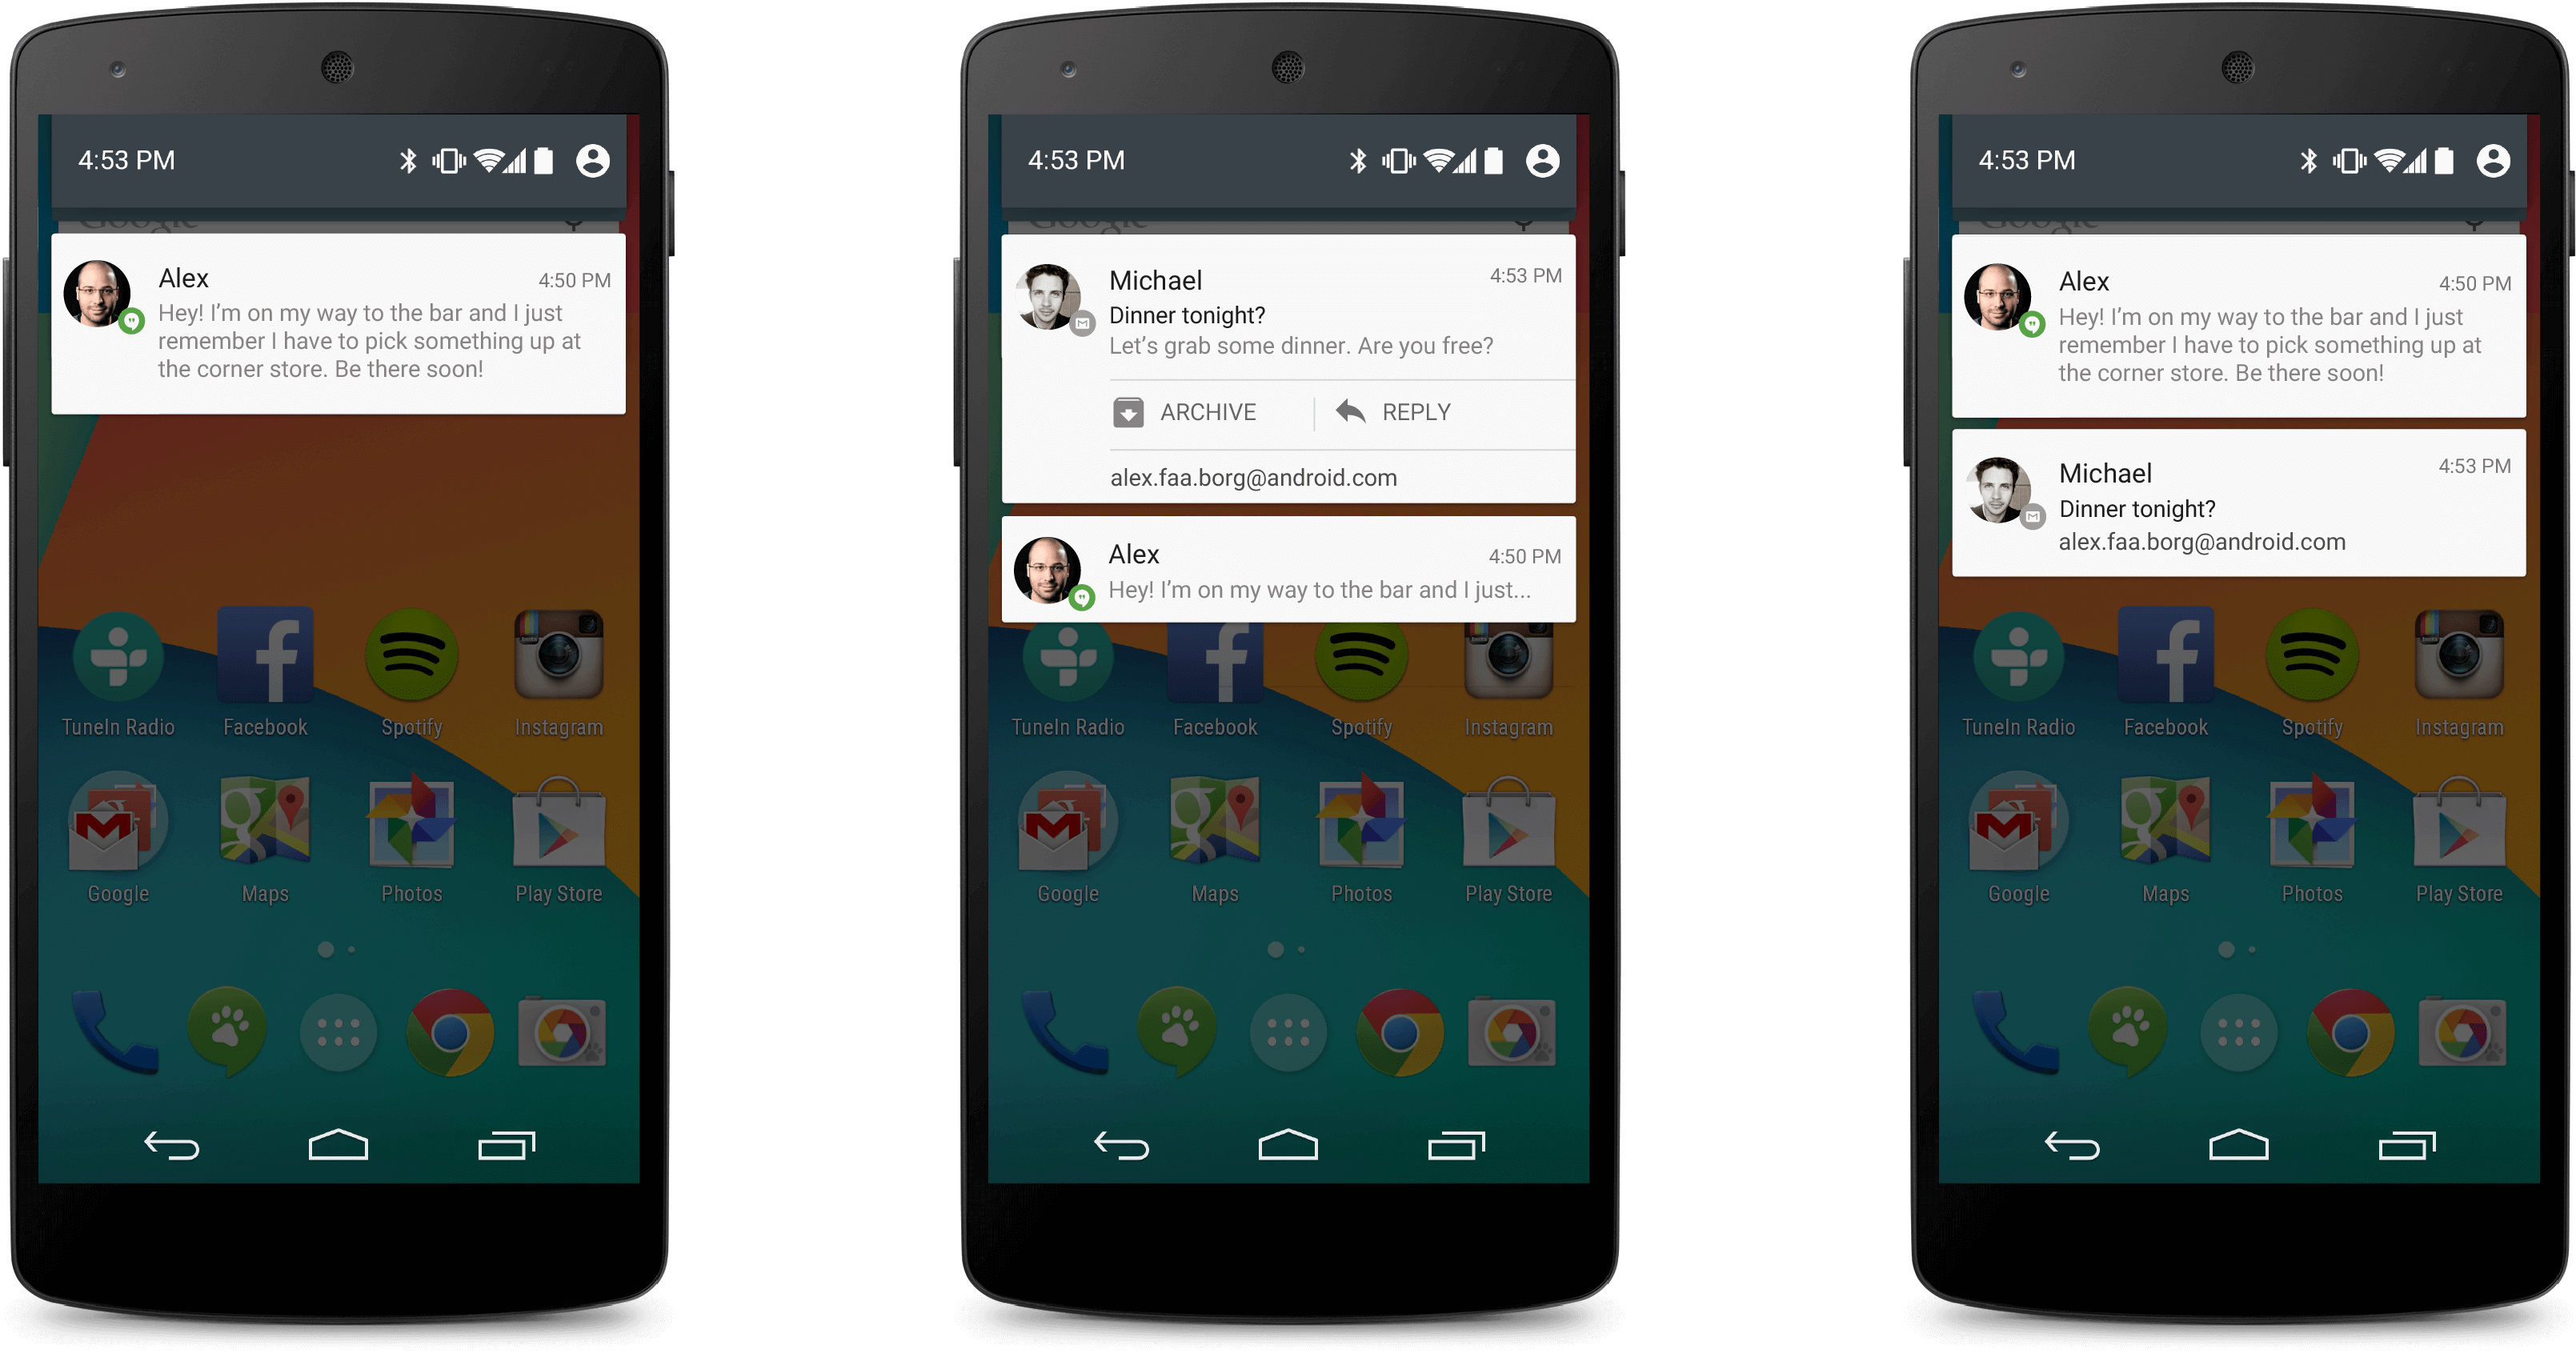
Notification คืออะไร ? จริงๆ Notification มันก็คือข้อความแจ้งเตือนรูปแบบหนึ่งเท่านั้น ซึ่งจะแตกต่างจากพวก Toast หรือ Snackbar ตรงที่ ไม่จำเป็นที่แอพพลิเคชันของเราทำงานอยู่ มันก็สามารถแสดงการแจ้งเตือนข้อความ Notification ได้ นอกจากข้อความแจ้งเตือนแล้ว Notification ยังสั่น หรือมีเสียงได้อีกด้วย
อ่านเพิ่มเติมเกี่ยวกับ Notification ได้ที่ Android Notifications
มาลองสร้าง Notification จริงๆกันเลยดีกว่า
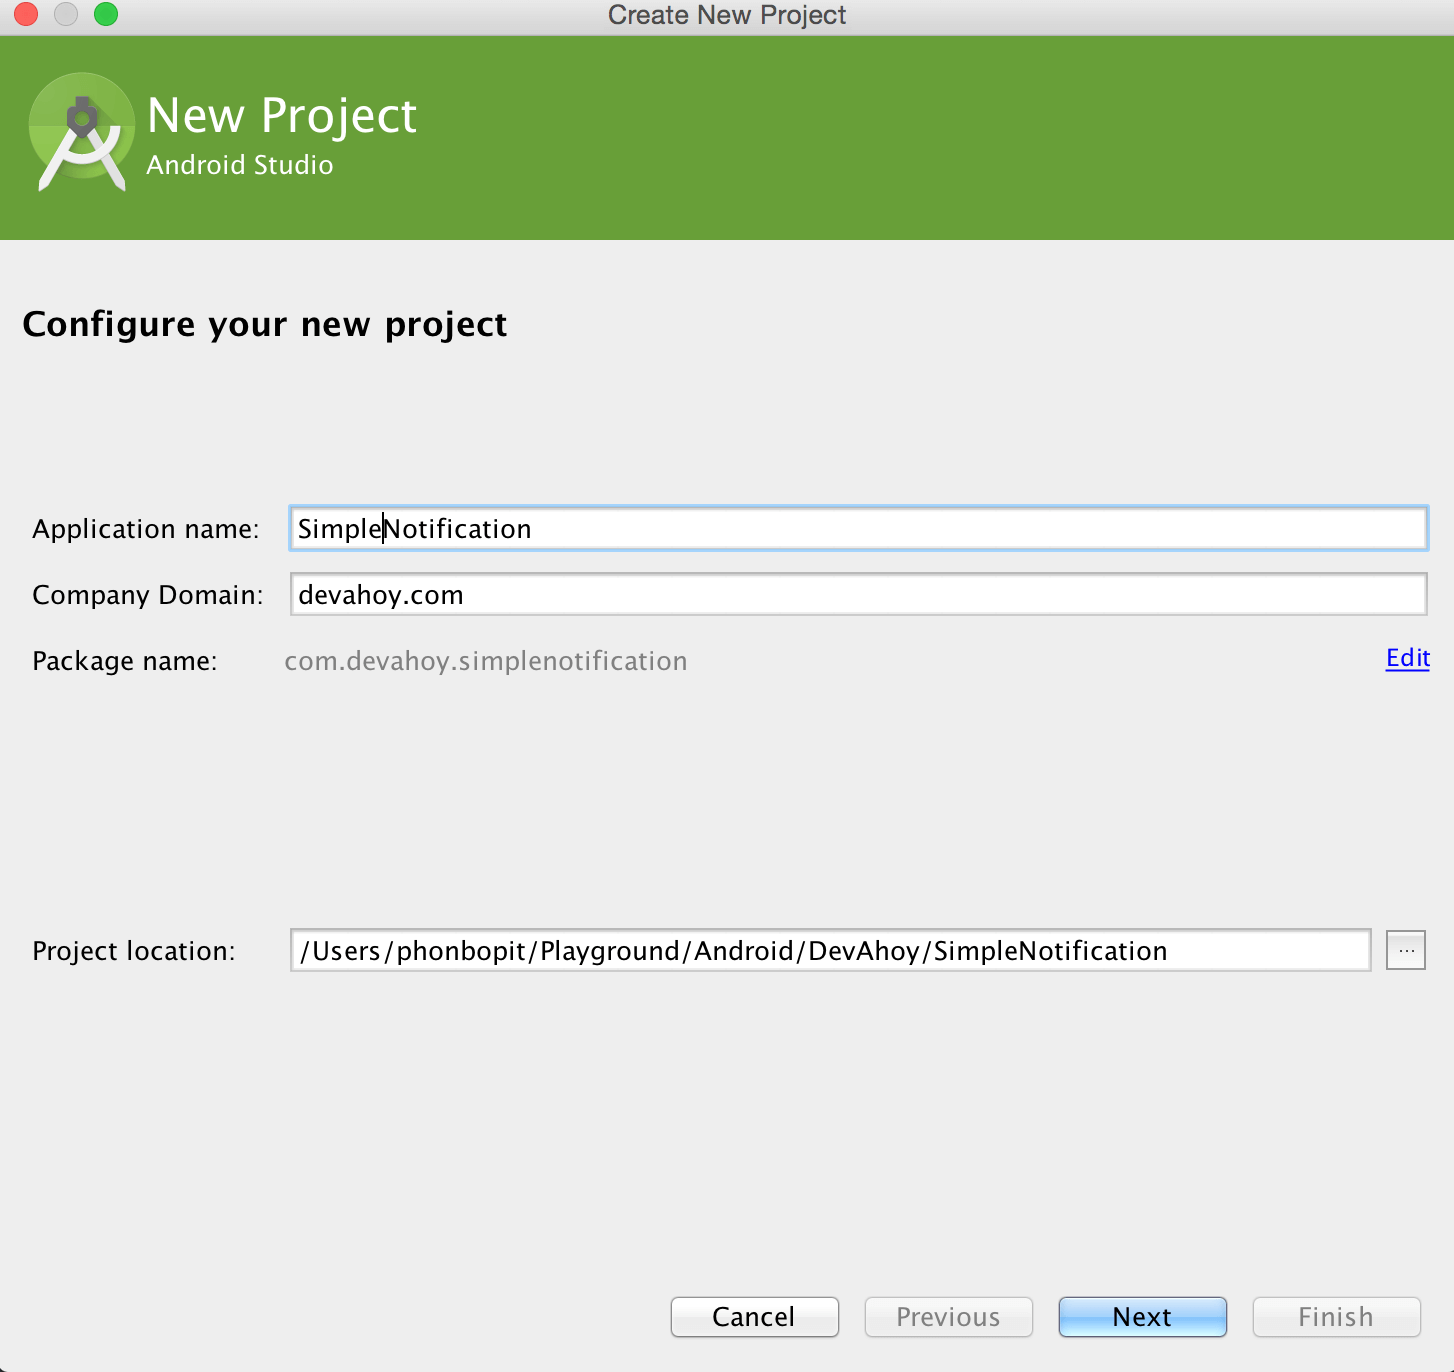
Step 1 : Create Project
ทำการสร้างโปรเจ็ค Android ขึ้นมา โดยผมกำหนด API เวอร์ชั่น ดังภาพ

ควรทำการดาวน์โหลด Support Library มาซะก่อน เนื่องจากบทความนี้ใช้
NotificationCompatซึ่งมีใน Support Library เท่านั้น
ไฟล์หลักจะเป็น MainActivity.java และเลเอาท์หลักจะเป็น activity_main.xml
Step 2 : Create Button
ต่อมาทำการเพิ่มปุ่ม Button ปุ่มนี้จะเอาไว้สำหรับกด เพื่อให้โชว์ Notification ฉะนั้นก็ไม่มีอะไรมาก ใช้ xml syntax onClick:"" ลงไปเลย เนื่องจากขี้เกียจ binding View ในโปรแกรม :) ฉะนั้นไฟล์ activity_main.xml จะได้ดังนี้
<RelativeLayout xmlns:android="http://schemas.android.com/apk/res/android"    xmlns:tools="http://schemas.android.com/tools" android:layout_width="match_parent"    android:layout_height="match_parent" android:paddingLeft="@dimen/activity_horizontal_margin"    android:paddingRight="@dimen/activity_horizontal_margin"    android:paddingTop="@dimen/activity_vertical_margin"    android:paddingBottom="@dimen/activity_vertical_margin"    tools:context=".MainActivity">
    <Button        android:id="@+id/btn_notification"        android:layout_width="wrap_content"        android:layout_height="wrap_content"        android:layout_centerInParent="true"        android:text="Show Notification"        android:padding="32dp"        android:onClick="showNotification"/>
</RelativeLayout>
ที่ไฟล์ MainActivity.java ก็เพิ่มเมธอดสำหรับ onClick event ดังนี้
package com.devahoy.simplenotification;
import android.support.v7.app.AppCompatActivity;import android.os.Bundle;import android.view.View;
public class MainActivity extends AppCompatActivity {
    @Override    protected void onCreate(Bundle savedInstanceState) {        super.onCreate(savedInstanceState);        setContentView(R.layout.activity_main);    }
    public void showNotification(View view) {      // your code goes here.    }
}
Note : สำหรับวิธีการทำ Button OnClick สามารถอ่านเพิ่มเติมได้ที่นี่
Step 3 : Create Notification
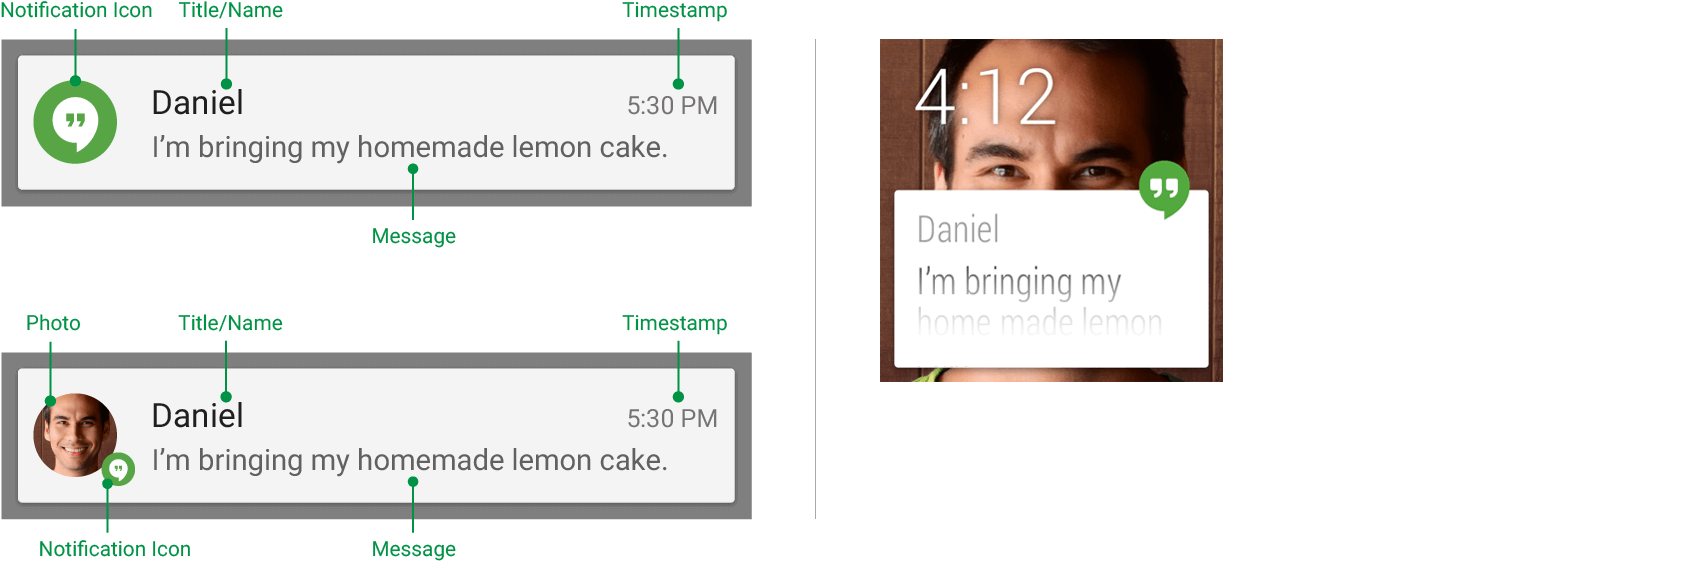
ส่วนประกอบในการสร้าง Notification จะประกอบไปด้วย
- setContentTitle() : แสดงหัวข้อของ Notification
- setContentText() : เอาไว้แสดงข้อความของ Notification
- setSmallIcon() : เอาไว้แสดงไอคอนของ Notification
ส่วนประกอบอื่นๆ เป็น Optional เสริม เช่น
- setAutoCancel() : เอาไว้กำหนด ให้ลบ Notification เมื่อกดหรือไม่
- setGroup() : แบ่งกลุ่มให้กับ Notification
- setStyle() : ปรับแต่งรูปแบบ Notification
- setContentIntent() : เอาไว้ส่ง PendingIntent เมื่อกด Notification
การสร้าง Notification จะทำการสร้างจาก NotificationCompat.Builder กัน โดยเพิ่มโค๊ดภายในเมธอด showNotification() ดังนี้
Notification notification = new NotificationCompat.Builder(this) // this is context .setSmallIcon(R.mipmap.ic_launcher) .setContentTitle("DevAhoy News") .setContentText("สวัสดีครับ ยินดีต้อนรับเข้าสู่บทความ Android Notification :)") .setAutoCancel(true) .build();ตอนนี้เราก็ได้ Notification ขึ้นมาแล้ว โดยมีไอคอน หัวข้อ และข้อความตามที่เรากำหนด แต่ว่ามันจะไม่โชว์บน ActionBar จนกว่าเราจะสั่ง และคำสั่งที่จะใช้โชว์ก็คือ notify() ซึ่งต้องใช้คลาส NotificationManager เข้ามาช่วย ดังนี้
NotificationManager notificationManager = (NotificationManager) getSystemService(NOTIFICATION_SERVICE);notificationManager.notify(1000, notification);โดยเมธอด notify(int id, Notification notification) จะรับ parameter เป็น id และ ออปเจ็ค Notification ที่เราทำการสร้างขึ้นก่อนหน้านี้
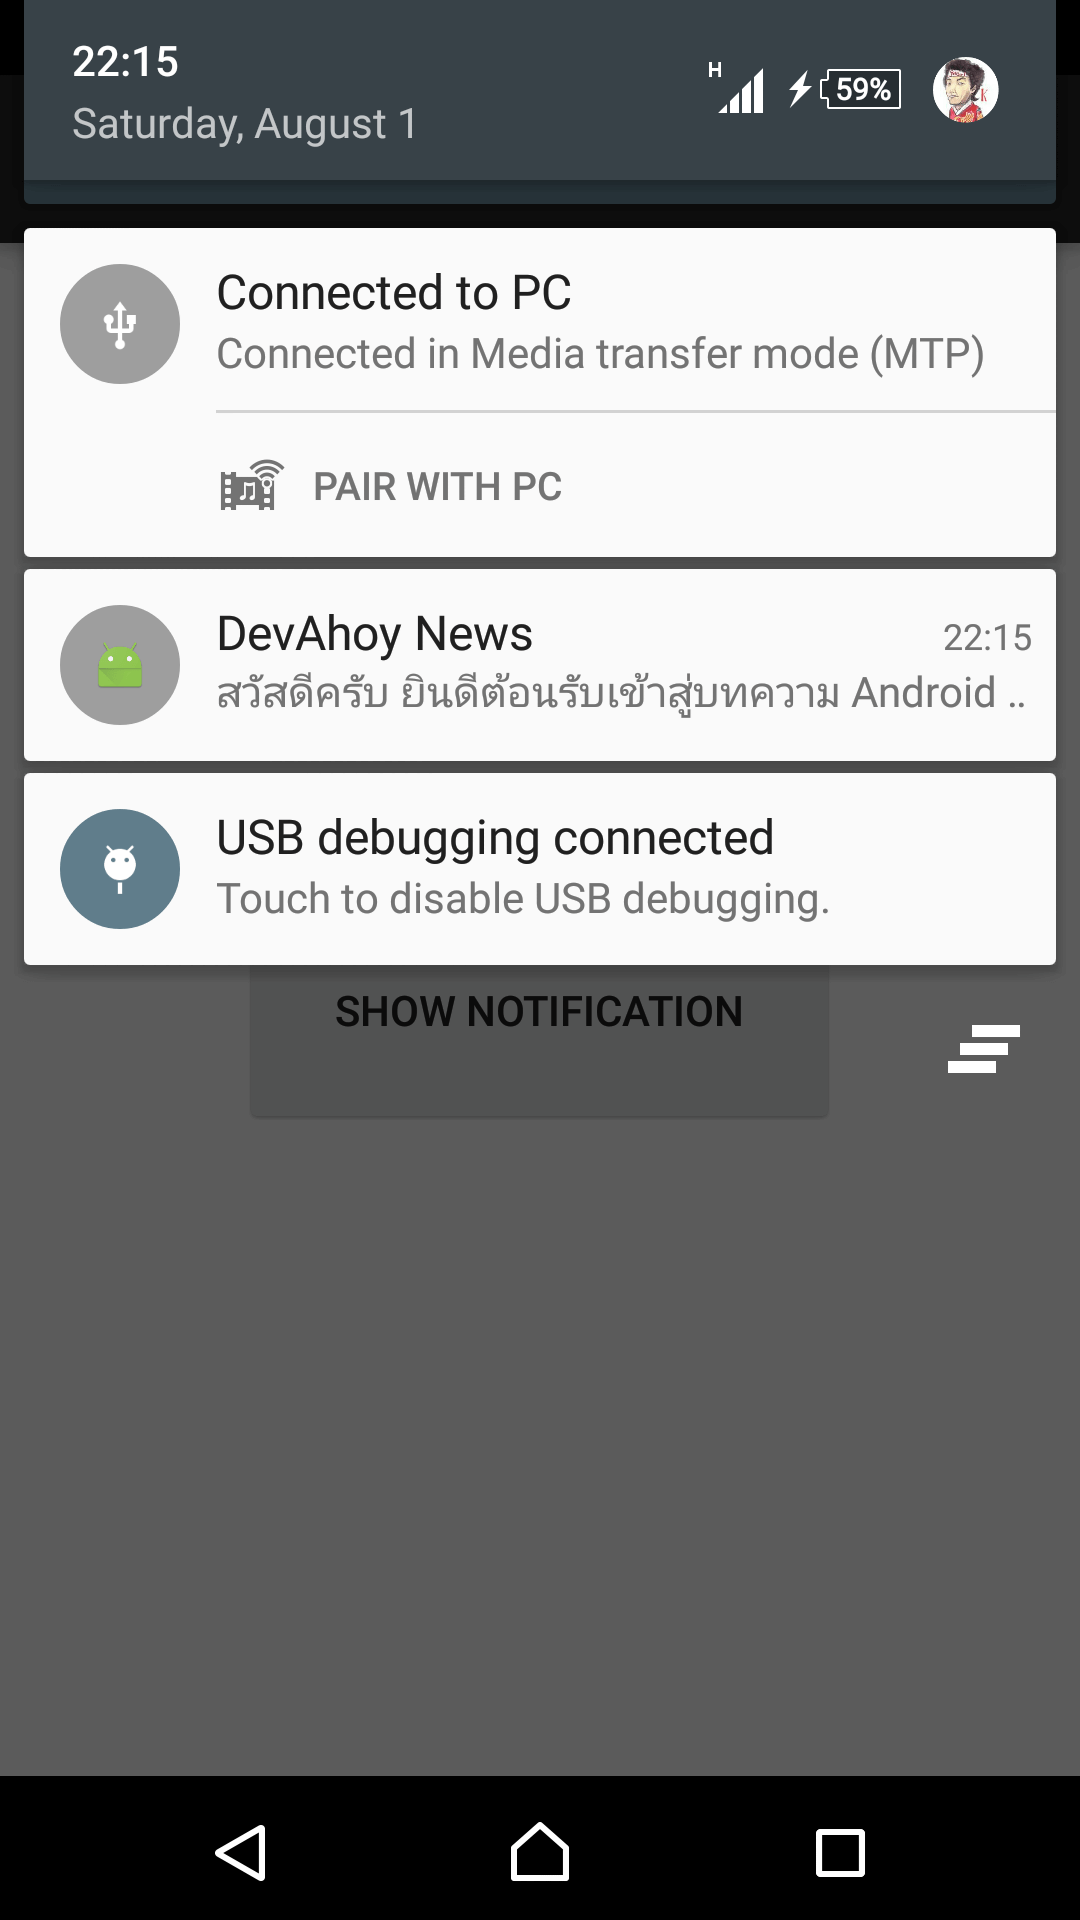
ทดสอบรันโปรแกรม เมื่อคลิก Button จะเห็น Notification ปรากฎ แสดงว่าถูกต้อง
แต่ว่าเดี๋ยวก่อน เมื่อกดแล้วไม่มีอะไรเกิดขึ้นใช่หรือไม่? ต่อมาเราลองเขียนเพิ่ม ว่า เมื่อมีการกด Notification จะให้มันไปทำงานอะไรต่อดี
Step 4 : Notification Actions
ต่อมา ทำการเพิ่ม Action เมื่อกด Notification ในตัวอย่าง จะทำการเปิดเว็บไซต์ devahoy.com โดยใช้ PendingIntent ดังนี้ เพิ่มโค๊ดไว้ก่อนการสร้าง Notification
Intent intent = new Intent(Intent.ACTION_VIEW, Uri.parse("https://devahoy.com"));PendingIntent pendingIntent = PendingIntent.getActivity(this, 0, intent, 0);จากนั้นตรงส่วน NotificationCompat.Builder() ที่เอาไว้สร้าง Notification ก็ทำการเพิ่ม setContentIntent() ดังนี้
Notification notification = new NotificationCompat.Builder(this) // this is context .setSmallIcon(R.mipmap.ic_launcher) .setContentTitle("DevAhoy News") .setContentText("สวัสดีครับ ยินดีต้อนรับเข้าสู่บทความ Android Notification :)") .setAutoCancel(true .setContentIntent(pendingIntent) .build();สุดท้ายเมธอด showNotification() จะได้ดังนี้
public void showNotification(View view) {
    Intent intent = new Intent(Intent.ACTION_VIEW,            Uri.parse("https://devahoy.com/blog/2015/08/android-notification/"));    PendingIntent pendingIntent = PendingIntent.getActivity(this, 0, intent, 0);
    Notification notification =            new NotificationCompat.Builder(this)                    .setSmallIcon(R.mipmap.ic_launcher)                    .setContentTitle("DevAhoy News")                    .setContentText("สวัสดีครับ ยินดีต้อนรับเข้าสู่บทความ Android Notification :)")                    .setAutoCancel(true)                    .setContentIntent(pendingIntent)                    .build();
    NotificationManager notificationManager =            (NotificationManager) getSystemService(NOTIFICATION_SERVICE);    notificationManager.notify(1000, notification);}
เอ๊ะถ้าเรา อยากจะทำการเปิดอีก Activity แทนที่จะเปิดหน้าเว็บด้วย PendingIntent จะทำได้ไหม ? คำตอบคือได้ครับ
Step 5 : Start new Activity
ทำการสร้าง Activity ขึ้นมาใหม่อีกหนึ่งตัวชื่อว่า PushActivity.java
package com.devahoy.simplenotification;
import android.os.Bundle;import android.support.v7.app.AppCompatActivity;
public class PushActivity extends AppCompatActivity {
    @Override    protected void onCreate(Bundle savedInstanceState) {        super.onCreate(savedInstanceState);        setContentView(R.layout.activity_push);    }}
และไฟล์ activity_push.xml ดังนี้
<RelativeLayout xmlns:android="http://schemas.android.com/apk/res/android"    xmlns:tools="http://schemas.android.com/tools" android:layout_width="match_parent"    android:layout_height="match_parent" android:paddingLeft="@dimen/activity_horizontal_margin"    android:paddingRight="@dimen/activity_horizontal_margin"    android:paddingTop="@dimen/activity_vertical_margin"    android:paddingBottom="@dimen/activity_vertical_margin"    tools:context=".MainActivity">
    <TextView        android:id="@+id/txt_message"        android:layout_width="wrap_content"        android:layout_height="wrap_content"        android:layout_centerInParent="true"/>
</RelativeLayout>
จากนั้นเพิ่ม PushActivity ลงไปใน AndroidManifest.xml ดังนี้
<application     android:allowBackup="true"     android:icon="@mipmap/ic_launcher"     android:label="@string/app_name"     android:theme="@style/AppTheme" >     <activity         android:name=".MainActivity"         android:label="@string/app_name" >         <intent-filter>             <action android:name="android.intent.action.MAIN" />             <category android:name="android.intent.category.LAUNCHER" />         </intent-filter>     </activity>
     <activity         android:name=".PushActivity"         android:parentActivityName=".MainActivity">         <meta-data             android:name="android.support.PARENT_ACTIVITY"             android:value=".MainActivity"/>     </activity> </application>
จากนั้นที่คลาส MainActivity.java ทำการสร้าง Intent ขึ้นมาใหม่แทนอันเก่า ดังนี้
// Uri.parse("https://devahoy.com/posts/android-notification/"));// PendingIntent pendingIntent = PendingIntent.getActivity(this, 0, intent, 0);
Intent intent = new Intent(this, PushActivity.class);intent.putExtra("message", MESSAGE);TaskStackBuilder stackBuilder = TaskStackBuilder.create(this);stackBuilder.addParentStack(PushActivity.class);stackBuilder.addNextIntent(intent);PendingIntent pendingIntent =        stackBuilder.getPendingIntent(0, PendingIntent.FLAG_UPDATE_CURRENT);
ส่วนข้อความและ title ก็ประกาศเป็น static final ไป
private static final String TITLE = "Devahoy News";private static final String MESSAGE = "สวัสดีครับ ยินดีต้อนรับเข้าสู่บทความ Android Notification :)";เมื่อแตะ Notification จะ putExtra() ส่งข้อความไปยัง PushActivity ด้วย ฉะนั้นที่คลาส PushActivity.java ก็ทำการรับ Intent และแสดงข้อความใส่ TextView ดังนี้
package com.devahoy.simplenotification;
import android.os.Bundle;import android.support.v7.app.AppCompatActivity;import android.widget.TextView;
public class PushActivity extends AppCompatActivity {
    @Override    protected void onCreate(Bundle savedInstanceState) {        super.onCreate(savedInstanceState);        setContentView(R.layout.activity_push);
        Bundle bundle = getIntent().getExtras();
        String message = bundle.getString("message");
        TextView textView = (TextView) findViewById(R.id.txt_message);        textView.setText(message);    }}
ทดสอบรันโปรแกรมอีกครั้ง ลองกดปุ่ม Button เพื่อแสดง Notification และเมื่อแตะ Notification แอพก็จะไปเปิดหน้า PushActivity ซึ่งมีข้อความแสดงอยู่ เป็นอันเรียบร้อย :D
สรุปขั้นตอนการสร้าง Notification
- ใช้
Notification.Builder()เพื่อทำกำหนดค่าต่างๆ จากนั้นbuild()เพื่อให้ได้ออปเจ็คNotificationขึ้นมา - ใช้
NotificationManagerเพื่อทำการแสดง Notification ด้วยnotify() - หากต้องการเพิ่ม Action ให้ Notification ก็ต้องทำการกำหนด ก่อนที่จะทำการ
build()
สุดท้าย Notification ก็ยังมีอะไรให้เล่นอีกเยอะ custom อะไรได้มากมาย ทั้งการใส่ Progress ลงบน Notification การกำหนดความสำคัญ (Priority) ใส่การสั่น เพิ่มเสียง เพ่ิม/ลบ Stack Notification หรืออื่นๆอีกเยอะแยะ ลองไปเล่นกันดูครับ สำหรับบทความนี้ก็ขอฝากไว้เพียงเท่านี้ :)
- Authors
-

Chai Phonbopit
Senior Software Engineer ประสบการณ์กว่า 12 ปี ด้าน Frontend: React, Next.js, Tailwind CSS และ Backend: Node.js, Express, NestJS ปัจจุบันสนใจ Astro, Cloudflare Workers และ AI Coding Tool