สวัสดีครับ วันนี้ผมได้ลองทำตาม Tutorial นี้ - Develop Smart Contracts with ink! ก็เลยนำมาย่อย อธิบายทบทวนตัวเองไปในตัวด้วย สำหรับใครสนใจ Polkadot / Substrate ลองไปอ่าน Tutorials หรือ How-to Guide เพิ่มเติมได้ครับ
ink! คืออะไร?
นี่เลย IG @inkwarunthon จะบ้าหรอ 🤣
ink! เป็นภาษา (จริงๆเรียกภาษาได้มั้ยนะ มันคือ eDSL) สำหรับเขียน Smart Contract ด้วยภาษา Rust ด้วย Substrate Framework ซึ่งตัว ink! contract มันจะ compiled เป็น WebAssembly (WASM) เพื่อเอาไป deploy ลง Substrate (pallet-contract)
สำหรับ ink! ต้องเขียนแบบนี้นะครับ ไม่ใช่แบบนี้ ink 🤣 (ต้องมีเครื่องหมายตกใจ ! ด้วย)
สิ่งที่ต้องมีคือ
- Rust - ภาษาหลักที่ใช้เขียน
- Substrate Contract Node - เป็นเหมือนตัว Node local server เพื่อ interact smart contract ที่เรากำลังจะเขียน
- Cargo Contract - เป็น CLI Tool สำหรับ build / deploy
ink!ให้เป็น contract (WASM) เพื่อเอาไว้ deploy - Contract UI - เป็นเว็บ ที่เอาไว้ deploy contract
มาเริ่มกันเลยดีกว่า
ติดตั้ง Rust
สามารถติดตั้ง Rust ผ่าน rustup (Windows จะเป็นไฟล์ rustup-init.exe กด Install ได้เลย)
rustup default stablerustup updaterustup update nightlyrustup target add wasm32-unknown-unknown --toolchain nightlyสำหรับ Windows แนะนำให้ใช้ Windows Subsystem Linux (WSL) - Guide สำหรับ Windows ครับ
อัพเดท Rust environment
rustup component add rust-src --toolchain nightlyสำหรับคนใช้ VS Code แนะนำ rust-analyzer ครับ (ตัว extension Rust ที่คนโหลดเยอะๆ และของ Official เลิกพัฒนาละครับ ตัว rust-analyzer พัฒนาตลอด มีอัพเดททุกอาทิตย์)
Substrate Contracts Node
ตัว [Substrate Contracts Node] - เป็นตัว Substrate node ที่ให้เราสามารถรัน Node บนเครื่อง local ของเราได้
cargo install contracts-node --git https://github.com/paritytech/substrate-contracts-node.git --force --lockedอันนี้แปลกใจมาก ตอนที่ผมติดตั้ง substrate-contracts-node เครื่องผม Macbook M1 Pro เกิดมีพัดลมดังซะงั้น เพิ่งเคยได้ยินครั้งแรก แถม CPU วิ่ง 100% อยู่เกือบนาที
cargo-contract
ตัว cargo-contract เป็น Command Line Interface สำหรับทำงานร่วมกับ Smart Contract และภาษา ink!
แต่ตัว cargo-contract มี Dependencies ที่ต้องใช้ก่อนติดตั้งคือ
- ต้องติดตั้ง binaryen ก่อน
ผมใช้ Mac ติดตั้งก็ผ่าน homebrew ปกติ
brew install binaryenสำหรับ Windows ก็ต้องโหลด file มาจากเว็บ binaryen ครับ
- ต้องใช้
cargo-dylintติดตั้งด้วยcargoได้เลย
cargo install cargo-dylint dylint-linkเมื่อมี dependencies ครบ ต่อมาก็ติดตั้ง cargo-contract
cargo install cargo-contract --force --lockedทดสอบว่าติดตั้งสมบูรณ์ครบถ้วน
cargo contract --helpCreate Project
เราจะสร้างโปรเจ็ค Smart Contract แรก ด้วย cargo contract ครับ คำสั่งคือ
cargo contract new flipperตัว cargo contract จะ Generate project มาให้เรา ซึ่งผมใช้ชื่อ flipper ตาม Tutorial ตัว Contract นี้จะไม่มีอะไรมาก เป็นเหมือนการ flip() สลับค่า true / false หรือมองเป็น switch toggle ก็ได้ครับ (มีแค่ true หรือ false)
ที่ generate จะมีไฟล์ 2 ไฟล์หลักๆ คือ
├── Cargo.toml└── lib.rsถ้าเราลองดูไฟล์ lib.rs และลองนั่งทำความเข้าใจ อ่านโค๊ดดูซักพักครับ ซึ่งโค๊ดไม่ได้ซับซ้อนเลย และอ่านง่ายมาก
#![cfg_attr(not(feature = "std"), no_std)]
use ink_lang as ink;
#[ink::contract]mod flipper {
    /// Defines the storage of your contract.    /// Add new fields to the below struct in order    /// to add new static storage fields to your contract.    #[ink(storage)]    pub struct Flipper {        /// Stores a single `bool` value on the storage.        value: bool,    }
    impl Flipper {        /// Constructor that initializes the `bool` value to the given `init_value`.        #[ink(constructor)]        pub fn new(init_value: bool) -> Self {            Self { value: init_value }        }
        /// Constructor that initializes the `bool` value to `false`.        ///        /// Constructors can delegate to other constructors.        #[ink(constructor)]        pub fn default() -> Self {            Self::new(Default::default())        }
        /// A message that can be called on instantiated contracts.        /// This one flips the value of the stored `bool` from `true`        /// to `false` and vice versa.        #[ink(message)]        pub fn flip(&mut self) {            self.value = !self.value;        }
        /// Simply returns the current value of our `bool`.        #[ink(message)]        pub fn get(&self) -> bool {            self.value        }    }
    /// Unit tests in Rust are normally defined within such a `#[cfg(test)]`    /// module and test functions are marked with a `#[test]` attribute.    /// The below code is technically just normal Rust code.    #[cfg(test)]    mod tests {        /// Imports all the definitions from the outer scope so we can use them here.        use super::*;
        /// Imports `ink_lang` so we can use `#[ink::test]`.        use ink_lang as ink;
        /// We test if the default constructor does its job.        #[ink::test]        fn default_works() {            let flipper = Flipper::default();            assert_eq!(flipper.get(), false);        }
        /// We test a simple use case of our contract.        #[ink::test]        fn it_works() {            let mut flipper = Flipper::new(false);            assert_eq!(flipper.get(), false);            flipper.flip();            assert_eq!(flipper.get(), true);        }    }}
ถ้าไล่ดูโค๊ดคือ เราจะเก็บ store value ไว้ที่นี่ ก็กำหนด type ปกติ (Data Types ของ Rust)
#[ink(storage)]pub struct Flipper { value: bool,}ตัว attribute $[ink(constructor)] ก็ตรงตัวเลย (เราสามารถกำหนดค่า default ให้มันได้ตอน deploy contract)
#[ink(constructor)]pub fn new(init_value: bool) -> Self { Self { value: init_value }}ตัว method มี 2 method คือ
#[ink(message)]pub fn flip(&mut self) {    self.value = !self.value;}
#[ink(message)]pub fn get(&self) -> bool { self.value}- attribute
#[ink(message)]ทำให้ functionflip()กับget()สามารถเรียกผ่าน API เพื่อคุยกับ contract ได้
ทดลองรัน test (อย่าลืมใช้ toolchain nightly)
cargo +nightly testBuild a Contract
หลังจากที่ Test ผ่าน ไม่มีอะไรผิดพลาด (แน่นอน เพราะเราไม่ได้แก้ไขโค๊ดเลย ฮ่าๆ) ต่อมาเราจะ Build Contract เพื่อทำการ compile Rust + ink! ให้เป็น WebAssembly นั่นเอง
cargo +nightly contract buildครั้งแรกจะ compile นานนิดหนึ่ง เมื่อ compiled เรียบร้อย จะได้ผลลัพธ์ประมาณนี้ (ไฟล์จะถูก generate ไว้ที่ /target/ink)
Original wasm size: 48.4K, Optimized: 22.4K
The contract was built in DEBUG mode.
Your contract artifacts are ready. You can find them in:/Users/chai/dev/flipper/target/ink
  - flipper.contract (code + metadata)  - flipper.wasm (the contract's code)  - metadata.json (the contract's metadata)
เราจะได้ไฟล์ 3 ไฟล์คือ
flipper.contract- เป็นตัว Code + Metadataflipper.wasm- เป็น contract code ที่ถูก compiled เป็น WASM แล้วmetadata.json- คล้ายๆ ABI ของ EVM-based
Substrate Node
ต่อมา เราต้องรัน substrate-contracts-node เป็น Local server ก่อน เพื่อที่จะ Deploy contract ได้
แนะนำ เปิดอีก Terminal นึงค้างไว้ครับ
substrate-contracts-node --devจะได้ Ouput คล้ายๆแบบนี้
2022-04-26 00:07:09 Substrate Contracts Node2022-04-26 00:07:09 ✌️ version 0.13.0-1a7fe782022-04-26 00:07:09 ❤️ by Parity Technologies <admin@parity.io>, 2021-20222022-04-26 00:07:09 📋 Chain specification: Development2022-04-26 00:07:09 🏷 Node name: white-twist-69182022-04-26 00:07:09 👤 Role: AUTHORITY2022-04-26 00:07:09 💾 Database: RocksDb at /var/folders/jx/46090gn/T/substrateQDCmqj/chains/dev/db/full2022-04-26 00:07:09 ⛓ Native runtime: substrate-contracts-node-100 (substrate-contracts-node-1.tx1.au1)2022-04-26 00:07:10 🔨 Initializing Genesis block/state (state: 0x4333…b6b9, header-hash: 0x730d…ce7c)2022-04-26 00:07:10 🏷 Local node identity is: 12D3KooWEgs1gP8SPsKB2022-04-26 00:07:10 💻 Operating system: macos2022-04-26 00:07:10 💻 CPU architecture: aarch642022-04-26 00:07:10 📦 Highest known block at #02022-04-26 00:07:10 〽️ Prometheus exporter started at 127.0.0.1:96152022-04-26 00:07:10 Listening for new connections on 127.0.0.1:9944.2022-04-26 00:07:15 💤 Idle (0 peers), best: #0 (0x730d…ce7c), finalized #0 (0x730d…ce7c), ⬇ 0 ⬆ 0Deploy a Contract
เมื่อเรารัน Local Node ได้แล้ว ต่อมาก็คือ Deploy Contract ที่เรา compiled เป็น WASM เรียบร้อยแล้ว
การ Deploy เราจะใช้เว็บนี้ครับ Contract UI ไปที่แท็ป Add New Contract
New Contract
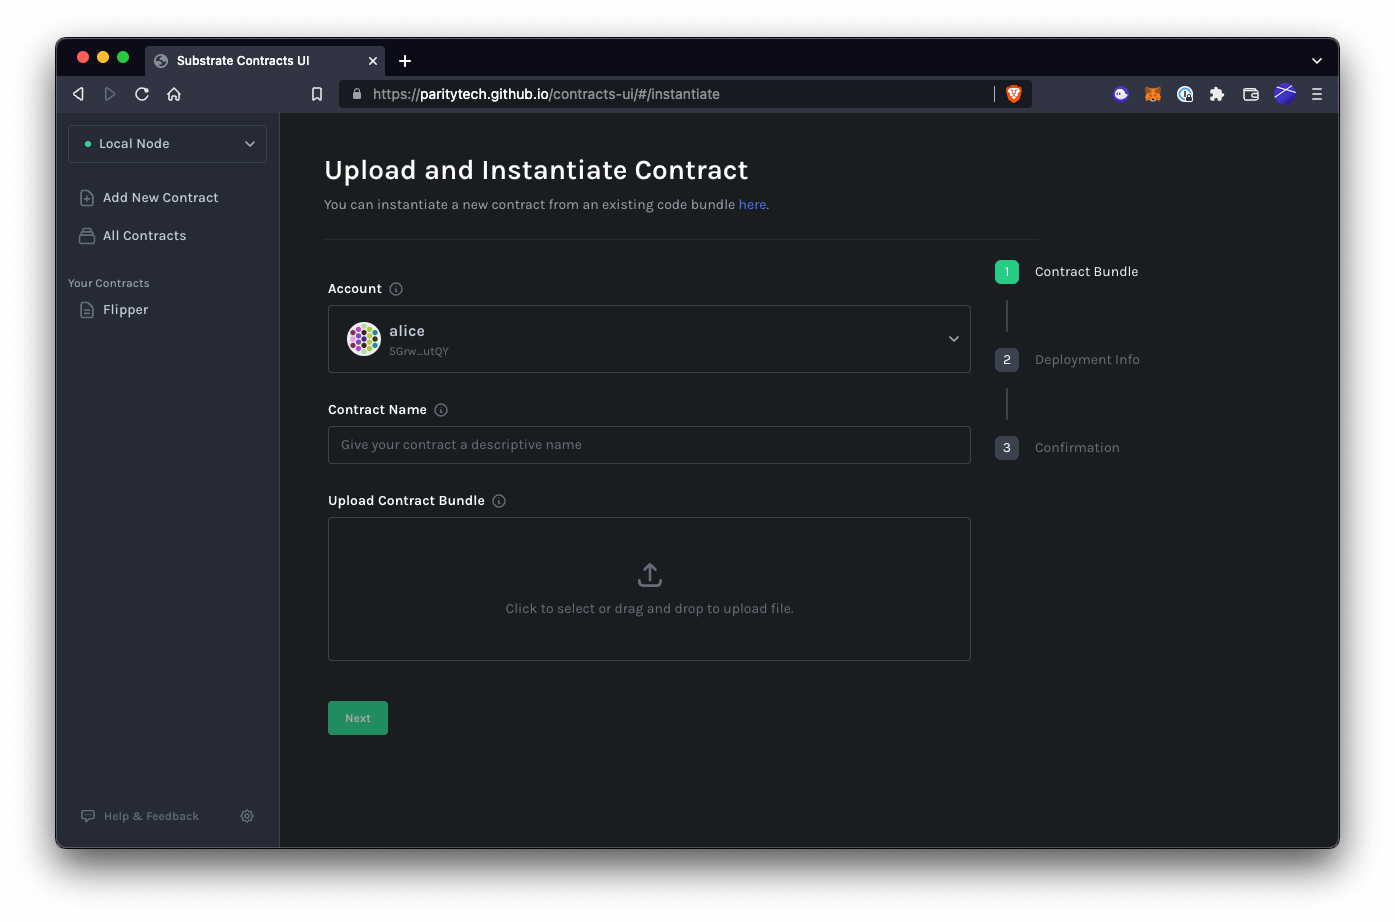
เลือก Upload New Contract Code
- Account เลือกเป็น alice จริงๆเลือกอะไรก็ได้ เป็น account test หมด
- Contract Name - ตั้งชื่อตามสะดวก (เอาไว้ display เฉยๆ ไม่มีผลกับ Contract)
- Upload Contract Bundle - ก็เลือกไฟล์
flipper.contractมาวางไว้ตรงนี้
กด Next
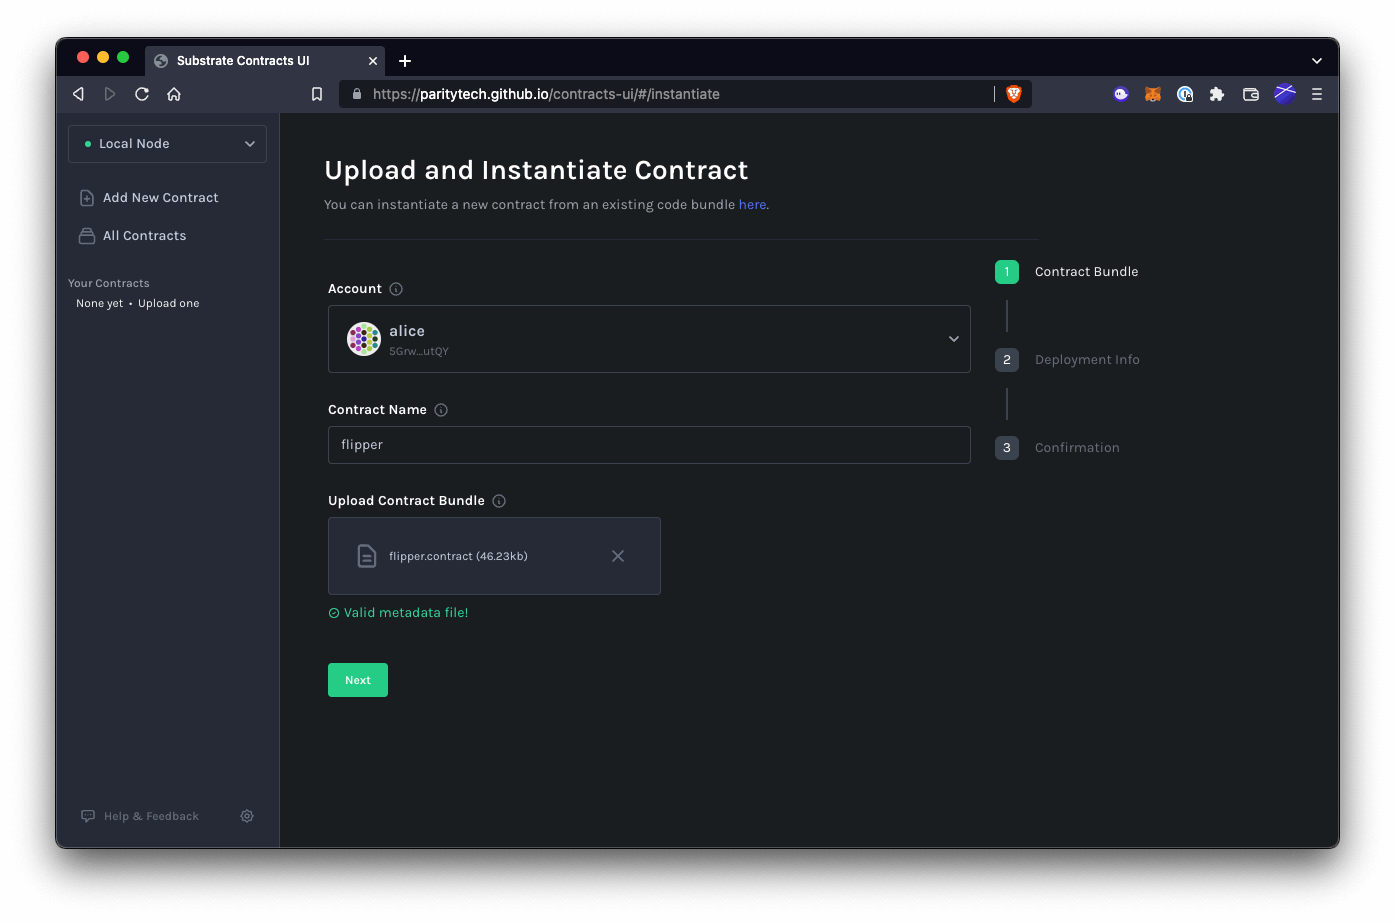
Instantiate Contract
ขั้นตอนนี้เป็นเหมือนการกำหนด Constructore จะเห็นชื่อ Deployment Constructor เป็น function ที่เราเขียนไว้ใน lib.rs เลย
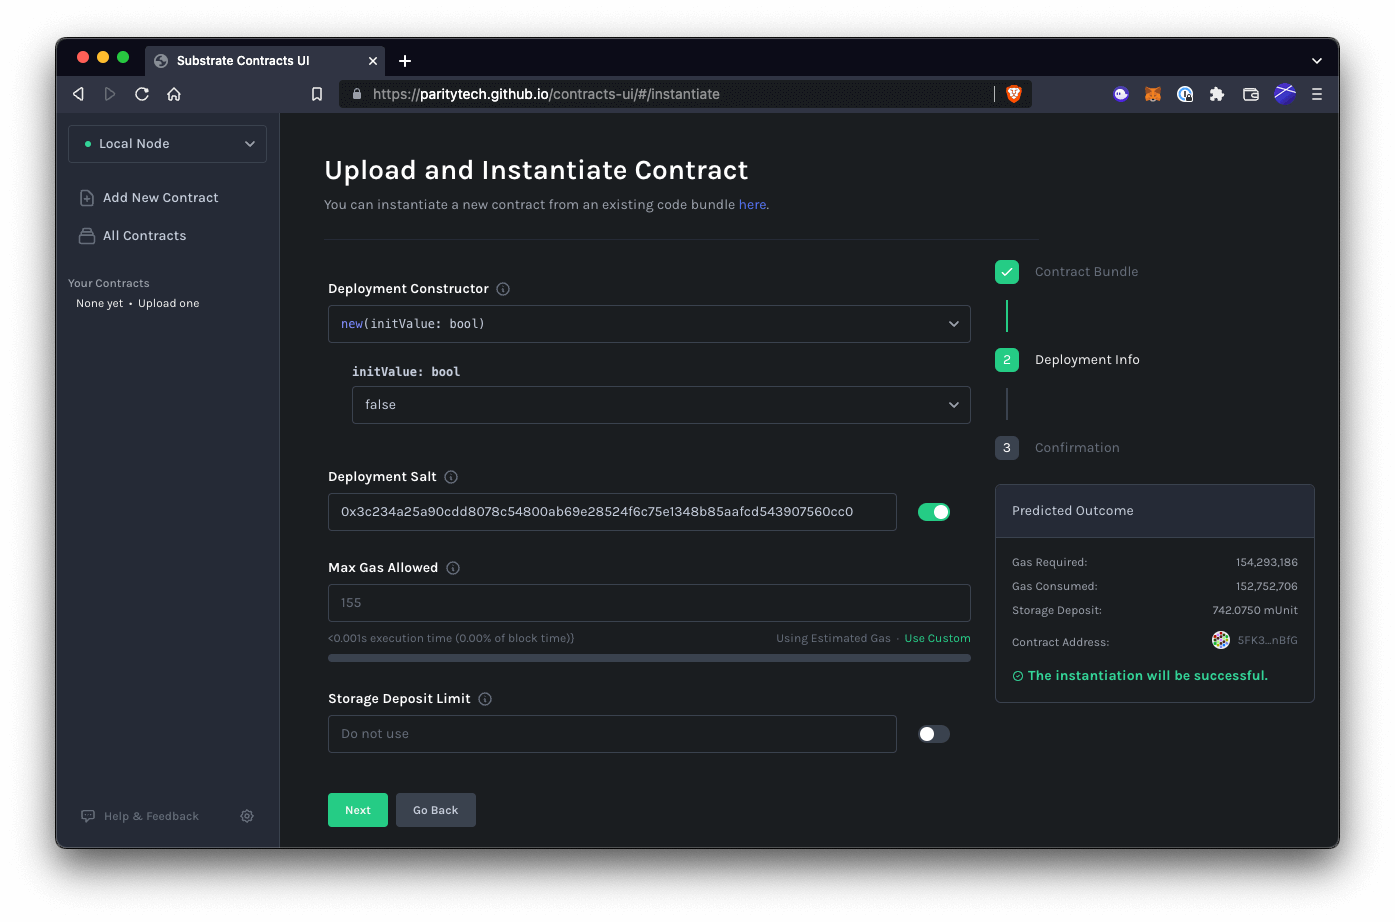
ผม initValue ให้เป็น false ค่าเริ่มต้น ส่วนค่าอื่นๆ ใช้ Default ได้ครับ จากนั้นกด Next
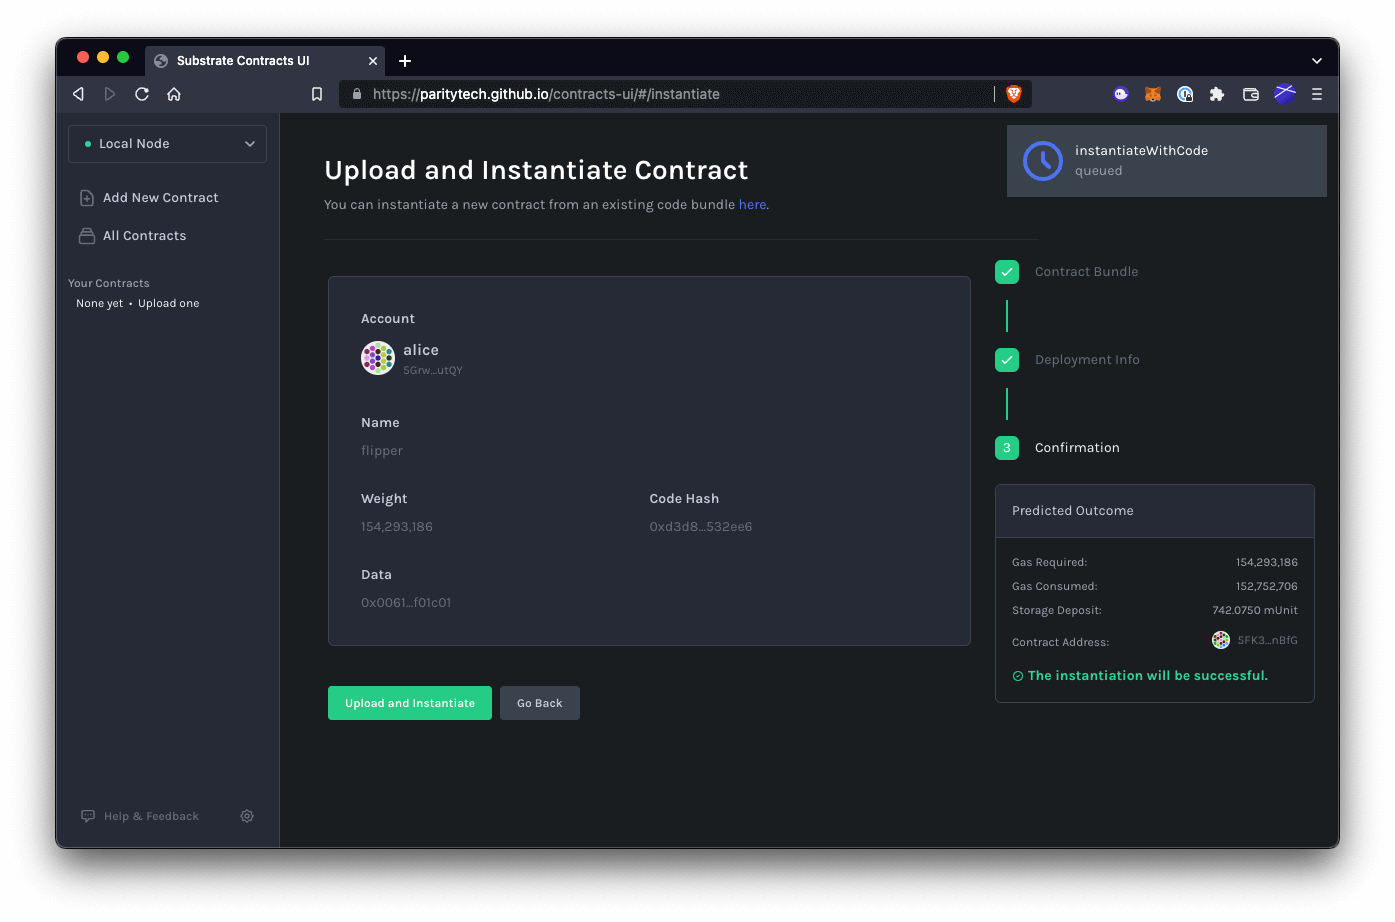
ตอนนี้ Trnasaction เราเข้า queue ไว้แล้วครับ แต่เราสามารถ Back เพื่อไปแก้ไขได้ แต่ถ้าไม่มีอะไรต้องแก้แล้ว ก็กด Upload and Instantiate ได้เลย
Interact
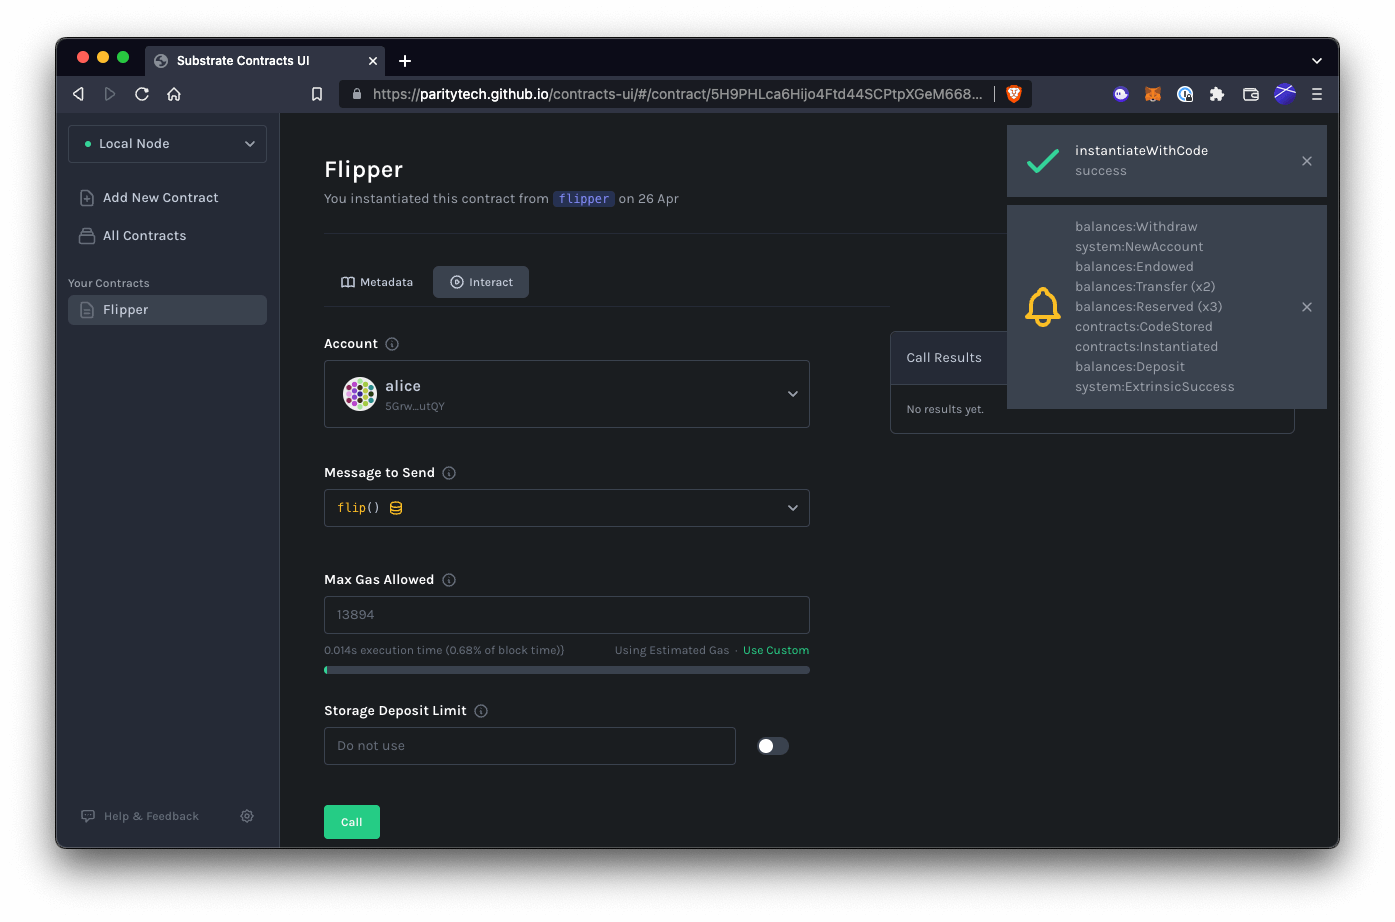
เราสามารถลองเรียก method (สิ่งที่เรากำหนดกับ attribute #[ink(message)]) จะมีให้เลือกคือ
Read get()- สำหรับอ่านค่าCall flip()- เรียก function เพื่อเปลี่ยนค่าใน state
ลองเล่น เพิ่มเติมดูครับ
Metadata
แท็ป metadata ก็เป็นคำอธิบายตัว Contract เรา ว่า เราสามารถเรียกอะไรผ่าน API ได้บ้าง พร้อมคำอธิบาย (ที่เรา comment แบบ /// LINE DOC ไว้ครับ)
นอกจากนี้ จริงๆ เราสามารถ Deploy ผ่าน CLI ได้นะครับ กรณีไม่อยากใช้ Contract UI ที่เป็นเว็บ ด้วย cargo contract แบบนี้
cargo contract upload --suri //Aliceและ Initial value ด้วยคำสั่ง :
cargo contract instantiate --suri //Alicesuriคือ Secure Uri (ใช้//Aliceที่เป็น default)
ส่วนอันนี้เป็น Source Code ที่ผมลองทำตาม Tutorial
สรุป
ผมค่อนข้างประทับใจ ink! แฮะ ตัวโค๊ดผมว่ามันอ่านง่ายมาก แม้จะเป็นโปรเจ็ค sample ง่ายๆ ก็เถอะ ส่วน Tutorial นี้ก็ถือว่าโอเคเลย อาจมีบางส่วน outdate บ้างนิดหน่อย เวลาเราทำตาม Tutorial เราก็เจอปัญหา ก็แก้กันไป เรียนรู้กันไปครับ
ส่วนของ Substrate, Parachain, Pallet, Frontier, FRAME อะไรพวกนั้น บอกตรงๆ ผมยังไม่ค่อยเข้าใจครับ อาจต้องหาเวลาอ่าน และเรียนรู้เพิ่มเติมอีกเยอะเลย แต่เอาเข้าจริงๆ ผมก็ยังคิดว่า เราไม่จำเป็นต้องรู้ทุกอย่างหรือรู้ทุกเรื่องก็ได้ ค่อยๆเรียนรู้ไป ทำงานไป แล้วเดี๋ยวสถานการณ์มันก็จะบังคับเองว่า ควรจะต้องรู้เรื่องนั้น เรื่องนี้เพิ่มเติมเอง
หวังว่าบทความนี้จะเป็นประโยชน์แก่เพื่อนๆ พี่ๆ น้องๆ ที่กำลังสนใจ Polkadot & Substrate อยู่นะครับ ขอบคุณครับ
Happy Coding ❤️
References
- Authors
-

Chai Phonbopit
Senior Software Engineer ประสบการณ์กว่า 12 ปี ด้าน Frontend: React, Next.js, Tailwind CSS และ Backend: Node.js, Express, NestJS ปัจจุบันสนใจ Astro, Cloudflare Workers และ AI Coding Tool
Related Posts