Devahoy Logo
PublishedAt

Astro

Astro คืออะไร? มาลองทำเว็บด้วย Astro กันครับ

Astro คืออะไร? มาลองทำเว็บด้วย Astro กันครับ

Astro: The web framework for content-driven websites นี่คือสโลแกนของ Astro ในหน้าเว็บ

Astro คือ คือเฟรมเวิร์คสำหรับสร้างเว็บไซต์ที่เน้นเนื้อหา (Content) เป็นหลัก และเน้นเรื่องประสิทธิภาพและความเร็ว โดยใช้แนวคิด “Islands Architecture” ที่ช่วยให้เว็บไซต์โหลดเร็วและมีประสิทธิภาพสูง

Astro
Astro builds fast content sites, powerful web applications, dynamic server APIs, and everything in-between.astro.build
Astro - Build the web you want.

เว็บไซต์ของ Astro

ข้อดีของ Astro

  • Islands : Frontend architecture ที่ช่วยให้หน้าเว็บโหลดเร็วขึ้น โดยแบ่ง HTML เป็นส่วนเล็กๆ
  • Zero JS, by default : เว็บไซต์โหลดเร็วเพราะส่ง JavaScript น้อยที่สุดไปยังผู้ใช้
  • รองรับการใช้งานร่วมกับ UI Framework ต่างๆ ทั้ง React, Vue, Svelte
  • รองรับทั้ง Static site และ Server Side Rendering (SSR)
  • รองรับการจัดการ content ด้วย Markdown/MDX
  • มีเรื่อง Content Layer / Collection ที่ช่วยให้จัดการเนื้อหาได้ง่ายขึ้น
  • มี built-in ViewTransition มาให้ในตัว
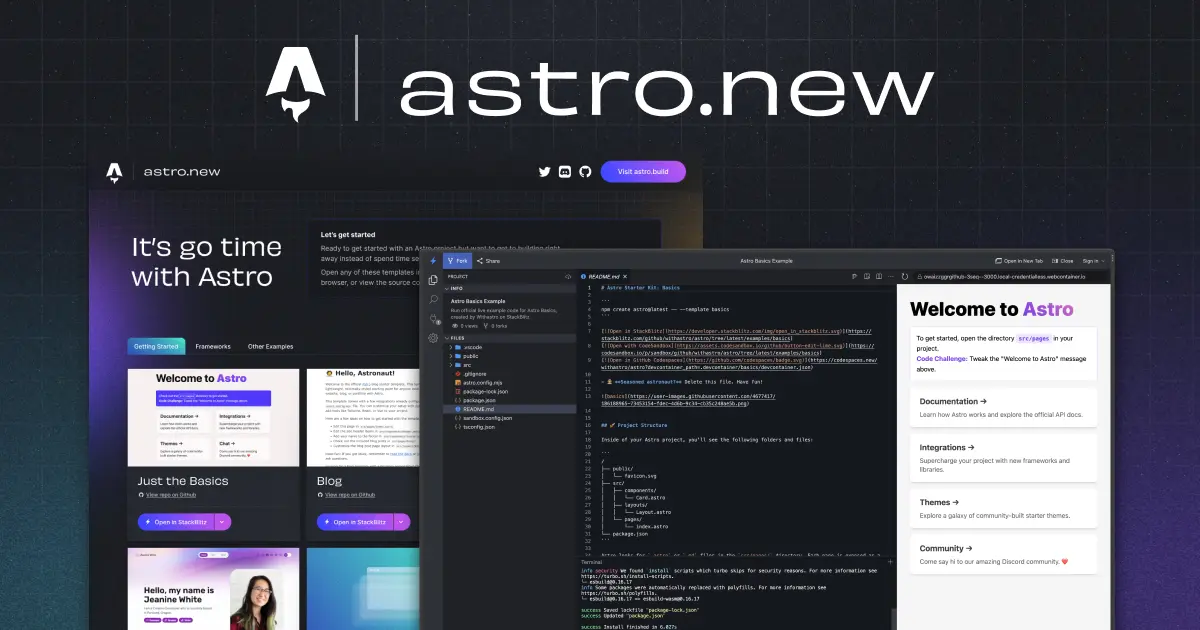
Getting Started | astro.new
Quickly launch example Astro projects in your favorite browser IDE!astro.new

คุณสามารถเข้าดุเว็บ astro.new เพื่อดูตัวอย่างได้

เริ่มต้น Astro

มาลองเริ่มต้นสร้างโปรเจ็คด้วย Astro กัน สิ่งที่ต้องมีคือ Node.js (แนะนำ v.18 หรือ v20 ขึ้นไป) ตัว v19 ไม่รองรับ

เวอร์ชั่น Astro คือ v5.0.3 ณ​ วันที่เขียนบทความ

สร้างโปรเจ็ค ด้วย template minimal

Terminal window
# กรณีใช้ npm
npm create astro@latest -- --template minimal
# กรณีใช้ pnpm
pnpm create astro@latest --template minimal
# กรณีใช้ yarn
yarn create astro --template minimal
# กรณีใช้ bun
bun create astro --template minimal

จากนั้น ตัว prompt ก็จะถามเราว่าจะใช้สร้างโปรเจ็คไว้ที่ folder อะไร รวมถึง ติดตั้ง dependencies และ git repository เลยหรือไม่

เมื่อติดตั้งเสร็จเรียบร้อย จะได้ผลลัพธ์แบบด้านล่าง

Terminal window
astro Launch sequence initiated.
dir Where should we create your new project?
./astro-minimal
tmpl Using minimal as project template
deps Install dependencies?
Yes
git Initialize a new git repository?
Yes
Project initialized!
Template copied
Dependencies installed
Git initialized
next Liftoff confirmed. Explore your project!
Enter your project directory using cd ./astro-minimal
Run bun run dev to start the dev server. CTRL+C to stop.
Add frameworks like react or tailwind using astro add.
Stuck? Join us at https://astro.build/chat
╭─────╮ Houston:
Good luck out there, astronaut! 🚀

ทำการเปิดโปรเจ็คด้วย VS Code ขึ้นมา จะเห็นว่า ตัว Project structure จะมีหน้าตาแบบนี้

Terminal window
tree -L 3 -I 'node_modules'
.
├── README.md
├── astro.config.mjs
├── bun.lockb
├── package.json
├── public
│   └── favicon.svg
├── src
│   └── pages
│   └── index.astro
└── tsconfig.json

ไฟล์สำคัญคือ

  • astro.config.mjs - ไฟล์สำหรับตั้งค่าต่างๆ ของ Astro
  • src/pages/index.astro - ไฟล์ index สำหรับเป็นหน้าเว็บ ตัว Astro รองรับ file-based routing

ทำการ start server ขึ้นมา ด้วยคำสั่ง (ในบทความผมใช้ bun แต่ผู้อ่านสามารถเลือกใช้ npm/pnpm หรือ yarn ก็ได้)

Terminal window
bun dev

ตัว server จะทำการ start และเราจะได้หน้าเว็บที่ url : http://localhost:4321/

Pages

ใน Astro เราสามารถสร้าง pages ได้ด้วยการสร้างไฟล์ใน โฟลเดอร์ /src/pages เราเริ่มด้วยการสร้างหน้า About ขึ้นมาก่อน ด้วยไฟล์ about.astro

src/pages/about.astro
1
---
2
3
---
4
5
<html lang="en">
6
<head>
7
<meta charset="utf-8" />
8
<link rel="icon" type="image/svg+xml" href="/favicon.svg" />
9
<meta name="viewport" content="width=device-width" />
10
<meta name="generator" content={Astro.generator} />
11
<title>About</title>
12
</head>
13
<body>
14
<h1>นี่คือหน้า About</h1>
15
</body>
16
</html>

จะเห็นว่าด้านบน มี --- (code fence) เป็น formatter ที่ให้เราสามารถเรียกใช้ JavaScript กำหนดตัวแปร import file ต่างๆได้ เช่น

src/pages/about.astro
1
---
2
const title = 'นี่คือหน้า About'
3
---
4
5
<html lang="en">
6
<head>
7
<meta charset="utf-8" />
8
<link rel="icon" type="image/svg+xml" href="/favicon.svg" />
9
<meta name="viewport" content="width=device-width" />
10
<meta name="generator" content={Astro.generator} />
11
<title>About</title>
12
</head>
13
<body>
14
<h1>{title}</h1>
15
</body>
16
</html>

ตอนนี้หน้าเว็บเราก็จะมี 2 หน้า คือ หน้าแรก และหน้า About

การ navigate ก็เหมือน HTML tag เลยคือ

1
<ul>
2
<li><a href="/">Home</a></li>
3
<li><a href="/about">About</a></li>
4
</ul>

Routing

Routing
An intro to routing with Astro.docs.astro.build

ตัว Astro จะใช้ file-based routing เพื่อทำการ generate URL ให้กับโปรเจ็คของเรา ขอแค่เรามีไฟล์อยู่ที่โฟลเดอร์ /src/pages/

Static Routes

การกำหนด static routes ก็คือขอแค่มีไฟล์ใน /src/pages ก็จะกลายเป็น page ของเว็บเราเลย โดยที่ตัวไฟล์รองรับคือ .md, .mdx .astro .js .ts และ .html

Terminal window
# Example: Static routes
src/pages/index.astro -> mysite.com/
src/pages/about.astro -> mysite.com/about
src/pages/about/index.astro -> mysite.com/about
src/pages/about/me.astro -> mysite.com/about/me
src/pages/posts/1.md -> mysite.com/posts/1

Dynamic Routes

การทำ dynamic routes คือการ generate หลายๆ page โดยใช้ filename ที่ตั้งชื่อภายใน [] เช่น /pages/posts/[post].astro

เวลาที่ Astro build static หน้า page ที่กำหนดแบบนี้จะทำการ generate ตอน build ซึ่ง เราก็ต้องใช้ร่วมกับ getStaticPaths()

ลองสร้างหน้า /posts/[post].astro ขึ้นมา มีหน้าตาแบบนี้

/posts/[post].astro
1
---
2
export function getStaticPaths() {
3
return [
4
{params: {post: 'post-1'}},
5
{params: {post: 'post-2'}},
6
{params: {post: 'post-3'}},
7
];
8
}
9
10
const { post } = Astro.params
11
---
12
13
<div>
14
<h1>{post}</h1>
15
</div>

เวลาที่ build มันจะถูก generate เป็น 3 หน้า คือ

  • /posts/post-1
  • /posts/post-2
  • /posts/post-3

Astro Component

การสร้าง component ใน Astro จะคล้ายคลึงกับ JSX บางส่วน และตัว template คล้ายๆกับ Vue หรือ Svelte

ตัว Astro component จะมีโครงสร้างแบบนี้

1
---
2
// Component Script (JavaScript)
3
---
4
<!-- Component Template (HTML + JS Expressions) -->

Component Script

Astro จะใช้ code fence (---) เป็นตัวกำหนด component script คล้ายๆ frontmatter ใน Markdown เราใช้ component script เพื่อเขียน JavaScript เช่น

  • การ import ไฟล์ Astro component อื่นๆ
  • การ import component อื่นๆ ได้เช่น React, Vue, Svelte
  • การ import data พวก JSON หรือการ fetch data จาก API
  • กำหนดตัวแปรต่างๆ ที่จะใช้ใน template

Component Template

เป็นส่วน Template หรือ HTML ตัว Component จะใช้ Astro Template Syntax ที่มีความคล้ายคลึงกับ JSX Expressions รวมถึง Astro directive

ตัวอย่าง Component Template

1
---
2
// Your component script here!
3
import Counter from '../components/Counter.astro'
4
import ReactCounter from '../components/CounterReact.jsx'
5
6
const items = await fetchItems()
7
8
// การเข้าถึง props ของ astro component
9
const { title } = Astro.props;
10
---
11
12
<!-- HTML comments supported! -->
13
{/* JS comment syntax is also valid! */}
14
15
<Counter />
16
<h1 class="title">{title}</h1>
17
18
<ReactCounter client:visible />
19
20
<ul>
21
{items.map((data) => <li>{data.name}</li>)}
22
</ul>
23
24
<style>
25
.title {
26
font-size: 2rem;
27
}
28
</style>
29
30
<script>
31
console.log('javascript code')
32
</script>

จะเห็นว่า ตัว Astro component สามารถใช้ component ทั้ง Astro และ React component ได้ ส่วนการ render items ที่เป็น array ก็จะคล้ายๆ JSX คือใช้ map()

ส่วนที่เราเห็น client:visible ตรง ReactCounter ตรงนี้เป็น directive สำหรับการ hydrate (ตัว Astro จะยังไม่ render ที่ฝั่ง Server และไปทำการ hydrate เพิ่มโค๊ด JavaScript ตรงนี้ที่ฝั่ง client)

ถ้าเราสังเกตดีๆ ตัว component จะมี 3ส่วน

  • code fence เป็นส่วนที่เอาไว้กำหนด JavaScript code
  • ส่วน markup เป็นส่วน แสดง HTML
  • ส่วน CSS อยู่ภายใต้ <style>

นอกจากนี้ เราก็ยังสามารถกำหนด <script> ลงไปใน Component ได้เหมือนกัน

ความต่างระหว่าง code fence --- กับ <script> คือ ใน code fence เป็น Server side code ในขณะที่ <script> เป็น client side ครับ ดังตัวอย่างด้านล่าง

1
---
2
// Server-side code
3
const items = await fetchItems();
4
const title = "Hello";
5
---
6
7
<!-- Template -->
8
<h1>{title}</h1>
9
<ul>
10
{items.map(item => <li>{item}</li>)}
11
</ul>
12
13
<script>
14
// Client-side code
15
document.querySelectorAll('li').forEach(li => {
16
li.addEventListener('click', () => {
17
li.classList.toggle('active');
18
});
19
});
20
</script>

การกำหนด รับ ส่ง props ใน Astro ก็คล้ายๆ React ครับ เช่น เรามี Button.astro เวลาส่ง props ให้ก็จะแบบนี้

1
---
2
import Button from '../components/Button.astro';
3
---
4
5
<Button text="Click me!" color="primary" />

โดยที่ตัว Button.astro กำหนดไว้แบบนี้

Button.astro
1
---
2
// รับ props
3
interface Props {
4
text: string;
5
color?: 'primary' | 'secondary';
6
}
7
8
const { text, color = 'primary' } = Astro.props;
9
---
10
11
<button class={color}>
12
{text}
13
</button>
14
15
<style>
16
button {
17
padding: 0.5rem 1rem;
18
border-radius: 0.25rem;
19
border: none;
20
}
21
.primary {
22
background: #4c1d95;
23
color: white;
24
}
25
.secondary {
26
background: #e5e7eb;
27
color: #1f2937;
28
}
29
</style>

การใช้งาน CSS

ใน Astro เราสามารถใช้งาน CSS ได้หลายแบบ เช่น

ทำการ import จาก ไฟล์ css

1
---
2
import '../styles/global.css'
3
---

กำหนด CSS ใน component ซึ่ง <style> default จะเป็น scope เฉพาะ component อยู่แล้ว

1
---
2
---
3
<h1>Hello</h1>
4
<style>
5
h1 {
6
color: red;
7
}
8
</style>

การกำหนด CSS แบบ global จะใช้ directive (attribute) is:global

1
<style is:global>
2
.title {
3
color: red;
4
}
5
</style>

กำหนด Layout

เราสามารถกำหนด Layout เพื่อลดการเขียนโค๊ดซ้ำๆ ได้ เช่น เรามีหน้า index กับหน้า about ที่มีโค๊ด HTML เราก็ย้ายไปเป็น RootLayout ได้ สร้างไฟล์ RootLayout.astro ขึ้นมา ในโฟลเดอร์ layout

layout/RootLayout.astro
1
<html lang="en">
2
<head>
3
<meta charset="utf-8" />
4
<link rel="icon" type="image/svg+xml" href="/favicon.svg" />
5
<meta name="viewport" content="width=device-width" />
6
<meta name="generator" content={Astro.generator} />
7
<title>Astro</title>
8
</head>
9
<body>
10
<slot />
11
</body>
12
</html>

จะเห็นว่าใน body เราจะมี <slot /> เป็นเหมือนการ render children ของ JSX หรือหลักการ slot outlet ของ Vue/Svelte

ทีนี้ไฟล์ index.astro และ about.astro เราก็แค่ import RootLayout มาใช้แบบนี้

pages/index.astro
1
---
2
import RootLayout from '../layout/RootLayout.astro'
3
4
const title = 'หน้า index Astro'
5
---
6
7
<RootLayout>
8
<h1>{title}</h1>
9
</RootLayout>

และไฟล์ about.astro

pages/about.astro
1
---
2
import RootLayout from '../layout/RootLayout.astro'
3
4
const title = 'นี่คือหน้า About'
5
---
6
7
<RootLayout>
8
<h1>{title}</h1>
9
</RootLayout>

UI Framework

ลองใช้งานร่วมกับ UI library เช่น React ซึ่งตัว Astro มีการจัดการ hydrate React component ฝั่ง client-side ให้เรา

ทำการรันคำสั่งเพื่อติดตั้ง โดยตัว astro จะติดตั้ง dependencies จะตั้งค่า astro.config.mjs ให้เราเอง

1
npx astro add react

ไฟล์ config เราหลังจากติดตั้ง react

1
// @ts-check
2
import { defineConfig } from 'astro/config'
3
4
import react from '@astrojs/react'
5
6
// https://astro.build/config
7
export default defineConfig({
8
integrations: [react()],
9
})

ไฟล์ tsconfig.json

tsconfig.json
1
{
2
"extends": "astro/tsconfigs/strict",
3
"include": [".astro/types.d.ts", "**/*"],
4
"exclude": ["dist"],
5
"compilerOptions": {
6
"jsx": "react-jsx",
7
"jsxImportSource": "react"
8
}
9
}

ลองสร้าง React Component ขึ้นมา

component/ReactCounter.tsx
1
import { useState } from 'react'
2
3
export default function Counter({ initialCount = 0 }) {
4
const [count, setCount] = useState(initialCount)
5
6
return (
7
<div>
8
<h2>React Counter</h2>
9
<p>Count: {count}</p>
10
<button onClick={() => setCount(count - 1)}>-</button>
11
<button onClick={() => setCount(count + 1)}>+</button>
12
</div>
13
)
14
}

หน้า index.astro ก็ทำการ import ReactCounter ไปใช้ โดยกำหนด directive client:visible

1
---
2
import RootLayout from '../layout/RootLayout.astro'
3
import ReactCounter from '../component/ReactCounter.jsx'
4
5
const title = 'หน้า index Astro'
6
---
7
8
<RootLayout>
9
<h1>{title}</h1>
10
11
<ReactCounter initialCount={0} client:visible />
12
</RootLayout>

Build

สุดท้าย ลองทำการ build project ตัว astro ถ้าเราไม่ได้กำหนด output mode เป็น server มันจะทำการ build static ให้เรานะครับ

Terminal window
bun run build

จะได้ output แบบด้านล่าง

Terminal window
building client (vite)
16:04:44 [vite] ✓ 28 modules transformed.
16:04:44 [vite] dist/_astro/ReactCounter.iJIUJ5ZK.js 1.04 kB │ gzip: 0.61 kB
16:04:44 [vite] dist/_astro/index.Dy6lLLXr.js 7.77 kB │ gzip: 3.00 kB
16:04:44 [vite] dist/_astro/client.BA2GgrTr.js 177.92 kB │ gzip: 56.33 kB
16:04:44 [vite] ✓ built in 381ms
generating static routes
16:04:44 src/pages/about.astro
16:04:44 └─ /about/index.html (+4ms)
16:04:44 src/pages/posts/[post].astro
16:04:44 ├─ /posts/post-1/index.html (+2ms)
16:04:44 ├─ /posts/post-2/index.html (+1ms)
16:04:44 └─ /posts/post-3/index.html (+1ms)
16:04:44 src/pages/index.astro
16:04:44 └─ /index.html (+6ms)
16:04:44 Completed in 31ms.
16:04:44 [build] 5 page(s) built in 802ms
16:04:44 [build] Complete!

สรุป

บทความนี้ก็เป็นเพียงแค่พื้นฐาน และก็ Overview ให้เห็นภาพรวมคร่าวๆ ของ Astro นะครับ ยังมีเรื่องอื่นๆ อีกหลายๆเรื่องที่ไม่ได้พูดถึง เช่น Middleware การจัดการ Markdown, Content Collections, Data fetching, Astro DB, SSG, SSR, Authentication และอื่นๆ สามารถไปลองอ่าน Docs หรือดูตัวอย่าง Template Theme เพิ่มเติมได้ครับ

อ่อ สุดท้าย ตัวบล็อก Devahoy ล่าสุด ก็ใช้ Astro เช่นกันครับ และก็กำลังพยายามเรียบเรียงเนื้อหา เป็นซีรีย์ Astro อยู่ครับ รอติดตามนะครับ

Happy Coding ❤️

Authors
avatar

Chai Phonbopit

เป็น Web Dev ในบริษัทแห่งหนึ่ง ทำงานมา 10 ปีกว่าๆ ด้วยภาษาและเทคโนโลยี เช่น JavaScript, Node.js, React, Vue และปัจจุบันกำลังสนใจในเรื่องของ Blockchain และ Crypto กำลังหัดเรียนภาษา Rust

Related Posts