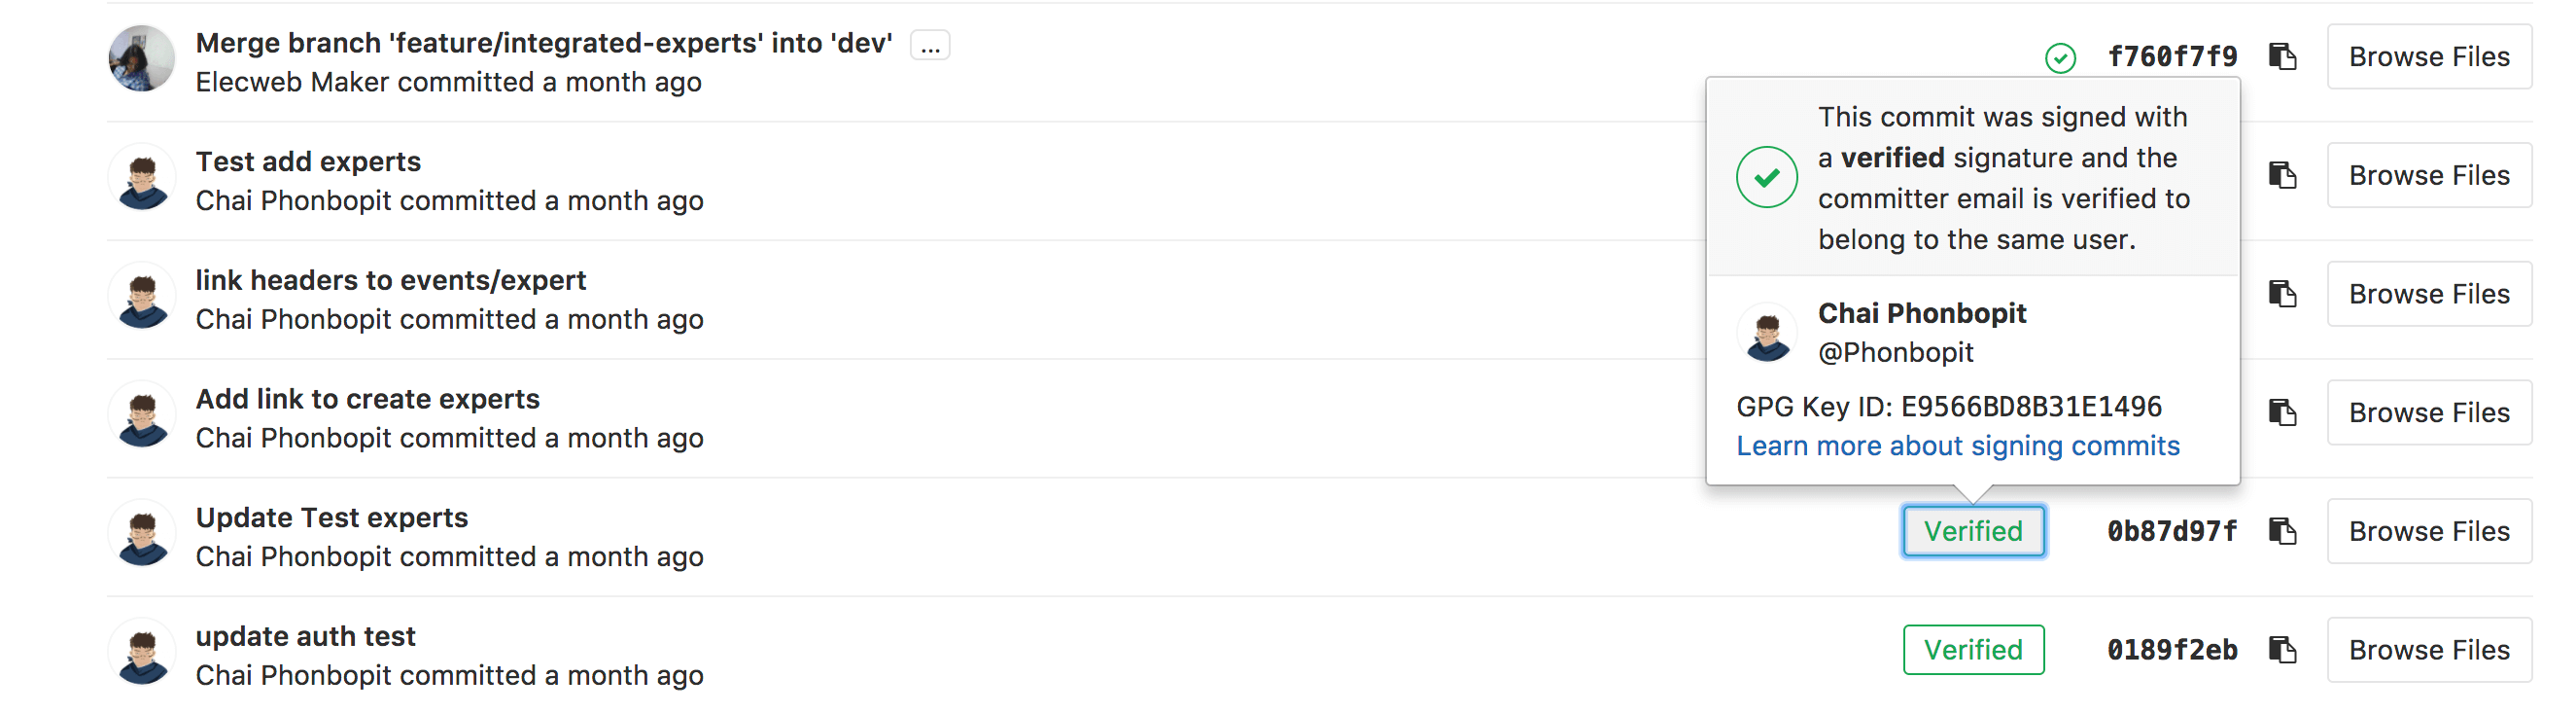
หากใครเคยลองอ่าน Commit History ใน Github, Gitlab หรือว่า Bitbucket จะเห็นว่าจะมีคำว่า Verified ต่อท้ายของ Commit เรา ละมันคืออะไร? เอาไว้ทำอะไร? และสามารถทำได้ยังไง?
วันนี้มาแนะนำ วิธีการทำ Verify เท่ๆกันครับ มันคือการ Verify GPG นั่นเอง ข้อดีคือมันถูก Verify จริงๆว่า Commit นั้นมาจากเรานะ วิธีการทำก็ไม่ยาก จริงๆมีเขียนไว้ในแต่ Provider อยู่แล้ว
TLDR
แบบรวบรัด
$ gpg --full-gen-key$ gpg --list-secret-keys --keyid-format LONG$ gpg --armor --export GPG_ID_KEY

$ git config --global user.signingkey GPG_KEY$ git config --global commit.gpgsign true
สำหรับคนต้องการวิธีการทำแบบยาวๆ ก็เริ่มจาก ติดตั้ง และ Generate GPG ID เลย
1. Install & Generate GPG
ทำการดาวน์โหลดและติดตั้ง จาก link นี้ GnuPG
$ gpg --full-gen-key
Please select what kind of key you want:   (1) RSA and RSA (default)   (2) DSA and Elgamal   (3) DSA (sign only)   (4) RSA (sign only)Your selection? 1
What keysize do you want? (2048) 4096Key is valid for? (0) 1y
Real name: DevahoyEmail address: hello@devahoy.comComment:You selected this USER-ID:    "Devahoy <hello@devahoy.com>"
ทำการเลือก
Your selection?: 1What keysize do you want? (2048): 4096Key is valid for?: 1y (หรือเลือกว่า key จะหมดอายุเมื่อไหร่ ตามต้องการ 0 คือไม่มีหมดอายุ)Real name: ใส่ชื่อเราEmail address: ใส่ email
จากนั้นทำการใส่ Passphrase เพื่อตั้งค่ารหัสผ่าน และ GPG จะทำการ generate key ให้เรา
ต่อมาทำการ copy GPG Key ID ด้วยคำสั่ง
$ gpg --list-secret-keys --keyid-format LONGจะได้รายการ ประมาณด้านล่างนี้ เราจะดูตรงบรรทัด sec rsa4096/ ให้เอาค่า ID หลักจากนี้มา
sec rsa4096/4D12345678901234 2017-12-31 [SC] [expires: 2019-12-31] DE1234CE123B1234567890ABCDEFG1234567890Auid [ultimate] Devahoy <devahoy@gmail.com>ssb rsa4096/BC12345678909123 2017-12-31 [E] [expires: 2019-12-31]ซึ่งจากค่าด้านบน GPG ID คือ 4D12345678901234
ทำการ Export GPG ID ด้วยคำสั่ง
gpg --armor --export 4D12345678901234เราจะได้ GPG Key หน้าตาประมาณนี้
-----BEGIN PGP PUBLIC KEY BLOCK-----xxxxxxxxx-----END PGP PUBLIC KEY BLOCK-----2. Add GPG to Github, Bicbucket or Gitlab
Step ต่อมา หลักจากที่เราได้ GPG แล้ว ก็ให้ทำการเพิ่มไปที่ Service Provider ต่างๆ อย่างเช่น Github ก็เข้าไปที่
My Accounts => Settings ตรงแท้ป Personal settings เลือกที่ SSH and GPG keys
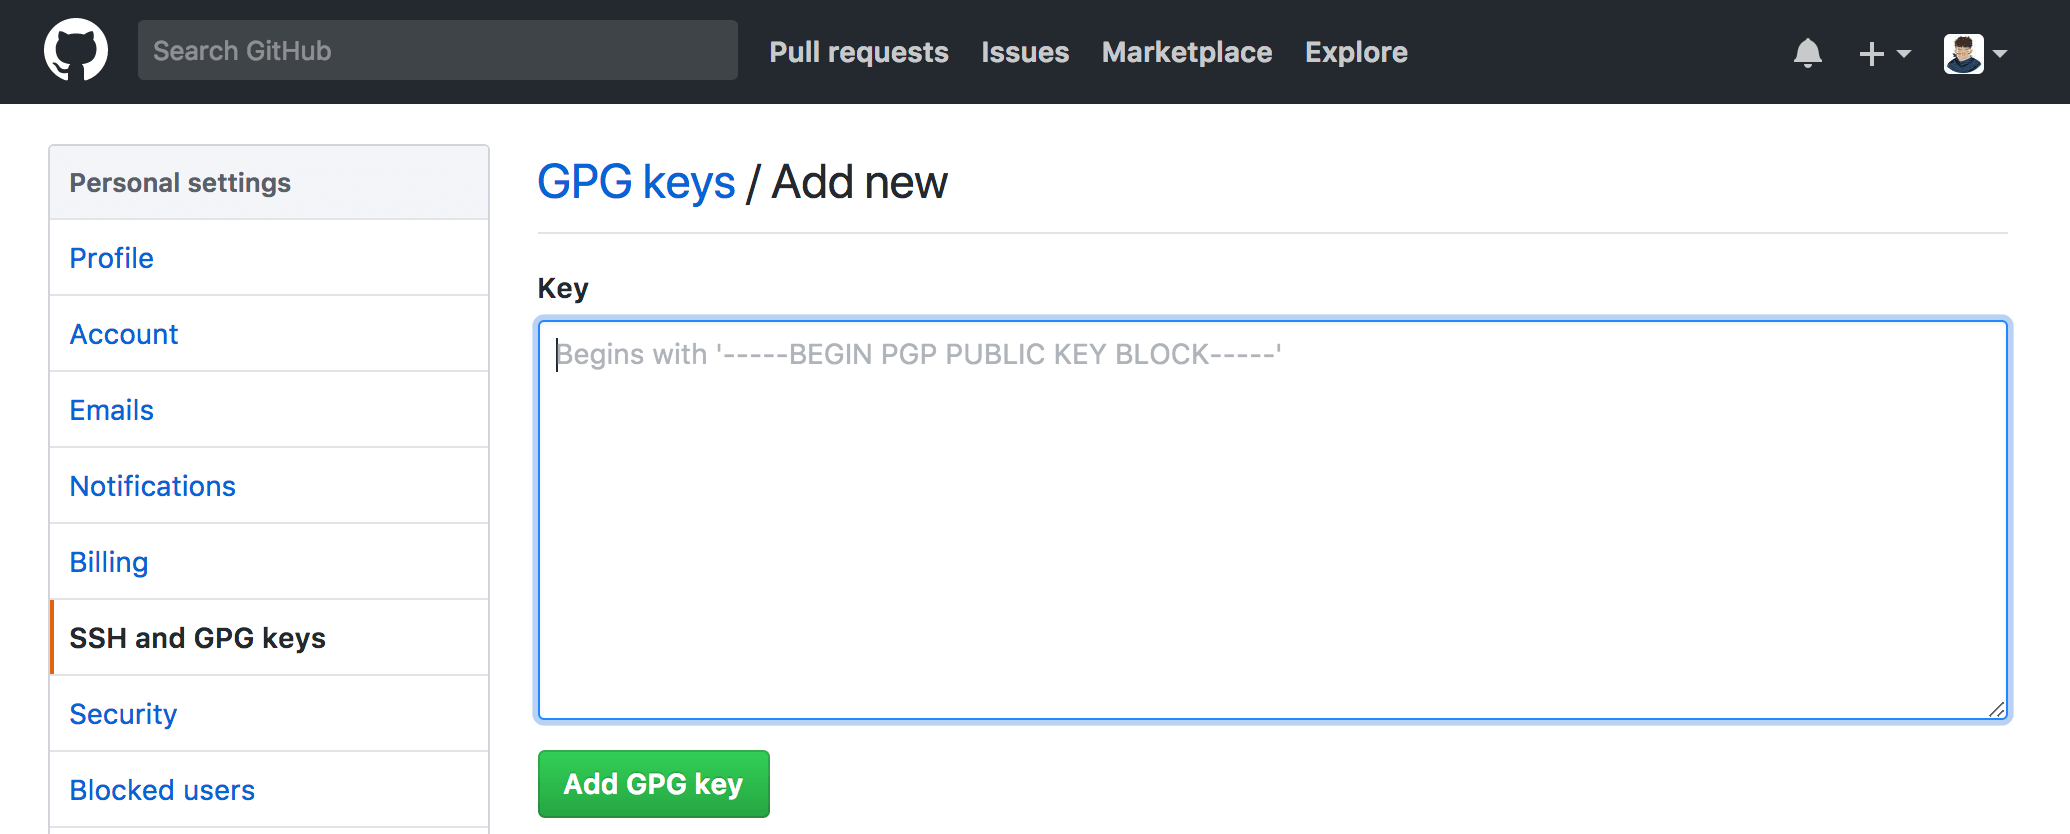
จากนั้นทำการเพิ่ม GPG Key โดย ก็อปปี้ไอ้ก้อน GPG ที่เรา export มาตอนแรก มาใส่
3. Commit with Verified
ต่อมา เราต้อง config git ให้รู้ว่า GPG ที่เราจะใช้คืออะไรด้วยคำสั่ง
git config --global user.signingkey GPG_KEYสำหรับการ commit แล้วให้ทุกๆการ commit มีการ sign GPG อัตโนมัติ ทำได้แบบ global คือคำสั่ง (คือบอกว่าทุกๆ commit จะใช้ GPG นะ แล้วพอใช้ GPG มันก็จะไปหา signingkey ที่เรา config ไว้นั่นเอง)
$ git config commit.gpgsign trueหรือการ Commit ก็ใช้คำสั่ง
$ git commit -S -m your commit messageNote: เงื่อนไขการ sign คือ Email ของ Github กับ email ที่เราทำการ generate GPG ต้องเป็นเมล์เดียวกัน (Gitlab และ Bitbucket ก็เช่นกัน)
หรือหากใครใช้ Sourcetree สามารถไปกำหนด ได้ที่ Repository Settings แล้วเลือกไปที่ Security ทำการ Enable GPG key signing for commits มันซะ เลือก key ที่เรา generate เป็นอันเรียบร้อย
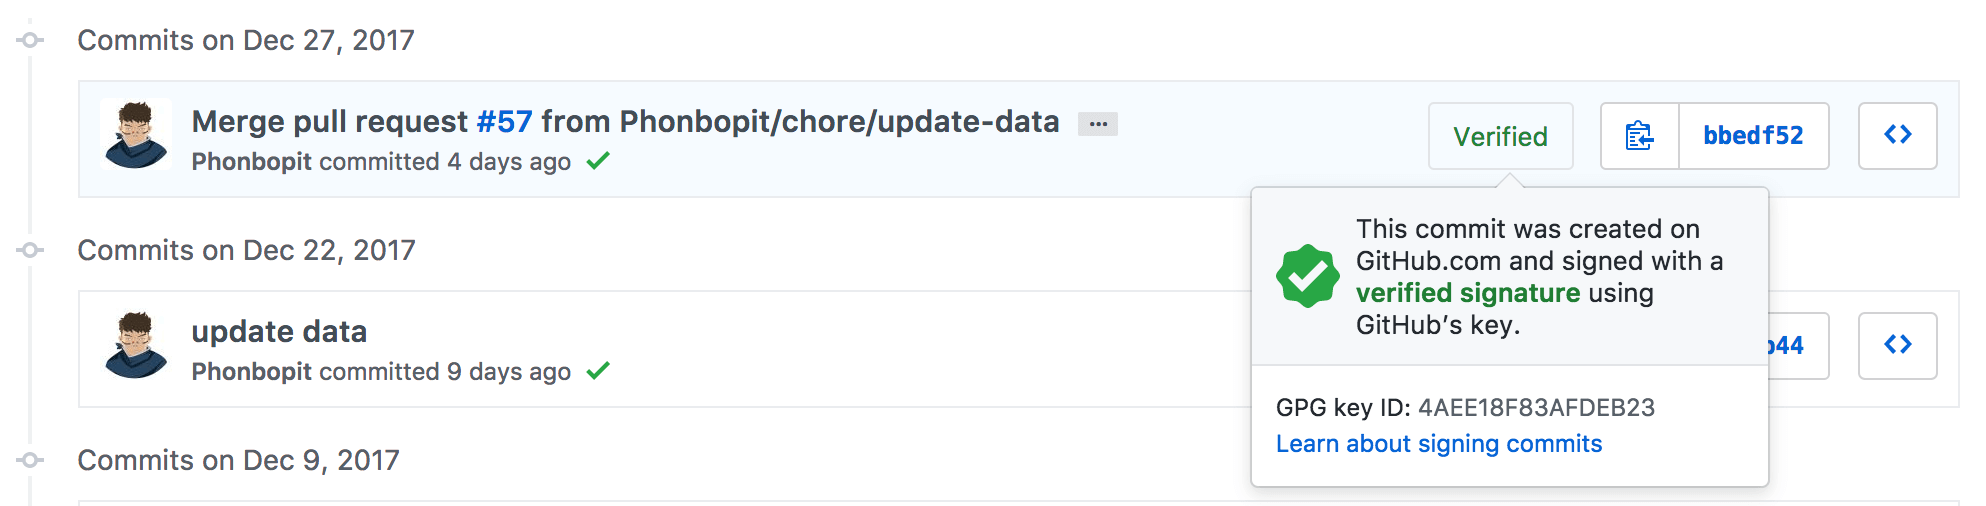
คราวนี้เราก็จะมี Verified เท่ๆ แล้ว (ไม่รู้มันเท่จริงเปล่านะ ฮ่าๆ)
References
- Authors
-

Chai Phonbopit
Senior Software Engineer ประสบการณ์กว่า 12 ปี ด้าน Frontend: React, Next.js, Tailwind CSS และ Backend: Node.js, Express, NestJS ปัจจุบันสนใจ Astro, Cloudflare Workers และ AI Coding Tool