สำหรับผู้ที่เพิ่งเข้ามาอ่าน และสนใจการเรียน Git ผมได้ทำการเขียนบทความเกี่ยวกับ Git ไว้แล้ว เชิญอ่านได้ที่นี่ครับ Git คืออะไร ? + พร้อมสอนใช้งาน Git และ Github
Setup Git
git config --global user.name "DevAhoy": ตั้งชื่อ (เปลี่ยน “DevAhoy” เป็นชื่อของคุณเอง)git config --global user.email "devahoy@gmail.com": ตั้งค่าอีเมล์ (เปลี่ยน email เป็นชื่อคุณเอง)git config --global color.ui auto: ตั้ง enable สีใน command line
Create Repo
git init: ทำการสร้าง local repo (ระบบจะสร้างโฟลเดอร์.gitไว้ใน directorygit clone URL: ทำการ clone repo จาก Server (Github/Bitbucket) มาที่ local
Local Repo
git status: ทำการเช็คสถานะใน directorygit add FILENAME: เพิ่มไฟล์ FILENAME ไปที่staging(พร้อมสำหรับcommit)git add .: เพิ่มทุกไฟล์ที่มีการแก้ไข/เปลี่ยนแปลงgit diff: แสดงการเปลี่ยนแปลงของไฟล์git diff FIRST_BRANCH SECOND_BRANCH: ทำการเปรียบเทียบระหว่าง branch1 กับ branch2git log: โชว์ log history ของ gitgit log --online: โชว์ log history แบบ 1 บรรทัดgit commit -m "Message": ทำการ commitstagedบันทึกลง Project Historygit commit: บันทึก Project History แต่ละเปิด Text Editor ขึ้นมาเพื่อใส่ commit messagegit commit --amend: เอาไว้แก้ไข commit ล่าสุด เช่น อยากเพิ่มไฟล์ที่หลัง หลังจากcommitแล้ว (รายละเอียดเพิ่มเติม : แก้ไข git commit ล่าสุด)
Remote Repo
git push origin master: ทำการ push โปรเจ็คไป remote repository (originชื่อ remote name,masterคือชื่อ default ของ branch)git remote add ARG1 ARG2: เพิ่ม remote มี 2 arguments : ARG1 = remote name (default : origin) , ARG2 = remote URLoriginvsupstream: กรณีที่เราทำการ fork repo (เฉพาะ Github)git remote add origin URL: คือ URL repo เรา ส่วนgit remote add upstream URLคือ URL ต้นฉบับที่เราทำการ fork มาgit remote -v: โชว์รายชื่อ remote URLgit remote set-url ARG1 ARG2: ตั้งค่า/เปลี่ยน remote URL (มี 2 arguments : ARG1 = remote name, ARG2 = remote URL)git remote rename origin destination: เปลี่ยนชื่อ remotegit remote rm REMOTE_NAME: ลบ remote repository
Branch
git branch: โชว์ list ของ branch ทั้งหมดgit branch BRANCH_NAME: สร้าง branch ใหม่git checkout BRANCH_NAME: ทำการเปลี่ยน branch (ย้าย HEAD ไป branch ใหม่) ต้องมี branch อยู่git checkout -b BRANCH_NAME: ทำการสร้างและเปลี่ยนไป branch ใหม่ (มีค่าเท่ากับgit branch BRANCH_NAMEต่อด้วยgit checkout BRANCH_NAME)git branch -d BRANCH_NAME: ทำการลบ branchgit merge BRANCH_NAME: ทำการรวม history ของ branch
Undo
git reset --hard HEAD: reset local repo- `git reset COMMIT : ทำการ undo ทุกๆอย่างกลับไปที่ COMMIT ก่อนหน้า
git reset FILENAME: ทำการ undo ไฟล์ที่เคย add ไปgit revert: ทำการ undo แล้วสร้าง commit ใหม่ (ต่างกับresetตรงที่resetจะย้อนไป commit เก่า แต่revertจะสร้าง commit ใหม่)
Remove
git rm FILENAME: ทำการลบไฟล์ และให้ git ทำการuntrackedไฟล์ด้วยgit rm --cached FILENAME: ลบไฟล์ออกจาก git repo เฉยๆ ไม่ได้ลบใน directory
Sync
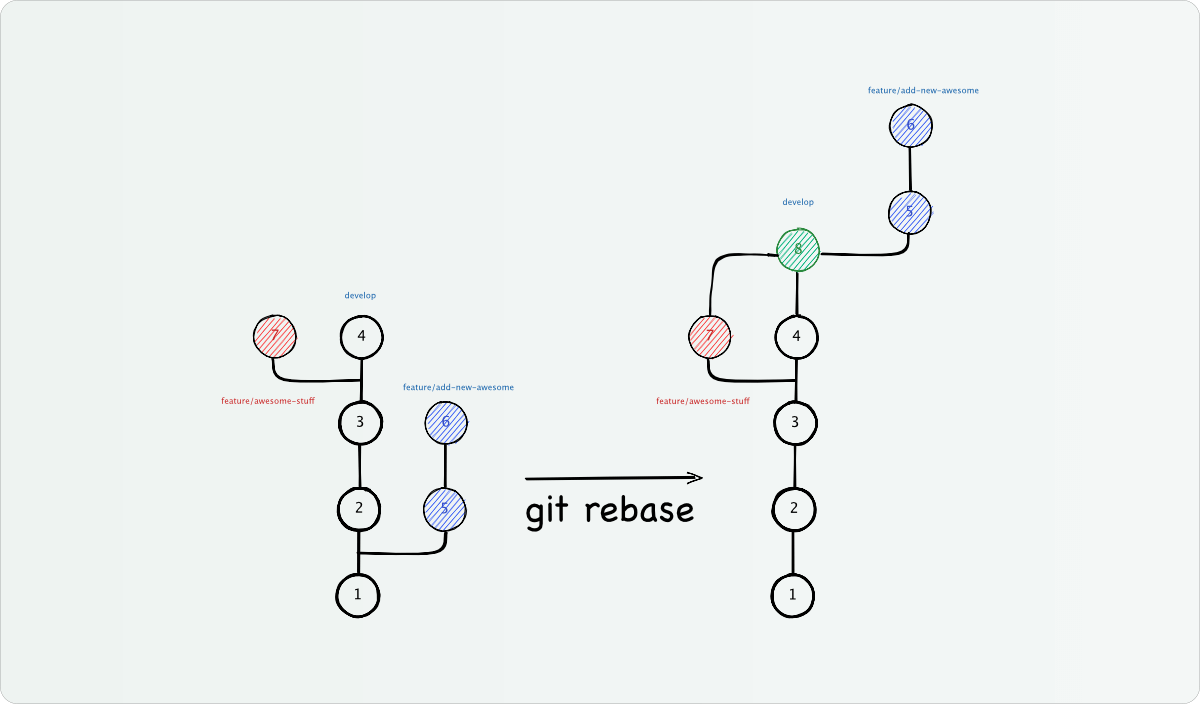
git fetch: เช็คการเปลี่ยนแปลงจาก remote repogit merge: ทำการรวมการเปลี่ยนแปลงจาก remote มาที่ local repogit pull: เช็คการเปลี่ยนแปลง และรวม (เหมือนกับการทำgit fetchและต่อด้วยgit merge)git fetch upstream: ทำการเช็คการเปลี่ยนแปลงจากไฟล์ต้นฉบับที่เราทำการ fork มาgit rebase: เหมือนกับgit mergeแต่จะยุบ branch ที่แตกออกมารวมกับ branch หลักเลย
Generate SSH
ssh-keygen -t rsa -C "devahoy@gmail.com": ทำการ generate SSH Key ไฟล์จะถูก gen ไว้ที่~/.ssh/id_rsassh -T git@github.com: ทดสอบ test SSH ว่า OK หรือไม่
แหล่งเรียนรู้อื่นๆเพิ่มเติม
- Authors
-

Chai Phonbopit
เป็น Web Dev ในบริษัทแห่งหนึ่ง ทำงานมา 10 ปีกว่าๆ ด้วยภาษาและเทคโนโลยี เช่น JavaScript, Node.js, React, Vue และปัจจุบันกำลังสนใจในเรื่องของ Blockchain และ Crypto กำลังหัดเรียนภาษา Rust


