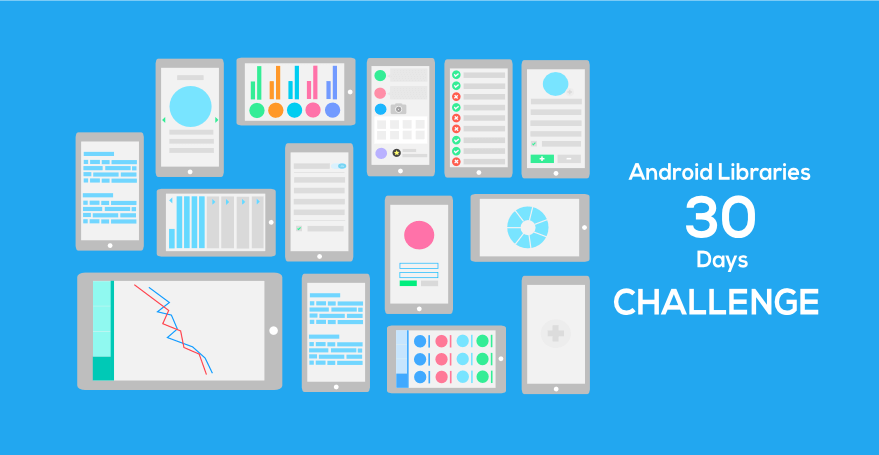
สวัสดีครับ บทความนี้เป็นบทความที่ 29 แล้วนะครับ ที่ผมจะมาเขียน ในซีรีย์ Learn 30 Android Libraries in 30 days
สำหรับบทความทั้งหมด อ่านได้จากด้านล่างครับ
- Day 1 : AndroidStaggered Grid
- Day 2 : Paralloid
- Day 3 : Retrofit
- Day 4 : SwipeRefreshLayout
- Day 5 : Android GraphView
- Day 6 : Holo Color Picker
- Day 7 : Android Async Http
- Day 8 : Crashlytics
- Day 9 : Butter Knife
- Day 10 : Android Annotations
- Day 11 : DateTimePicker
- Day 12 : Circular Progress Button
- Day 13 : ViewPager
- Day 14 : ViewPagerIndicator
- Day 15 : FadingActionBar
- Day 16 : AutofitTextView
- Day 17 : SwipeListView
- Day 18 : ShowcaseView
- Day 19 : GreenDAO
- Day 20 : AndroidViewAnimation
- Day 21 : ActiveAndroid
- Day 22 : Twitter4J
- Day 23 : ListViewAnimations
- Day 24 : AndEngine
- Day 25 : EazeGraph
- Day 26 : Cardslib
- Day 27 : AdapterKit
- Day 28 : WeatherLib
- Day 29 : FlatUI
- Day 30 : Android Firebase
สำหรับวันนี้ขอนำเสนอเรื่อง WeatherLib
WeatherLib เป็น Library ที่เอาไว้ช่วยทำแอพ Weather เหมาะกับคนต้องการนำไปพัฒนาเพื่อตรวจสอบสภาพอากาศ แค่ใช้ Library ตัวนี้ เราไม่ต้องไปกังวลเรื่อง request/response หรือว่า API จาก server จากผู้ให้บริการ เราสามารถโฟกัสแค่โค๊ดของเรา ส่วนผู้ให้บริการเรื่องสภาพอากาศ ใน WeatherLib ประกอบไปด้วย
ปกติเวลาเราต้องใช้งานพวก API จากด้านบน เราต้องขอ API แล้วดู Docs ของแต่ละเจ้า แต่ถ้าใช้ Weatherlib เราใช้โค๊ดเดียวกัน โครงสร้างเดียวกัน ใช้ได้ทุก Server เลย
จุดเด่นของ WeatherLib อย่างเช่น
- HTTP Request/response จะทำคนละ thread กับ Main UI Thread
- ค้นหาสภาพอากาศตามชื่อเมือง ชื่อประเทศได้
- ค้นหาสภาพอากาศตาม Latitude, Longitude
- ค้นหาสภาพอากาศปัจจุบัน/ สภาพอากาศย้อนหลัง
Installation
ขั้นตอนการติดตั้ง เปิดไฟล์ build.gradle ขึ้นมา แล้วเพิ่ม dependencies ลงไปดังนี้
dependencies { compile 'com.survivingwithandroid:weatherlib:1.5.2' compile 'com.survivingwithandroid:weatherlib_volleyclient:1.5.2' compile 'com.mcxiaoke.volley:library:1.0.6@aar'}กด Sync Gradle เป็นอันเรียบร้อย
Usage
การใช้งาน WeatherLib มีคลาสที่จำเป็นดังนี้
WeatherClient.ClientBuilder: เป็นเหมือนตัว Builder เอาไว้สร้าง instance ของ WeatherLib ที่ใช้ภายในแอพWeatherConfig: ตัว config เช่น พวก API_KEY (บาง Provider จะต้องทำการขอ API ด้วย)WeatherClient: เป็นเหมือนคลาสหลัก ที่เอาไวจัดการทุกๆอย่างของ WeatherLib เช่นค้นหาสภาพอากาศปัจจุบัน ค้นหาเมือง ดูสภาพอากาศย้อนหลัง
สเตปการสร้าง เริ่มต้นด้วยการสร้าง
WeatherClient.ClientBuilder builder = new WeatherClient.ClientBuilder();
WeatherClient mClient = new WeatherClient.ClientBuilder()                .attach(this)                .provider(new OpenweathermapProviderType())                .httpClient(WeatherClientDefault.class)                .config(new WeatherConfig())                .build();
ทำการสร้าง WeatherClient จากตัว ClientBuilder ส่วน pamameter แต่ละตัวมีดังนี้ครับ ตัวที่ 1 : .attach() คือ Context ตัวที่ 2 provider() คือชื่อของ Provider ที่ให้บริการ มีทั้งหมด 4 ชนิด
- Openweathermap -> OpenweathermapProviderType
- Yahoo! Weather -> YahooWeatherProviderType
- Weatherundergroung -> WeatherundergroundProviderType
- Forecast.io -> ForecastIOProviderType
ตัวที่ 3 httpClient() เป็น HTTP Client ที่ WeatherLibs ใช้ระหว่าง Volley กับ OkHttp แต่ว่าตอนแรก เราใส่ dependencies ของ Volley ไป ฉะนั้นตัวนี้ก็จะใช้ WeatherDefaultClient ของ Volley ตัวที่ 4 เป็น WeatherConfig()
ส่วนเมธอดภายใน WeatherClient ที่สามารถใช้ได้มีดังนี้
getCurrentCondition()getForecastWeather()getHistoricalWeather()getHourForecastWeather()getDefaultProviderImage()getWeatherImage()
มาลองสร้างโปรเจ็คลองดูดีกว่าครับ
Create Project
เริ่มแรกผมทำการสร้างคลาส Activity ขึ้นมา 1 คลาส ทำการ extends ListActivity เพื่อจะใช้ built-in ListView เลย ฉะนั้น ก็ไม่จำเป็นต้องใช้ Layout ตัวคลาสมีดังนี้
package com.devahoy.learn30androidlibraries.day28;
import android.app.ListActivity;import android.os.Bundle;import android.util.Log;import android.widget.ArrayAdapter;
import com.survivingwithandroid.weather.lib.WeatherClient;import com.survivingwithandroid.weather.lib.WeatherConfig;import com.survivingwithandroid.weather.lib.client.volley.WeatherClientDefault;import com.survivingwithandroid.weather.lib.provider.openweathermap.OpenweathermapProviderType;import com.survivingwithandroid.weather.lib.request.WeatherRequest;
public class WeatherActivity extends ListActivity {
    private String TAG = WeatherActivity.class.getSimpleName();
    private WeatherClient mClient;    private ArrayAdapter<String> mAdapter;
    @Override    protected void onCreate(Bundle savedInstanceState) {        super.onCreate(savedInstanceState);
/*        WeatherConfig config = new WeatherConfig();//        config.ApiKey = "YOUR_API_KEY";*/
        try {            mClient = new WeatherClient.ClientBuilder()                    .attach(this)                    .provider(new OpenweathermapProviderType())                    .httpClient(WeatherClientDefault.class)                    .config(new WeatherConfig())                    .build();
        } catch (Exception e) {            // Some error            Log.i(TAG, e.getMessage());        }
        // YAHOO : Bangkok = 1225448        // OpenWeatherMap : Bangkok = 1609350        final WeatherRequest request = new WeatherRequest("1609350");    }}
โค๊ดด้านบนเป็นการสร้าง WeatherClient ขึ้นมา โดยขั้นแรก ผมจะทำการดึงข้อมูล พยากรณ์อากาศล่วงหน้า ในกรุงเทพ ฉะนั้นก็จะใช้เมธอด getForecastWeather() โดยมีโครงสร้างการใช้ดังนี้
mClient.getForecastWeather(WeatherRequest, ForecastWeatherEventListener);ตัวแรกคือ WeatherRequest ระบุ cityId ของเมืองนั้นๆ ในส่วนนี้หาได้จากเมธอด searchCity หรือ searchCityByLocation ส่วนอีกอันคือ Listener ที่จะส่งค่ากลับมา เมื่อมีการทำงานเสร็จสิ้น สุดท้าย จะได้โครงสร้างสมบูรณ์แบบนี้
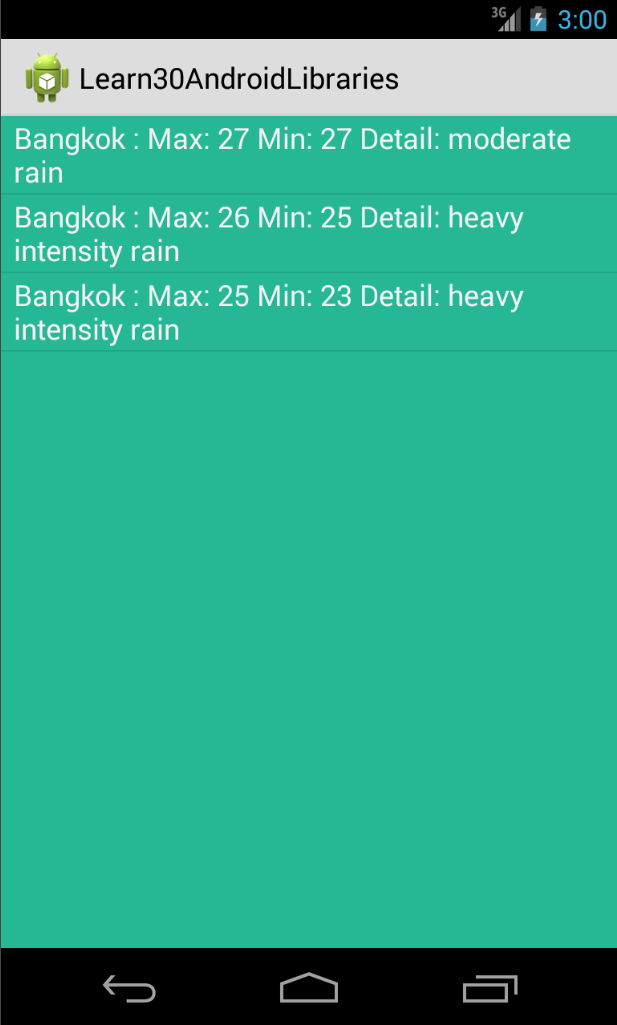
mClient.getForecastWeather(request, new WeatherClient.ForecastWeatherEventListener() {    @Override    public void onWeatherRetrieved(WeatherForecast weatherForecast) {        List<String> dataset = new ArrayList<String>();        List<DayForecast> forecases = weatherForecast.getForecast();        for (DayForecast forecast : forecases) {            String result = forecast.weather.location.getCity() + " : Max: " +                    Math.round(forecast.forecastTemp.max) + " Min: " +                    Math.round(forecast.forecastTemp.min) + " Detail: " +                    forecast.weather.currentCondition.getDescr();            dataset.add(result);        }        getListView().setBackgroundColor(Color.parseColor("#26B895"));        getListView().setDividerHeight(2);        mAdapter = new ArrayAdapter<String>(getApplicationContext(),                android.R.layout.simple_list_item_1, dataset);        setListAdapter(mAdapter);

    }
    @Override    public void onWeatherError(WeatherLibException e) {        Log.e(TAG, e.getMessage());    }
    @Override    public void onConnectionError(Throwable throwable) {
    }});
โค๊ดด้านบน เมื่อ เรารีเควสขอ สภาพอากาศของกรุงเทพไป ก็จะได้ผลลัพธ์กลับมาเป็น WeatherForecast จากนั้นก็ นำข้อมูล City และ อุณหภูมิ ใส่ใน ListView จะได้ผลลัพธ์ดังนี้
ส่วนอีกเมธอดนึง เอาไว้สำหรับดึงข้อมูลสภาพอากาศปัจจุบันเลย ด้วยเมธอด getCurrentCondition()
mClient.getCurrentCondition(request, new WeatherClient.WeatherEventListener() {    @Override    public void onWeatherRetrieved(CurrentWeather cWeather) {        Weather weather = cWeather.weather;
        Location location = weather.location;        Weather.Temperature temperature = weather.temperature;
        Log.i(TAG, "City : " + location.getCity() +                " Country : " + location.getCountry());        Log.i(TAG, "Temp : " + temperature.getTemp());
    }
    @Override    public void onWeatherError(WeatherLibException t) {
    }
    @Override    public void onConnectionError(Throwable t) {
    }});
จะเห็นว่าใช้ WeatherRequest เหมือนกับแบบแรก แต่ว่า Listener จะเปลี่ยนเป็น WeatherEventListener() แทน ส่วนเมื่อได้ข้อมูลมาแล้ว เราจะเอาไปทำอะไรก็แล้วแต่เราเลยครับ เนื่องจากว่า WeatherLib มันเตรียมพวกคลาส Model ต่างๆมาให้เราแล้ว เช่นคลาส Weather, Location , Temperature เราสามารถเข้าถึงข้อมูลพวกนี้ได้หมด สุดท้าย ก็เหลือแค่จะเอาไปใส่ในเลเอาท์ยังไง อยู่ที่การออกแบบหน้าตาเลเอาท์แล้วครับ
สำหรับบทความนี้ก็ขอจบแค่นะครับ หากสนใจอ่านรายละเอียดเพิ่มเติม หรือดูโค๊ดตัวอย่าง ก็อ่านเพิ่มได้จากต้นฉบับเลยครับ และ Tutorial เพิ่มเติม
Reference
- Authors
-

Chai Phonbopit
Senior Software Engineer ประสบการณ์กว่า 12 ปี ด้าน Frontend: React, Next.js, Tailwind CSS และ Backend: Node.js, Express, NestJS ปัจจุบันสนใจ Astro, Cloudflare Workers และ AI Coding Tool