- Nuxt.js Fundamental ตอนที่ 0 - พื้นฐานการเขียนเว็บด้วย Nuxt.js
- Nuxt.js Fundamental ตอนที่ 1 - เริ่มต้นกับ Nuxt.js
- Nuxt.js Fundamental ตอนที่ 2 - สร้าง Nuxt.js ด้วย create-nuxt-app
- Nuxt.js Fundamental ตอนที่ 3 - การกำหนด Routing
- Nuxt.js Fundamental ตอนที่ 4 - Nuxt.js Concept
- Nuxt.js Fundamental ตอนที่ 5 - Nuxt Content และ Async Data
- Nuxt.js Fundamental ตอนที่ 6 - การ Fetch ข้อมูลจาก API
- Nuxt.js Fundamental ตอนที่ 7 - การใช้งานร่วมกับ Vuex Store
- Nuxt.js Fundamental ตอนที่ 8 - การทำระบบ Authentication
- Nuxt.js Fundamental ตอนที่ 9 - การ Deploy Nuxt.js
- Nuxt.js Fundamental ตอนที่ 10 - การทำ Internal API และ Middleware
- Nuxt.js Fundamental ตอนที่ 11 - ทำ SEO และ Meta tags
- Nuxt.js Fundamental ตอนที่ 12 - ทำ Workshop เว็บ Portfolio
Nuxt.js Fundamental ตอนที่ 7 - การใช้งานร่วมกับ Vuex Store
เขียนวันที่ : Aug 23, 2020
(อัพเดท : Mar 19, 2022)
มาถึงเรื่องการเก็บข้อมูลลง Store โดยใช้ Vuex กันบ้างครับ ตัว Nuxt.js ก็รองรับการใช้งาน Vuex เลย (default จะ disable) หากเราต้องการใช้งาน ก็แค่เพิ่มไฟล์ index.js ใน folder store ก็ได้แล้ว
โดย Vuex รองรับทั้งแบบ 1. ธรรมดา และ 2. แบบ modules โดยหลักการทำงานของ Nuxt Vuex คือ
- Nuxt.js จะมองหาไฟล์ใน
storeถ้ามี - จะทำการ
import 'vuex'ให้อัตโนมัติ - เพิ่ม
storeลงใน Vue instance.
stateควรจะเป็น function นะครับ เพื่อหลีกเลี่ยงปัญหา share state กับ server
ตัวอย่างเช่นไฟล์ store/index.js
export const state = () => ({
  counter: 0
});

export const mutations = {
  increment(state) {
    state.counter++;
  }
};
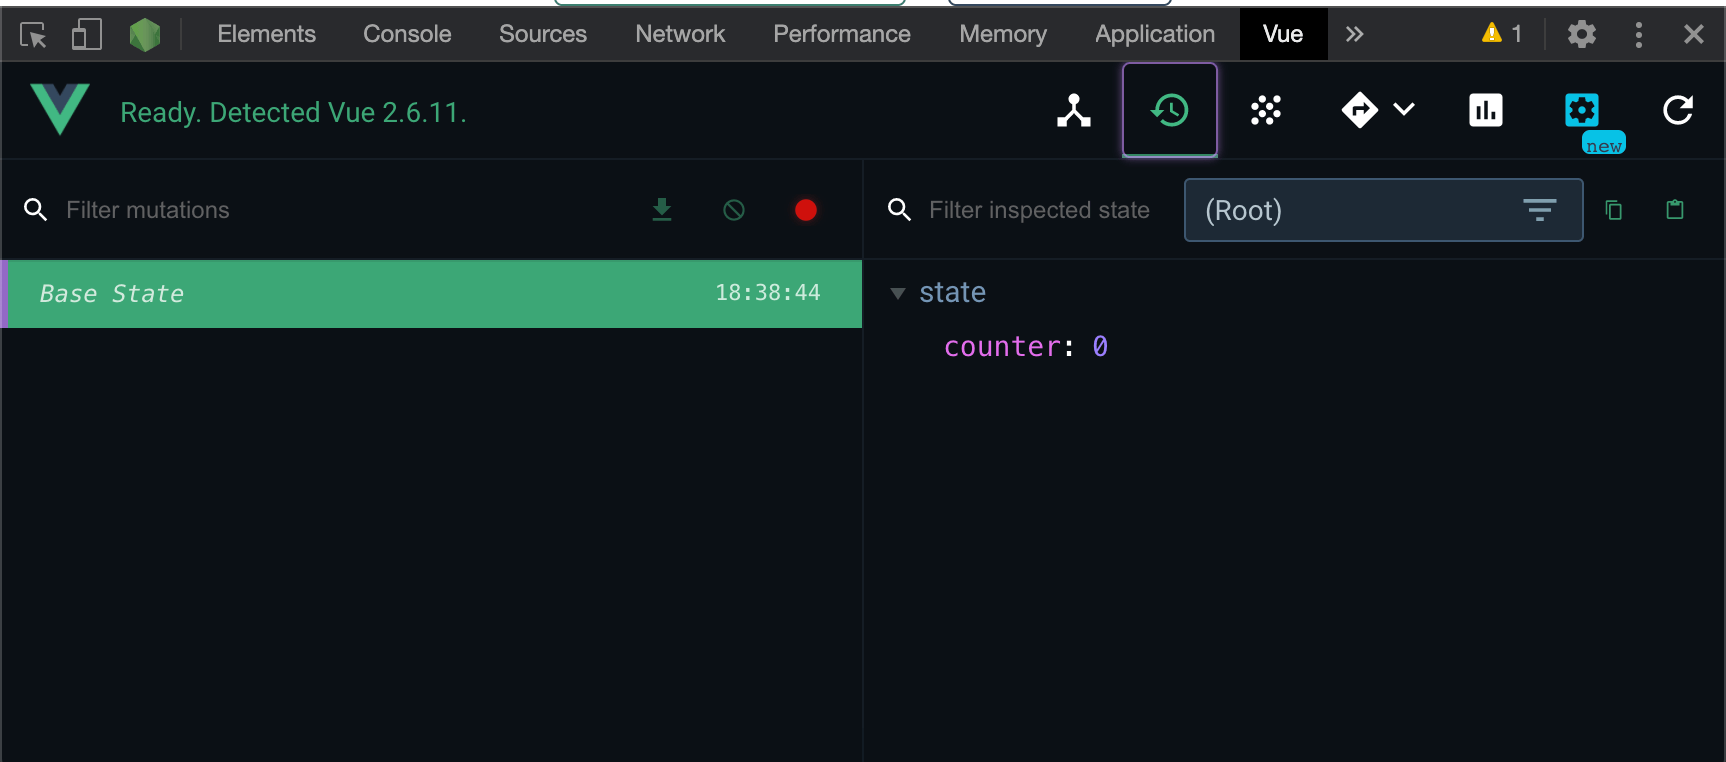
เรามี state เก็บค่า counter และมี mutation ชื่อ increment สำหรับเพิ่มค่า counter ใน state
ตัวอย่าง vuex เวลาส่องใน Vue DevTools (ปกติใครเขียน Vue.js ก็ควรมีติด browser ไว้นะครับ)

สำหรับใครยังไม่เคยใช้ Vue DevTools สามารถดาวน์โหลดได้จาก Vue Devtools
Modules Mode
ปกติตัว Nuxt จะทำเป็น modules mode ให้เราอยู่แล้ว ตามชื่อไฟล์ หรือ folder เป็น namespaced ให้เรา เช่น เราสร้างไฟล์ store/todos.js
export const state = () => ({
  list: []
});

export const mutations = {
  add(state, text) {
    state.list.push({
      text,
      done: false
    });
  },
  remove(state, { todo }) {
    state.list.splice(state.list.indexOf(todo), 1);
  },
  toggle(state, todo) {
    todo.done = !todo.done;
  }
};
จะได้ store เทียบเท่ากับการใช้ Vuex ปกติคือ
new Vuex.Store({
  state: () => ({
    counter: 0
  }),
  mutations: {
    increment(state) {
      state.counter++;
    }
  },
  modules: {
    todos: {
      namespaced: true,
      state: () => ({
        list: []
      }),
      mutations: {
        add(state, { text }) {
          state.list.push({
            text,
            done: false,
            id: Date.now()
          });
        },
        remove(state, { todo }) {
          state.list = state.list.filter((item) => item.id !== todo.id);
        },
        toggle(state, { todo }) {
          todo.done = !todo.done;
        }
      }
    }
  }
});
และไฟล์ pages/todos.vue แบบนี้
<template>
  <ul>
    <li v-for="todo in todos" :key="todo.id">
      <input :checked="todo.done" @change="toggle(todo)" type="checkbox" />
      <span :class="{ done: todo.done }">{{ todo.text }}</span>
      <button @click="removeTodo(todo)">remove</button>
    </li>
    <li>
      <input @keyup.enter="addTodo" placeholder="What needs to be done?" />
    </li>
  </ul>
</template>

<script>
  import { mapMutations } from 'vuex'

  export default {
    computed: {
      todos() {
        return this.$store.state.todos.list
      }
    },
    methods: {
      addTodo(e) {
        this.$store.commit('todos/add', e.target.value)
        e.target.value = ''
      },
      ...mapMutations({
        toggle: 'todos/toggle'
      }),
      removeTodo(todo) {
        this.$store.commit('todos/remove', todo)
      }
    }
  }
</script>

<style>
  .done {
    text-decoration: line-through;
  }
</style>
Source Code จาก Nuxt Vuex Store
- จากตัวอย่างโค๊ด จะเห็นว่า เราสามารถใช้ Vuex ได้แบบปกติใน Nuxt.js เลยไม่ต้องทำอะไรเลย เพียงแค่สร้างไฟล์ใน
storeปกติครับ - ตัวอย่าง
mapMutationsคือการ map function ในmutationsให้เราเรียกผ่านthis.toggle(value)ได้เลย
และสำหรับใครที่อยากรู้เรื่อง Vuex เพิ่มเติม แนะนำให้อ่าน Vuex Doc เพิ่มเติมนะครับ
ตัวอย่างการสร้างหลายๆ Modules
ตัวอย่างเช่น ผมมี vues 3 modules คือ
- auth
- users
- posts
ทีนี้ ผมจะแยก เป็น folder และใน folder ผมก็จะแยก state.js, mutations.js, actions.js และมี index.js เพื่อรวมเป็น module อีกที แบบนี้
store/
  -- auth/
    -- mutations.js
    -- actions.js
    -- state.js
    -- getters.js
  -- users/
    -- mutations.js
    -- actions.js
    -- state.js
  -- posts/
    -- mutations.js
    -- actions.js
    -- state.js
และตัวอย่างแต่ละไฟล์ ประมาณนี้ครับ เช่น
ไฟล์ store/auth/state.js
export default () => ({
  isAuthenticated: false,
  currentUser: null
});
ไฟล์ store/auth/mutations.js
export default {
  setCurrentUser(state, payload) {
    state.currentUser = payload;
    state.isAuthenticated = true;
  }
};
ไฟล์ store/auth/actions.js
export default {
  login({ commit }) {
    // POST /auth/login , axios.post(url, payload).then()
    // if success then set response.data
    commit('setCurrentUser', response.data);
  }
};
หรืออย่างไฟล์ store/auth/getters.js หากเราอยากใช้ getters
export default {
  isAuthenticated: (state) => state.isAuthenticated
};
และเวลาเราใช้งาน แต่ละ modules ในหน้า pages เราใช้ mapActions และ mapGetters ก็จะได้หน้าตาประมาณนี้
<script>
import { mapActions, mapGetters } from 'vuex'

export default {
  computed: mapGetters({
    isAuthenticated: 'auth/isAuthenticated'
  }),
  methods: {
    ...mapActions({
      login: 'auth/login'
    })
  }
}
</script>
Hints & Questions?
เพื่อนๆ ลองนำ Vuex ไปประยุกต์กับเรื่องการ Fetch API จากตอนที่แล้วกันดูนะครับ โดย
- สร้าง state สำหรับเก็บข้อมูล photos ที่ได้จาก API
- เมื่อได้ข้อมูลก็ใช้ให้
actionsหรือmutationอัพเดทค่าใน state - ใช้
mapState,mapActionsของ Vuex Helpers มาช่วย


