วันนี้มาพบกับบทความเกี่ยวกับพื้นฐาน React.js ครับ ว่าด้วยเรื่องการของจัดการ Form และ Input ต่างๆ กันนะครับ
เนื่องจากว่าการทำ Web Application ปฎิเสธไม่ได้ว่า เราต้องใช้พวก Input Form ต่างๆ ในการส่งข้อมูลไปที่ Server ไม่ว่าจะเป็นการ POST/PUT/PATCH ด้วยการใช้ fetch หรือ Library อื่นๆ เช่น axios แต่ก่อนที่จะส่งละ เรามีวิธีการจัดการกับพวก state ของ Form ยังไงบ้าง ไปลองอ่านกันครับ
เริ่มต้นสร้าง Project
- เราจะใช้ Create React App ขึ้นโปรเจ็ค และไม่ใช้ Library อื่นเลย
- Component เราเป็นแบบ functional Component ฉะนั้นก็เลยใช้ Hook
- เราจะใช้
useState()เพื่อเก็บ State ใน Component นะครับ
ผมสร้าง Project ขึ้นมาด้วย Create React App ครับ (หากใครที่หลงเข้ามาอ่าน ไม่มี Node.js ต้องทำการติดตั้งลงบนเครื่องก่อนนะครับ)
npx create-react-app basic-react-formจากนั้น ผมเพิ่ม Bootstrap ไปซักนิด พอดีจะใช้ หน้า form ของ Bootstrap ก็เลยเพิ่มลงไปในไฟล์ public/index.html
<head> <link rel="stylesheet" href="https://maxcdn.bootstrapcdn.com/bootstrap/4.0.0/css/bootstrap.min.css" integrity="sha384-Gn5384xqQ1aoWXA+058RXPxPg6fy4IWvTNh0E263XmFcJlSAwiGgFAW/dAiS6JXm" crossorigin="anonymous" /> <script src="https://maxcdn.bootstrapcdn.com/bootstrap/4.0.0/js/bootstrap.min.js" integrity="sha384-JZR6Spejh4U02d8jOt6vLEHfe/JQGiRRSQQxSfFWpi1MquVdAyjUar5+76PVCmYl" crossorigin="anonymous" ></script></head>ลอง Start Server ก็ได้หน้า Create React App default ขึ้นมา
npm startต่อมา ลองเปลี่ยนส่วน App.js เป็น Form จาก Bootstrap
import React from 'react'import './App.css'
function App() {  return (    <div className="container">      <div className="row mt-4">        <div className="col-12 col-md-6 offset-md-3">          <h2 className="my-4 text-center">LOGIN</h2>
          <form>            <div className="form-group">              <label for="exampleInputEmail1">Email address</label>              <input                type="email"                className="form-control"                id="exampleInputEmail1"                aria-describedby="emailHelp"                placeholder="Enter email"              />            </div>            <div className="form-group">              <label for="exampleInputPassword1">Password</label>              <input                type="password"                className="form-control"                id="exampleInputPassword1"                placeholder="Password"              />            </div>            <div className="form-check mb-4">              <input type="checkbox" className="form-check-input" id="exampleCheck1" />              <label className="form-check-label" for="exampleCheck1">                Accept term and conditions              </label>            </div>
            <button type="submit" className="btn btn-primary">              Submit            </button>          </form>        </div>      </div>    </div>  )}
export default App
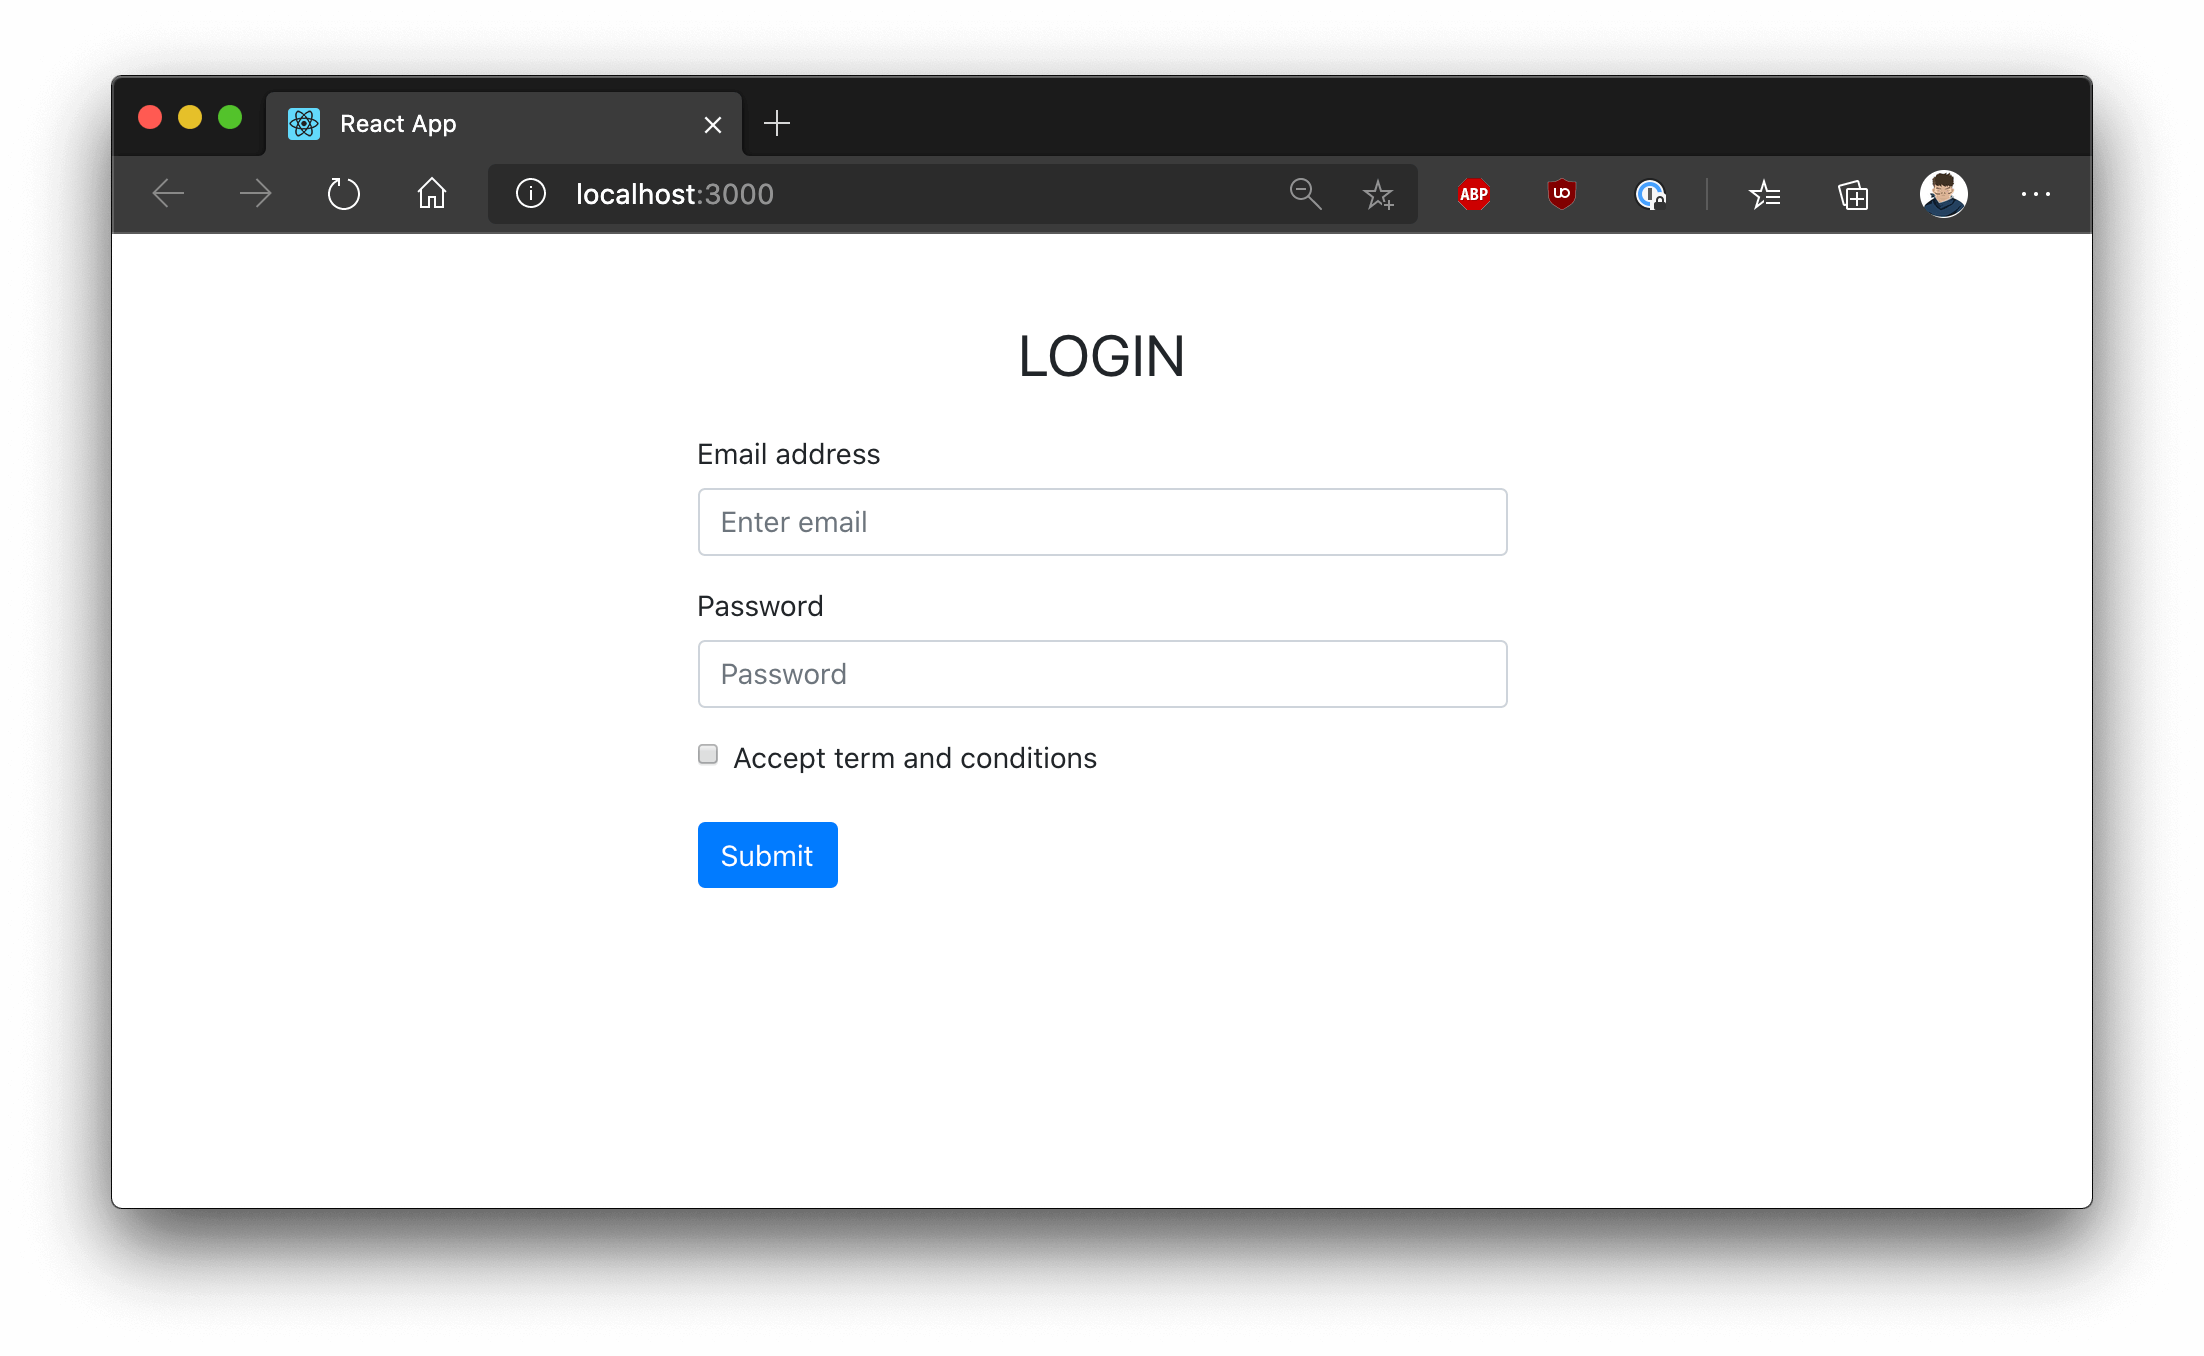
เมื่อเข้า http://localhost:3000 จะได้หน้าตาแบบนี้

เก็บ State แต่ละ Field
ทีนี้ การที่เราจะ handle ค่าของ Input แต่ละตัว เราก็ต้องทำการสร้าง state เพื่อมาเก็บ ยิ่งหน้า Form เรามี Field เยอะเท่าไหร่ เราก็ต้องเก็บ State มากขึ้น เท่านั้น ตอนนี้ใช้วิธีเก็บแยกก่อน ตอนนี้เรามีแค่ email, password และ toc (Term & Condition) ก็เลยได้แบบนี้
function App() {  const [email, setEmail] = useState('');  const [password, setPassword] = useState('');  const [term, setTerm] = useState(false):
  return ();}
จากนั้น แต่ละ Input เราก็แค่ handle ด้วย onChange คือทุกๆครั้ง ที่ input มีการเปลี่ยนแปลงค่า เราก็ setState() ให้มันซะ แบบนี้
<input type="email" className="form-control" id="exampleInputEmail1" aria-describedby="emailHelp" onChange={(e) => setEmail(e.target.value)} placeholder="Enter email"/>ของ Password และ Term ก็เช่นเดียวกัน เพียงแต่ Term เป็น checkbox ทำให้เราใช้ e.target.checked แทน แบบนี้
<input type="checkbox" className="form-check-input" id="exampleCheck1" onChange={(e) => setTerm(e.target.checked)}/>ต่อมา เราก็ทำการ handleSumbit ตรง form ด้วย onSubmit ซะ โดยการสร้าง function ขึ้นมา ตัวนึง แบบนี้
const onSubmit = (e) => {  e.preventDefault()
  const payload = {    email,    password,    term  }
  console.log('submit value', payload)}
;<form onSubmit={onSubmit}>...</form>
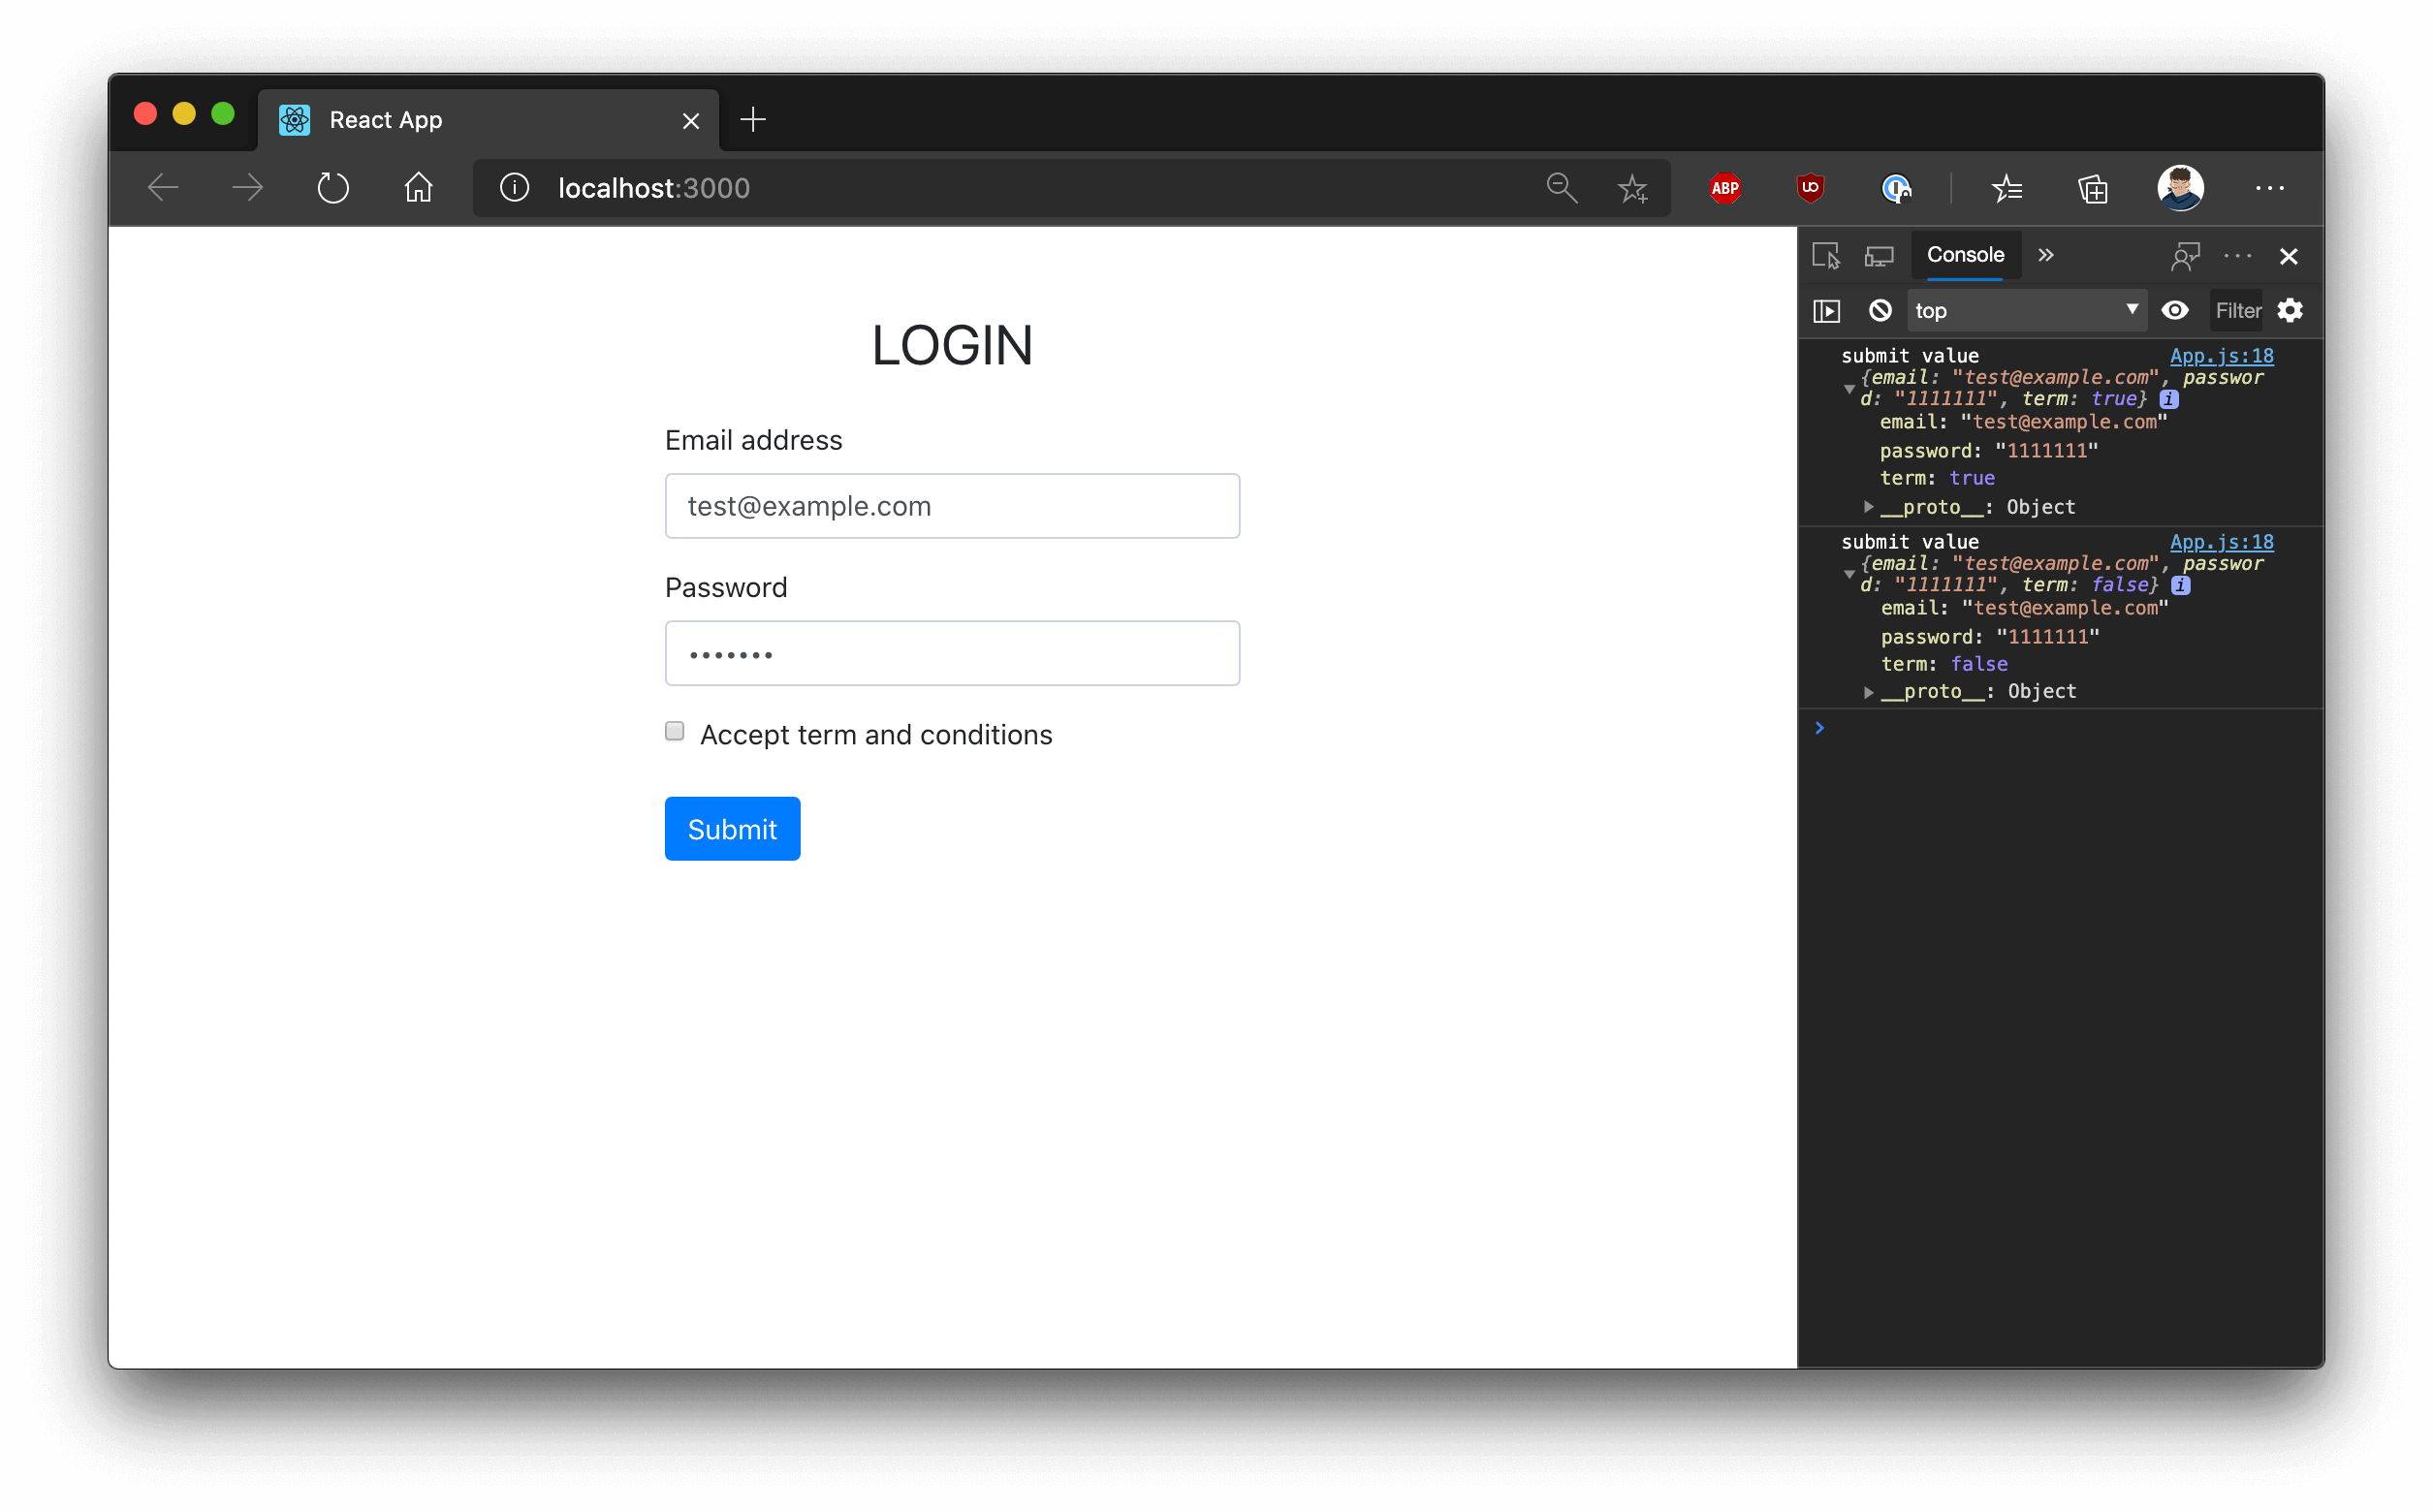
ลองเปิดเว็บ http://localhost:3000 ทีนี้เวลากรอกข้อมูล แล้วกด Submit เราก็จะได้ค่าของเราแล้ว ก็แค่เอาค่า นี้ POST ไปที่ Server อาจจะเป็น Native Fetch api หรือ axios ก็ได้ เช่น
const onSubmit = async (e) => {  const payload = {...}
  const response = await fetch('/api/auth/login', {    method: 'POST',    headers: {      'Content-Type': 'application/json'    },    body: JSON.stringify(payload)  }).then(res => res.json())}
เพียงแค่นี้เราก็จัดการกับ Form ได้แล้ว

Handle หลายๆ Inputs
สุดท้าย ถ้าเกิดว่าเรามี Input มากขึ้น เราต้องมานั่ง setState() มานั่งกำหนด onChange เปลี่ยนค่านิดหน่อย ก็รู้สึกลำบาก เราสามาถเก็บ state เดียวกันได้ โดยใช้เป็น Object แทน แบบนี้
function App() {  const [input, setInput] = useState({    email: '',    password: '',    term: false  });
  const handleChange = e => {    const { target } = e;    const { name } = target;    const value = name === 'term' ? target.checked : target.value;
    setInput({      ...input,      [name]: value    });  }
  return ();}
จะเห็นว่าเราเก็บ ตัวแปรเป็น State เดียวแบบ Object และสร้าง handleChange เอาไว้เป็น Handler ของ onChange จากนั้น ก็ทำการ setInput() ค่าโดยใช้ Computed Property Name ของ ES6 เพื่อ set ค่า key value ให้ตรงกับ e.target.name (ต้องตั้งชื่อ input) และ Destructuring object เพื่อใช้ค่า input เก่า อัพเดทค่าเฉพาะ input ที่ onChange เท่านั้น
แต่จะเห็นว่า มีการเช็คด้วยว่า name เท่ากับ term จะใช้ e.target.checked นั่นเอง แต่ input ปกติจะใช้ e.target.value
จากนั้น input ทั้งหลาย ก็เหลือแค่นี้
<input type="email" className="form-control" id="exampleInputEmail1" aria-describedby="emailHelp" onChange={handleChange} placeholder="Enter email" name="email"/>เป็นอันเรียบร้อย เราก็ยังได้ค่าเหมือนเดิม สิ่งที่ง่ายคือ ไม่ต้องทำหลายๆ State เราก็แค่เก็บ state เป็น form หน้านั้นๆไปเลย ทีนี้จะมี Fields เพิ่ม เราก็ไม่ต้องเพิ่ม state เราเพิ่ม key ใน object ได้เลย
สุดท้าย Code ทั้งหมดของ App.js ก็ได้แบบนี้ หากใครติดปัญหา หรือไม่ตรง ก็ลองเปรียบเทียบดูได้ครับ
import React, { useState } from 'react'import './App.css'
function App() {  // const [email, setEmail] = useState('');  // const [password, setPassword] = useState('');  // const [term, setTerm] = useState(false);
  const [input, setInput] = useState({    email: '',    password: '',    term: false  })
  const handleChange = (e) => {    const { target } = e    const { name } = target    const value = name === 'term' ? target.checked : target.value
    setInput({      ...input,      [name]: value    })  }
  const onSubmit = (e) => {    e.preventDefault()
    console.log('submit value', input)  }
  return (    <div className="container">      <div className="row mt-4">        <div className="col-12 col-md-6 offset-md-3">          <h2 className="my-4 text-center">LOGIN</h2>
          <form onSubmit={onSubmit}>            <div className="form-group">              <label for="exampleInputEmail1">Email address</label>              <input                type="email"                className="form-control"                id="exampleInputEmail1"                aria-describedby="emailHelp"                onChange={handleChange}                placeholder="Enter email"                name="email"              />            </div>            <div className="form-group">              <label for="exampleInputPassword1">Password</label>              <input                type="password"                className="form-control"                id="exampleInputPassword1"                placeholder="Password"                name="password"                onChange={handleChange}              />            </div>            <div className="form-check mb-4">              <input                type="checkbox"                className="form-check-input"                id="exampleCheck1"                name="term"                onChange={handleChange}              />              <label className="form-check-label" for="exampleCheck1">                Accept term and conditions              </label>            </div>
            <button type="submit" className="btn btn-primary">              Submit            </button>          </form>        </div>      </div>    </div>  )}
export default App
สวัสดี
Happy Coding
- Authors
-

Chai Phonbopit
เป็น Web Dev ในบริษัทแห่งหนึ่ง ทำงานมา 10 ปีกว่าๆ ด้วยภาษาและเทคโนโลยี เช่น JavaScript, Node.js, React, Vue และปัจจุบันกำลังสนใจในเรื่องของ Blockchain และ Crypto กำลังหัดเรียนภาษา Rust

